> ## Documentation Index
> Fetch the complete documentation index at: https://docs.flowscale.ai/llms.txt
> Use this file to discover all available pages before exploring further.
# Import/Create Workflows
> Learn how to bring existing ComfyUI workflows into FlowScale AI or create new ones from scratch
import ImportWorkflowsTroubleshooting from '/snippets/troubleshooting/import-workflows-basic.mdx';
Import your ComfyUI workflows into FlowScale AI for team collaboration and production deployment. This guide covers importing existing workflows and creating new ones in the cloud environment.
**New to FlowScale AI?** You'll need to [create a project first](/getting-started/glossary/projects). Think of projects as collaborative workspaces where your team's workflows live and evolve together.
## Import Existing Workflows
### Step-by-Step Import Process
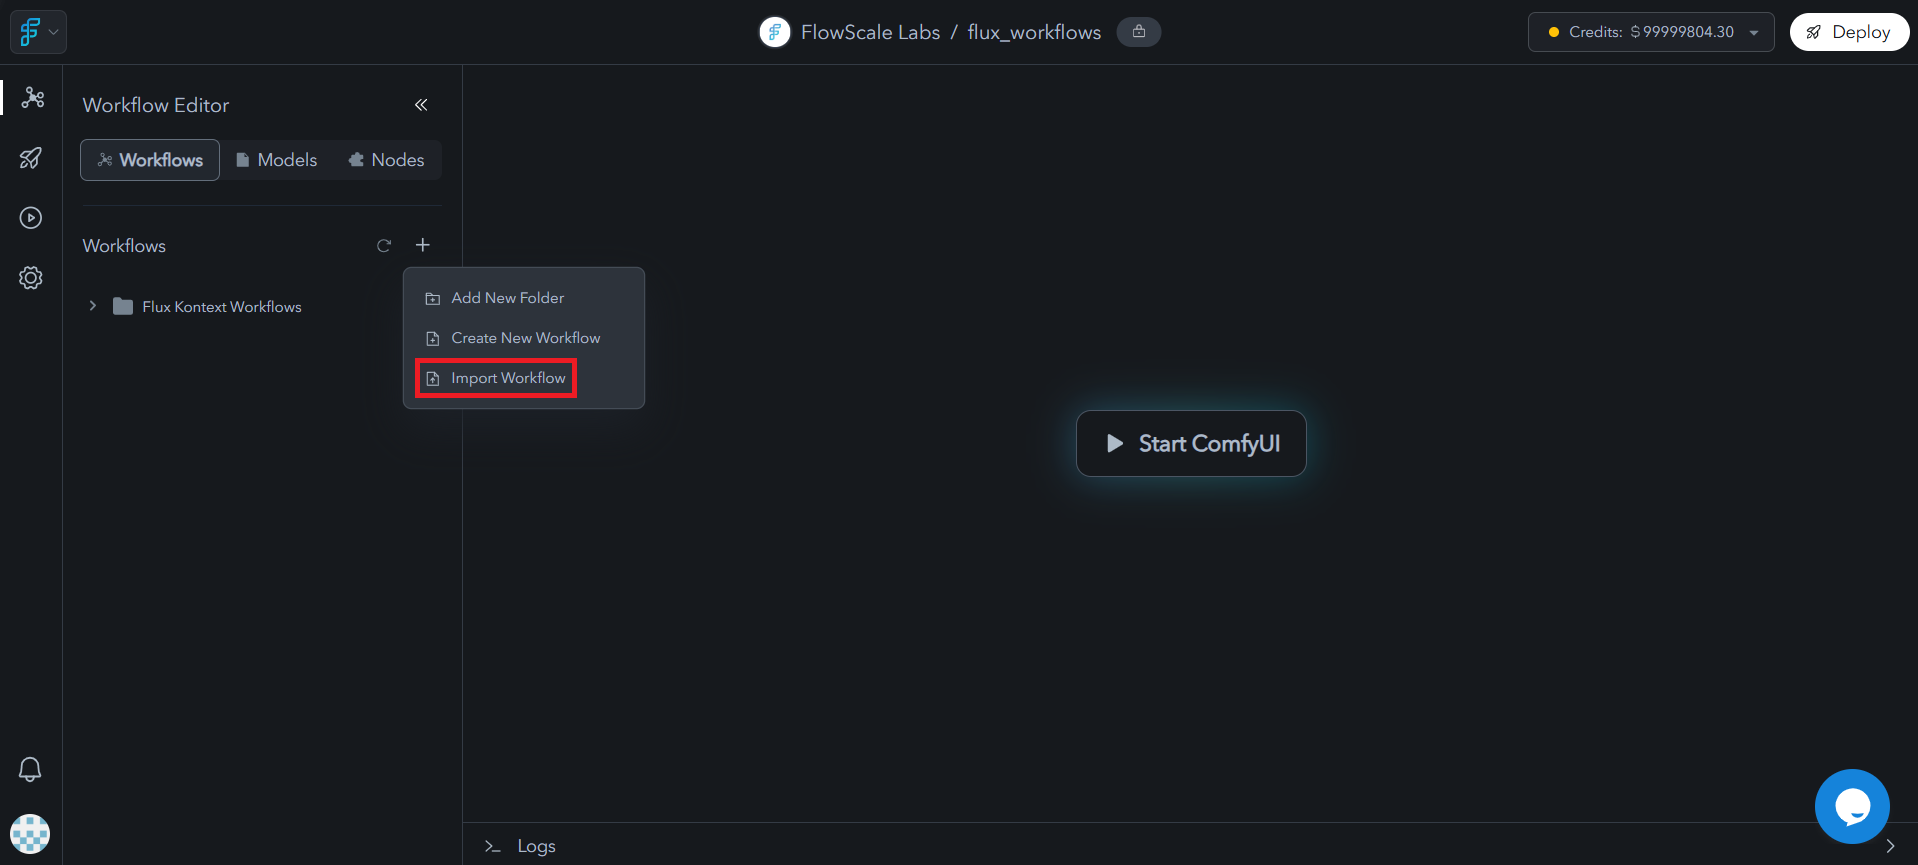
In your FlowScale AI project dashboard, click the **"Import Workflow"** button
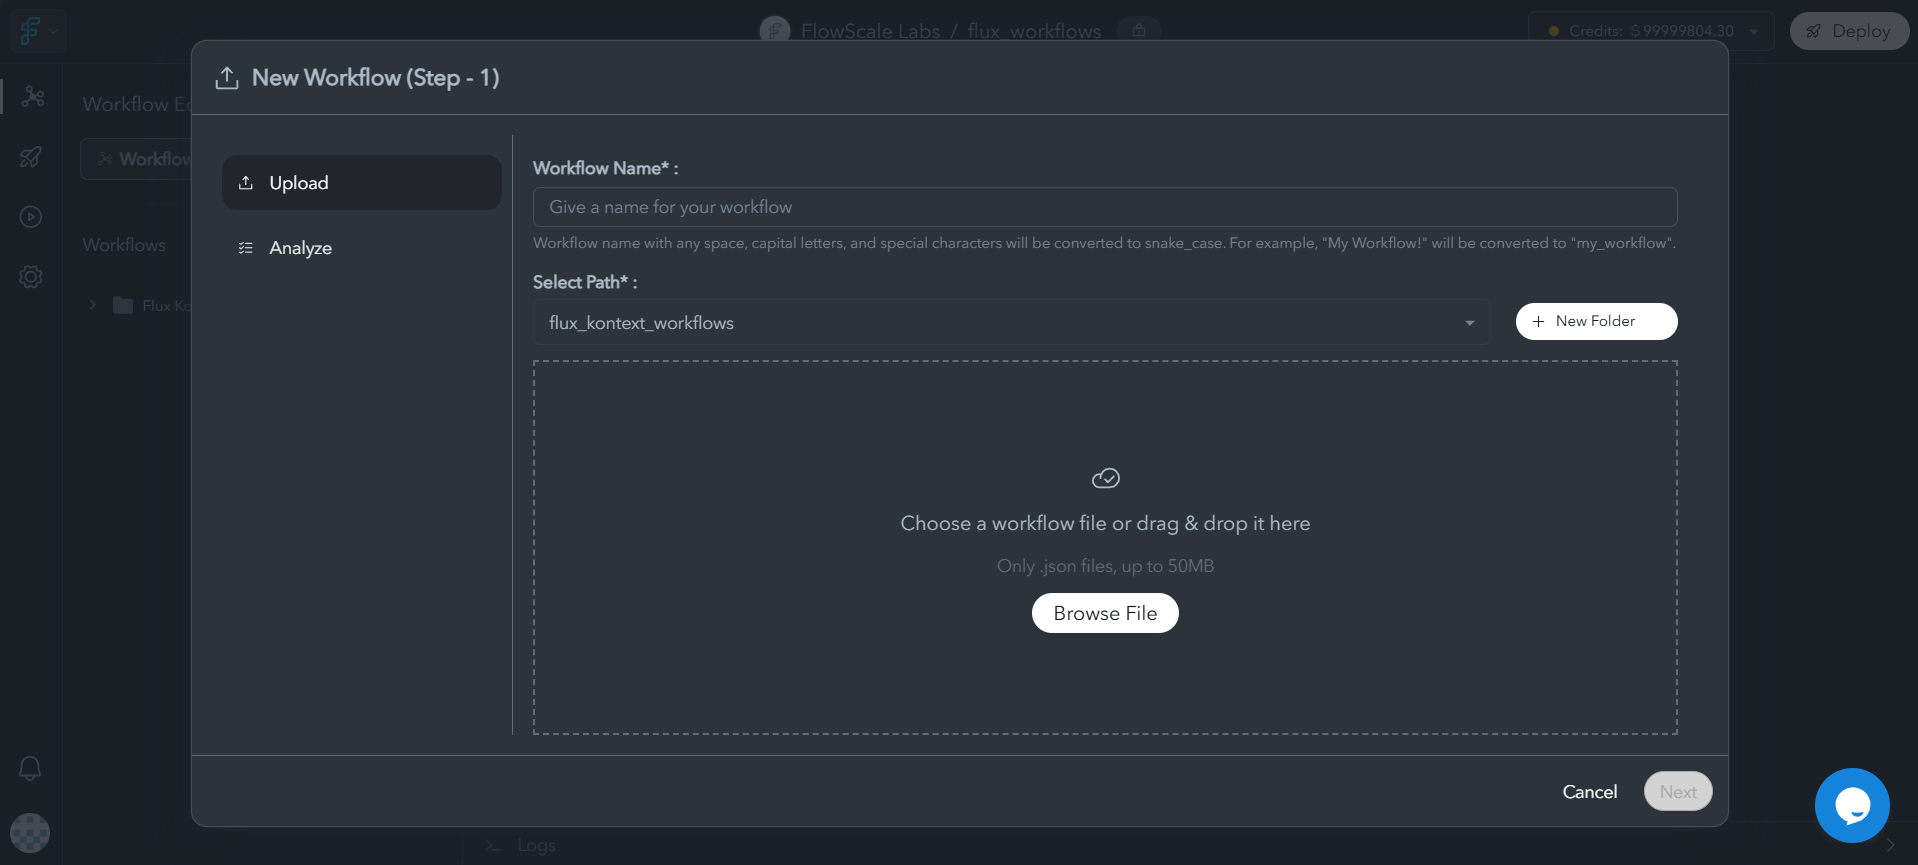
 Select and upload your ComfyUI workflow JSON file (exported from ComfyUI using the "Save" option)
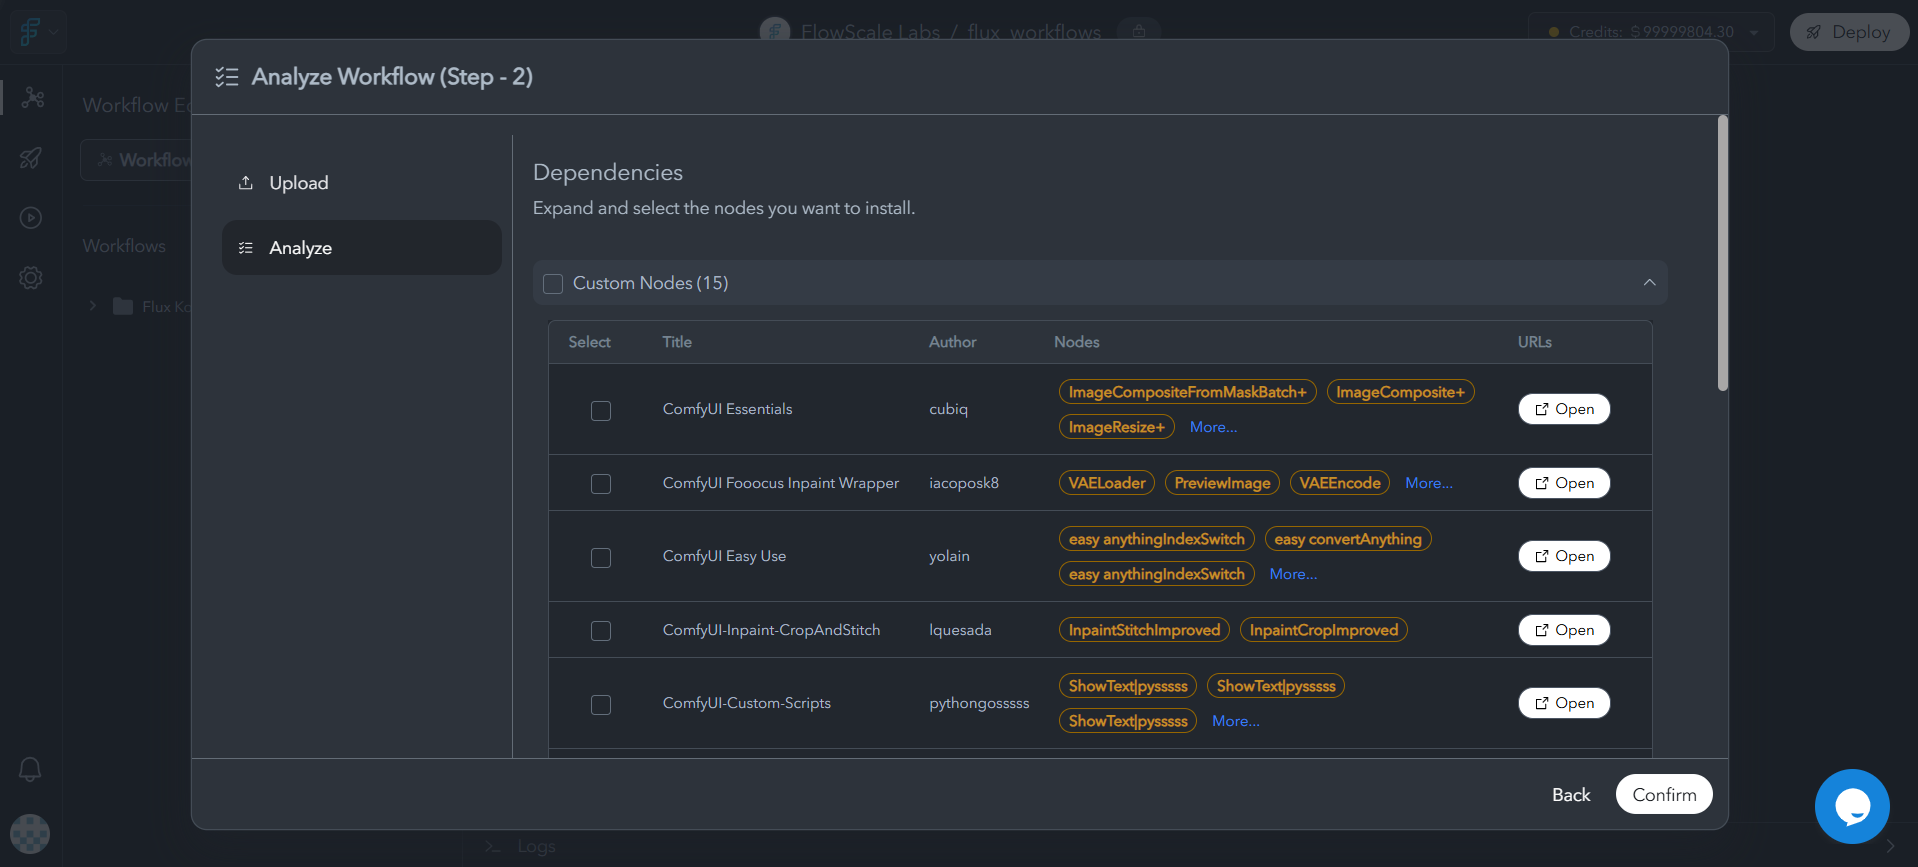
 FlowScale AI automatically detects required custom nodes and displays them for review
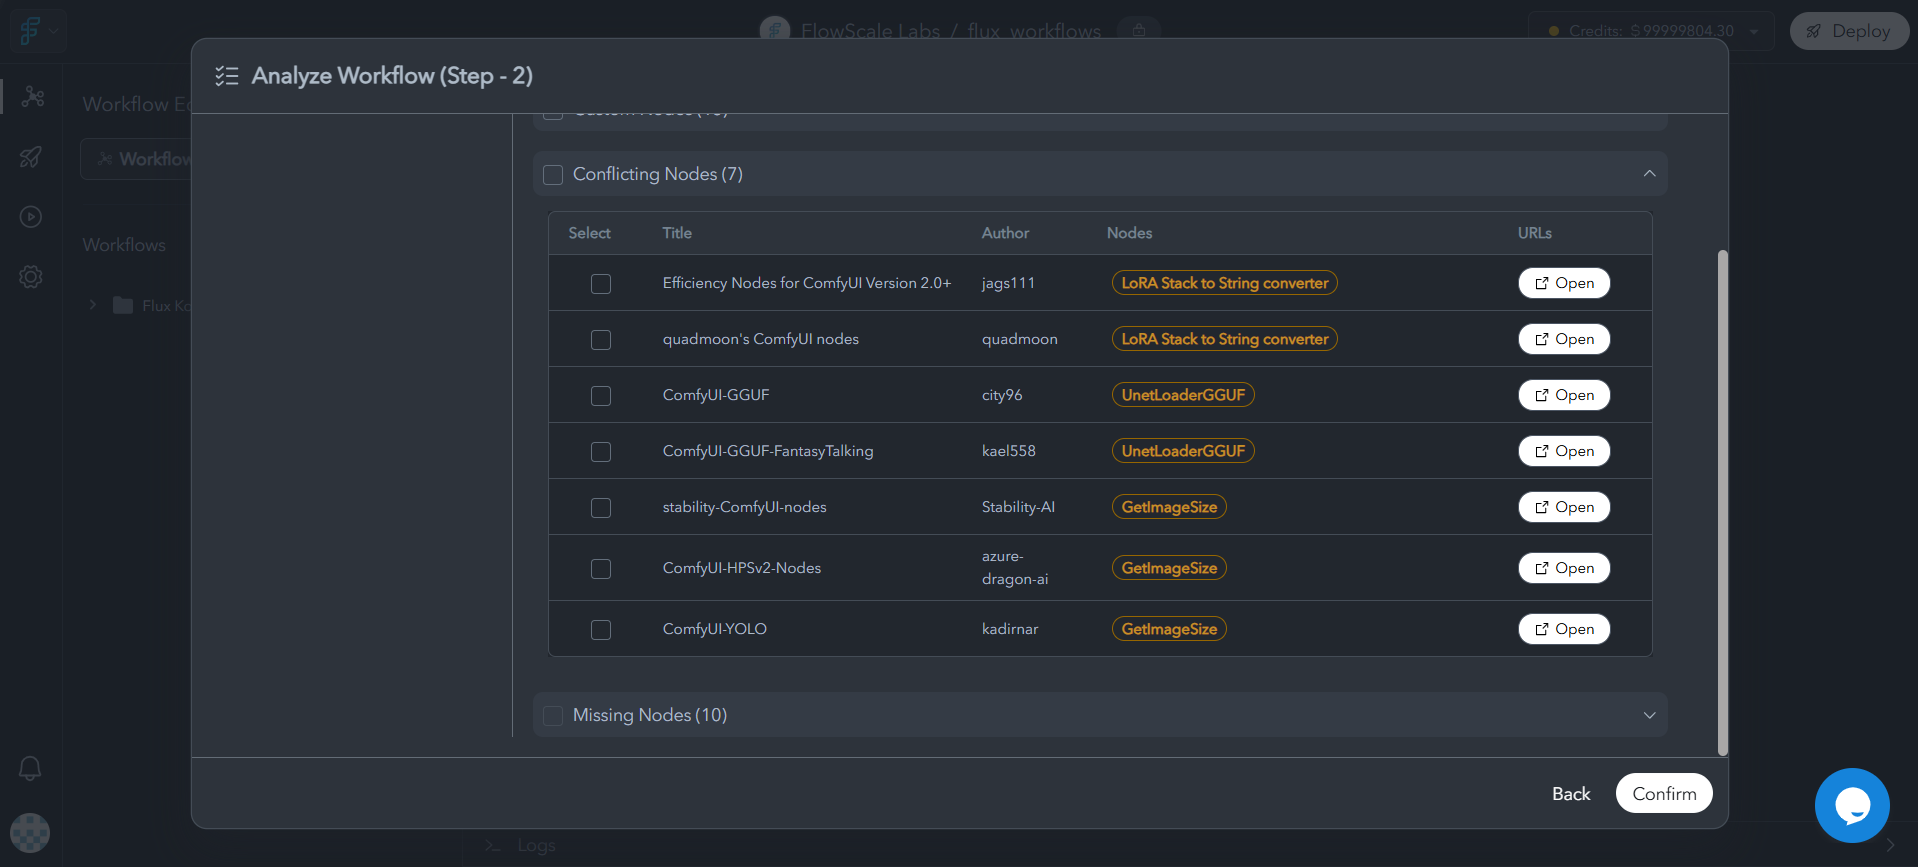
 If conflicting nodes are detected, select the correct versions that your workflow actually uses
 Click Confirm to add all necessary configuration for your workflow, and your imported project is ready to use!
 ### Supported Import Format
FlowScale AI imports **Workflow JSON** files from ComfyUI's "Save" function.
**File Format Matters:** Only use JSON files exported directly from ComfyUI's Save function. Other export formats or manually edited files may cause import issues or lost functionality.
## Accessing ComfyUI Workspace
Pods are cloud-hosted ComfyUI instances that provide on-demand access to GPU resources.
### Launch Process
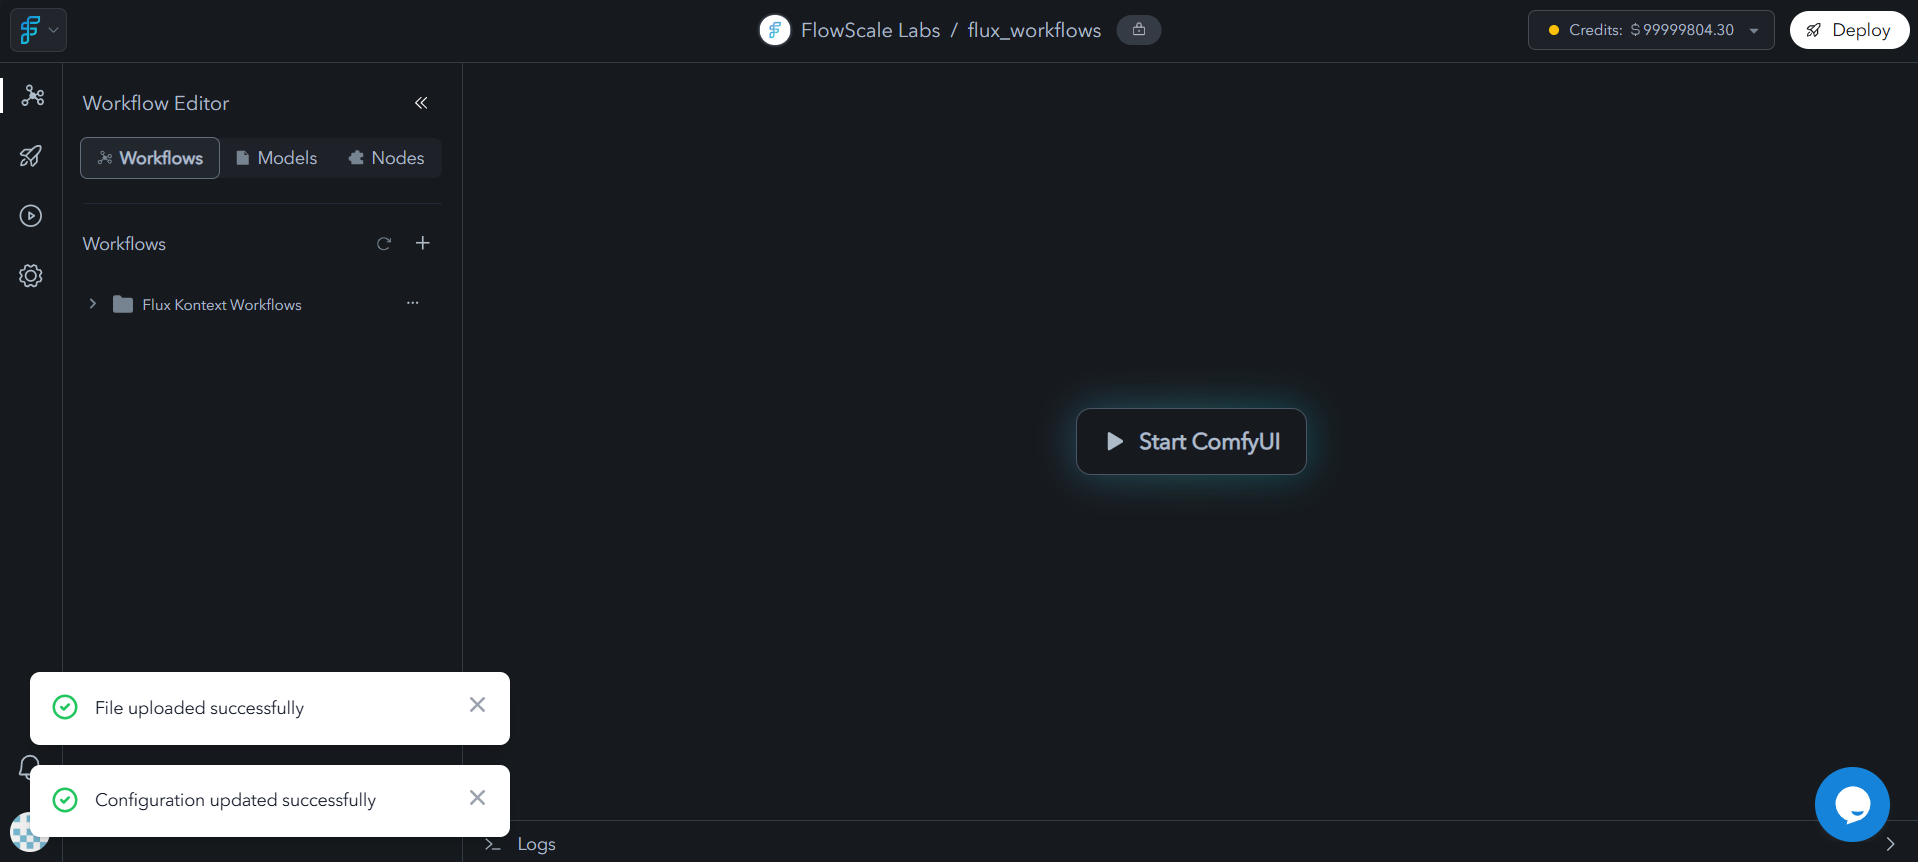
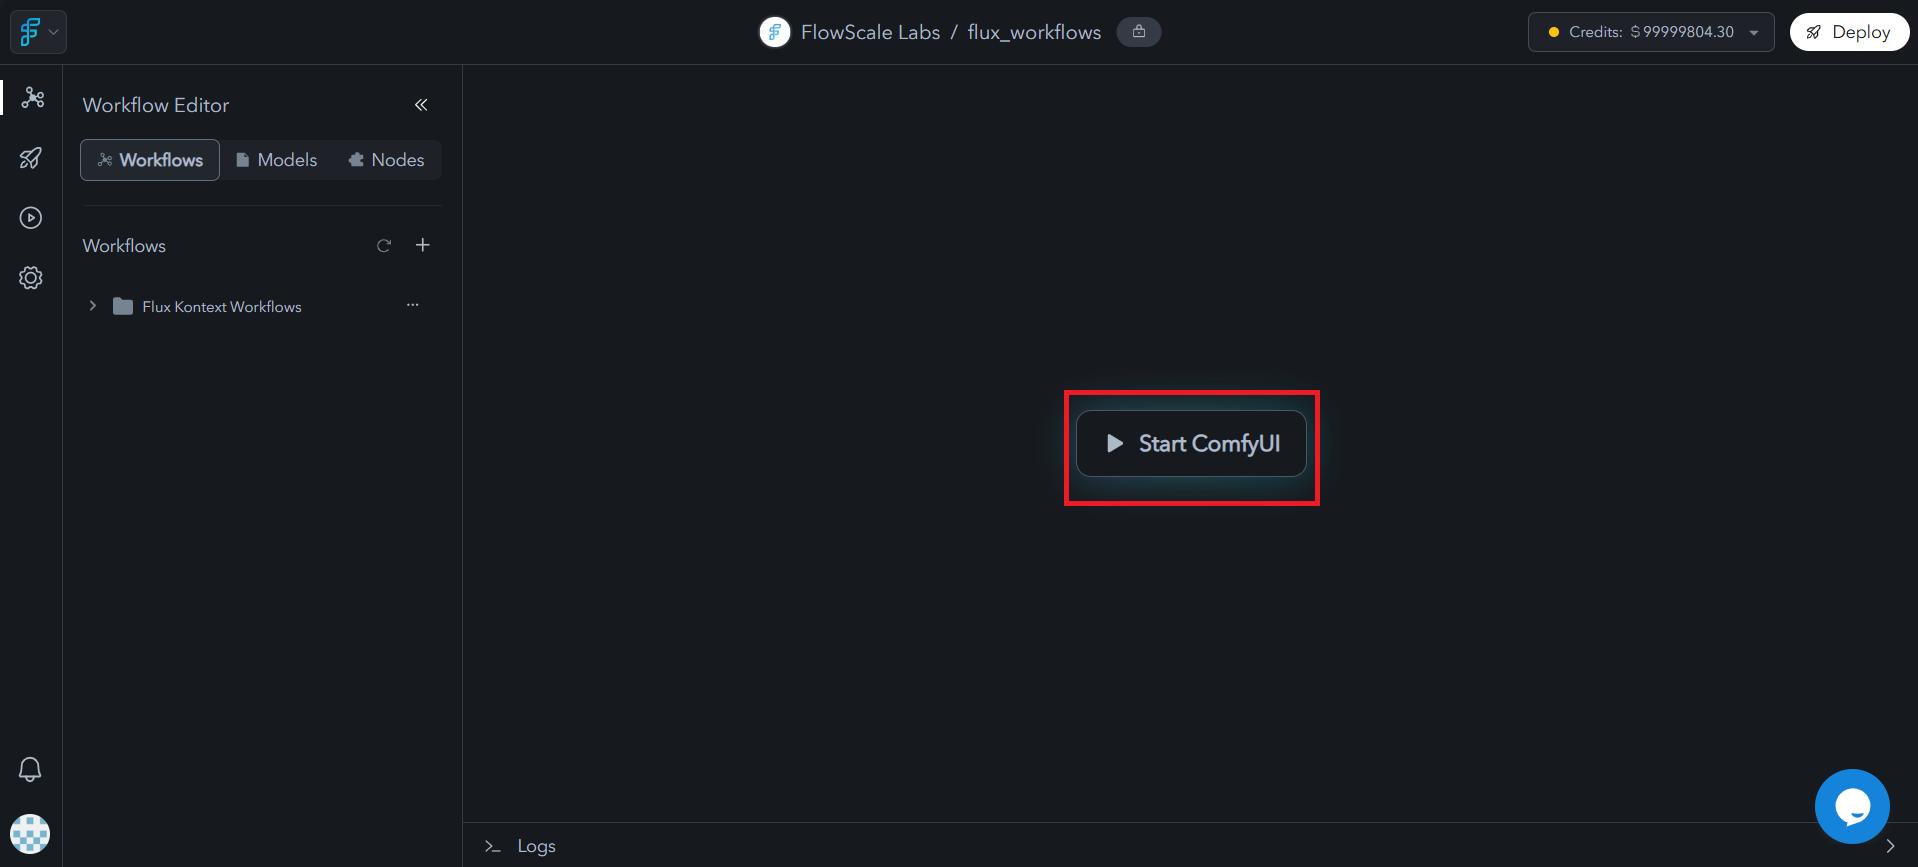
Click **"Start ComfyUI"** button in your project
### Supported Import Format
FlowScale AI imports **Workflow JSON** files from ComfyUI's "Save" function.
**File Format Matters:** Only use JSON files exported directly from ComfyUI's Save function. Other export formats or manually edited files may cause import issues or lost functionality.
## Accessing ComfyUI Workspace
Pods are cloud-hosted ComfyUI instances that provide on-demand access to GPU resources.
### Launch Process
Click **"Start ComfyUI"** button in your project
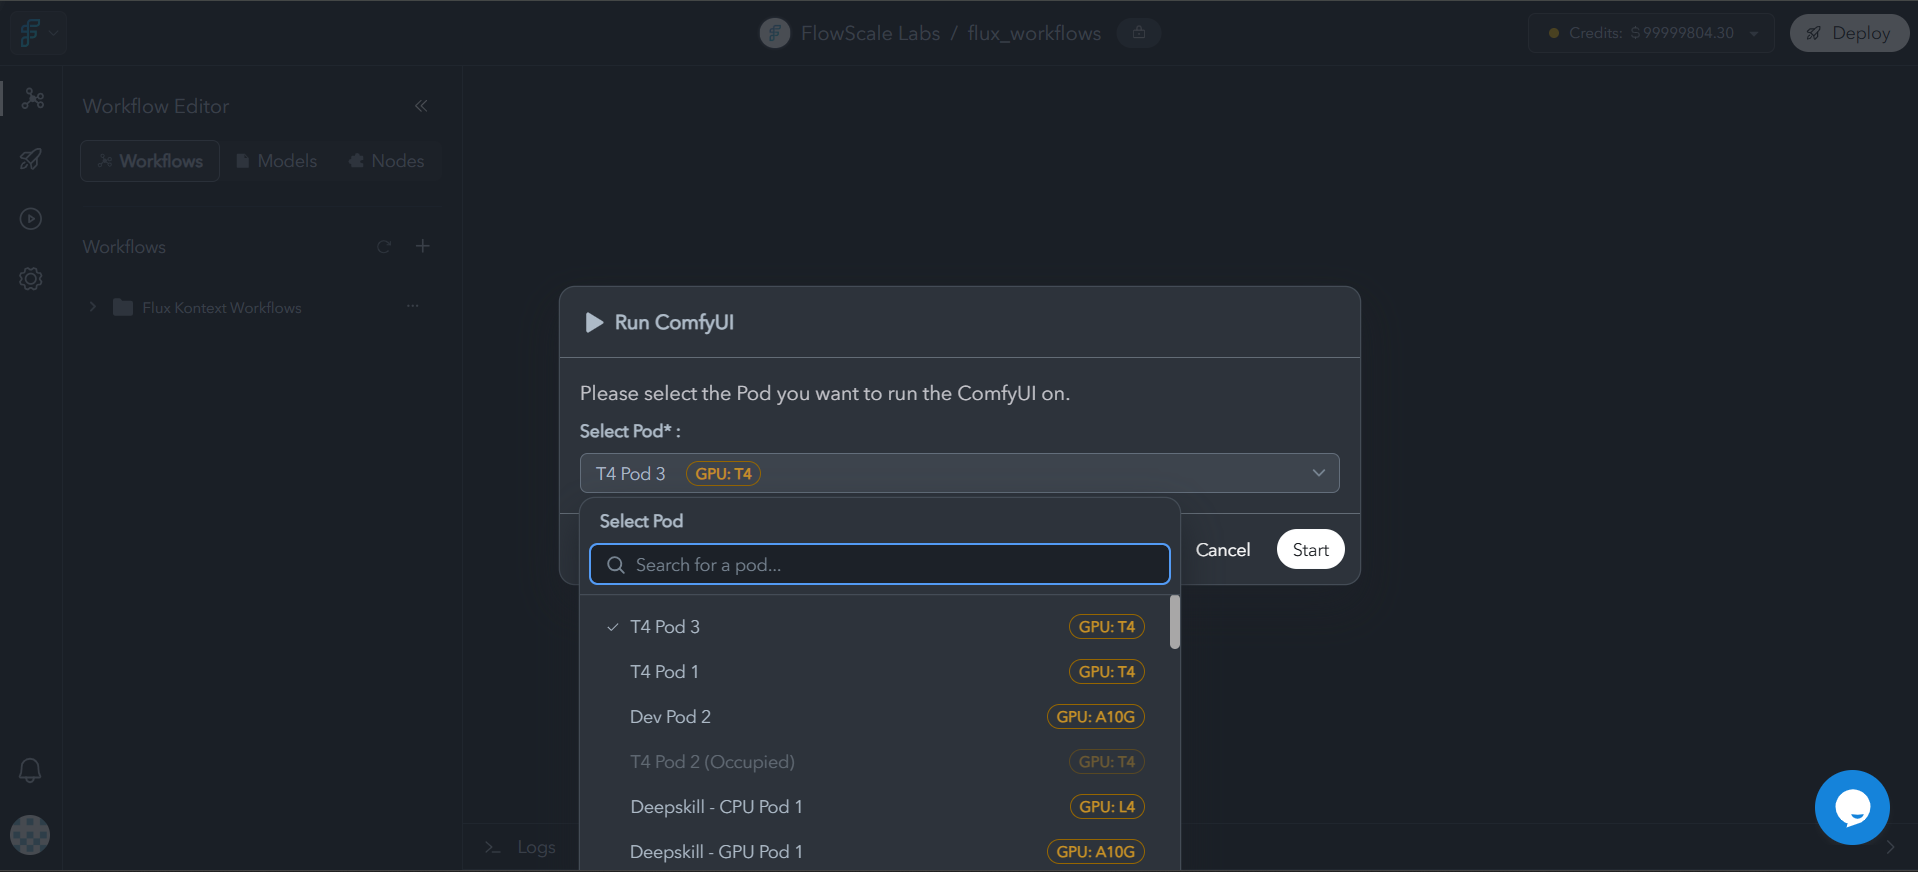
 Choose the pod configuration for your ComfyUI instance from the modal
 While ComfyUI starts, custom nodes are installed automatically. View progress in System Logs
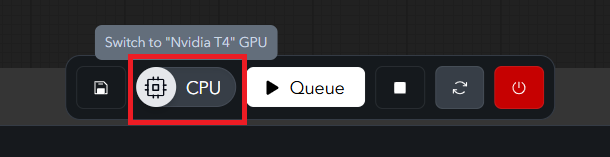
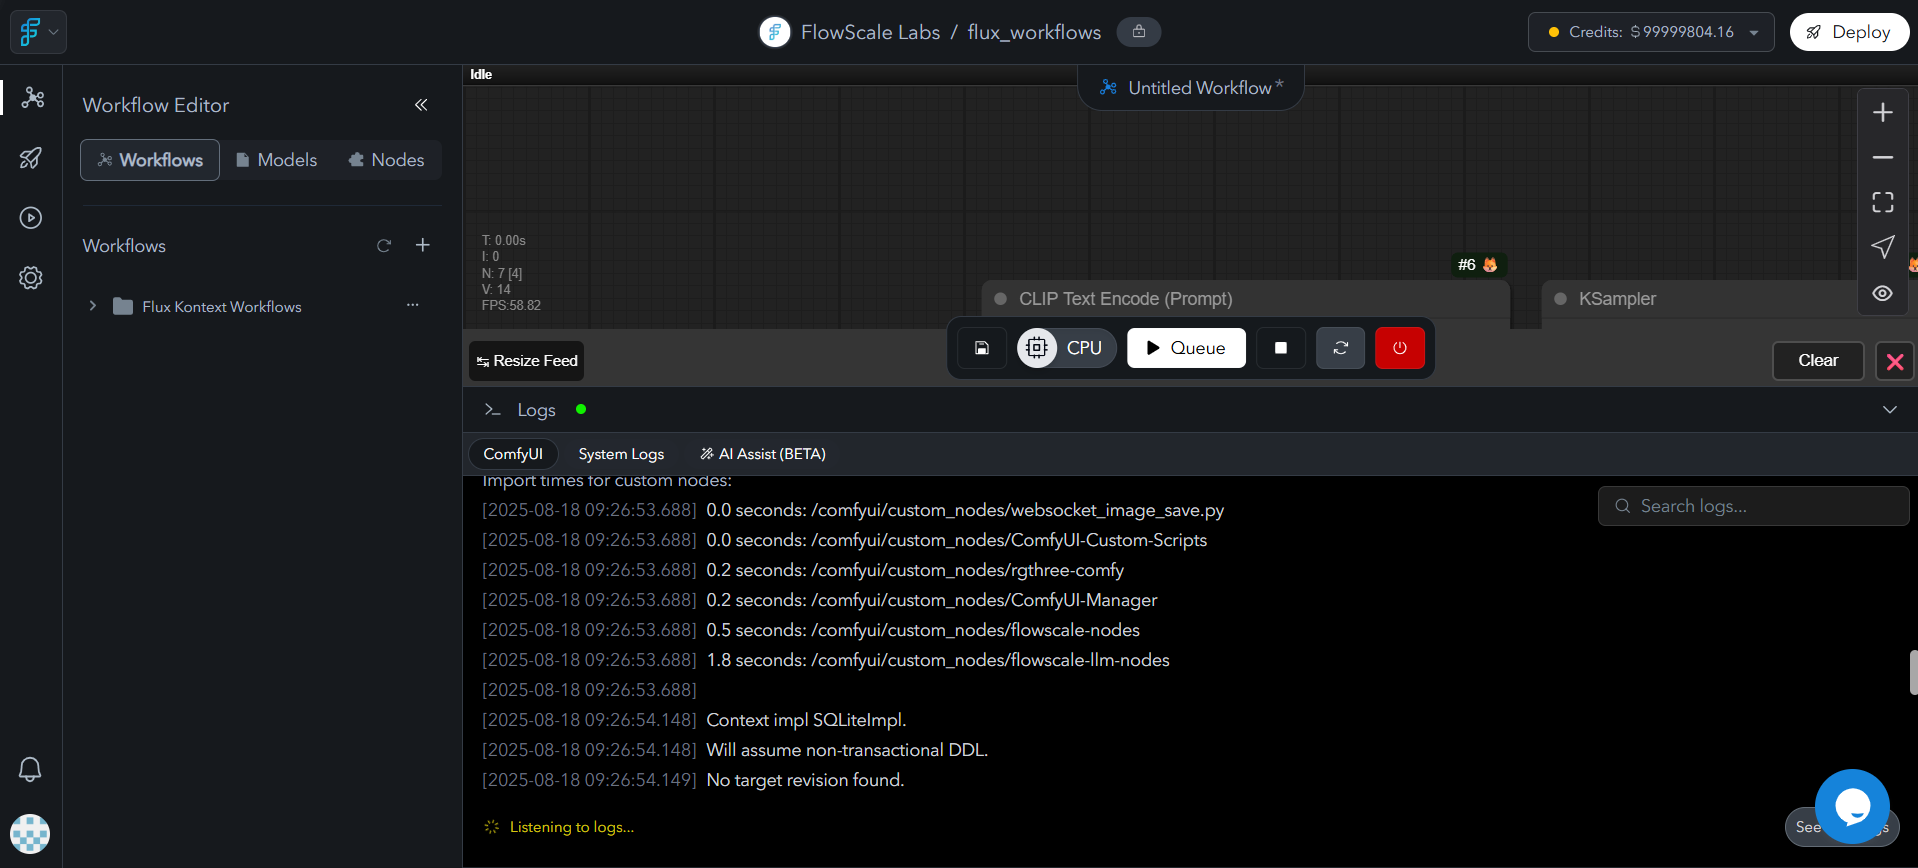 Once started, you'll see the ComfyUI workspace in CPU mode
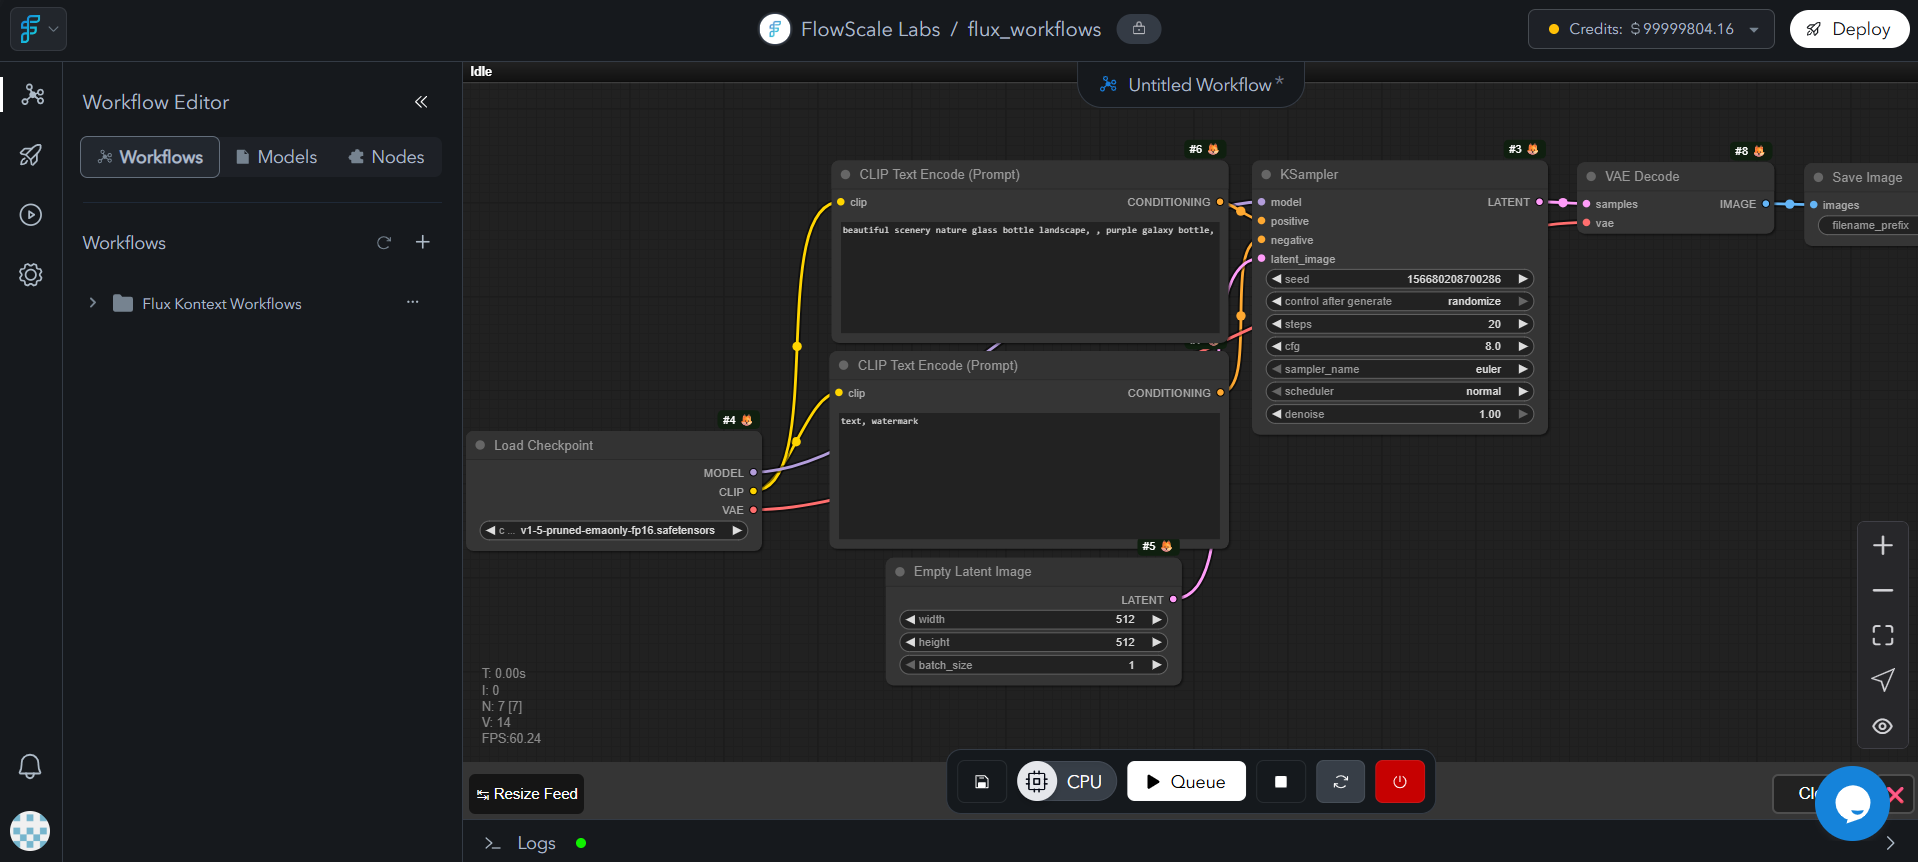 ### CPU vs GPU Mode
**For workflow editing:**
* Connecting nodes and adjusting parameters
* Low cost for workflow development
* Use for planning and structure building
**For workflow execution:**
* Running inference and testing outputs
* Higher cost but enterprise GPU performance
* Use only when generating results
**Cost Optimization**: Always use CPU mode for editing workflows and only switch to GPU mode when you need to execute them. This prevents unnecessary credit burn.
### CPU vs GPU Mode
**For workflow editing:**
* Connecting nodes and adjusting parameters
* Low cost for workflow development
* Use for planning and structure building
**For workflow execution:**
* Running inference and testing outputs
* Higher cost but enterprise GPU performance
* Use only when generating results
**Cost Optimization**: Always use CPU mode for editing workflows and only switch to GPU mode when you need to execute them. This prevents unnecessary credit burn.
 ## Model Management
FlowScale AI provides centralized model management with public and private model libraries for team sharing.
### Model Setup Process
Launch your ComfyUI instance in your project
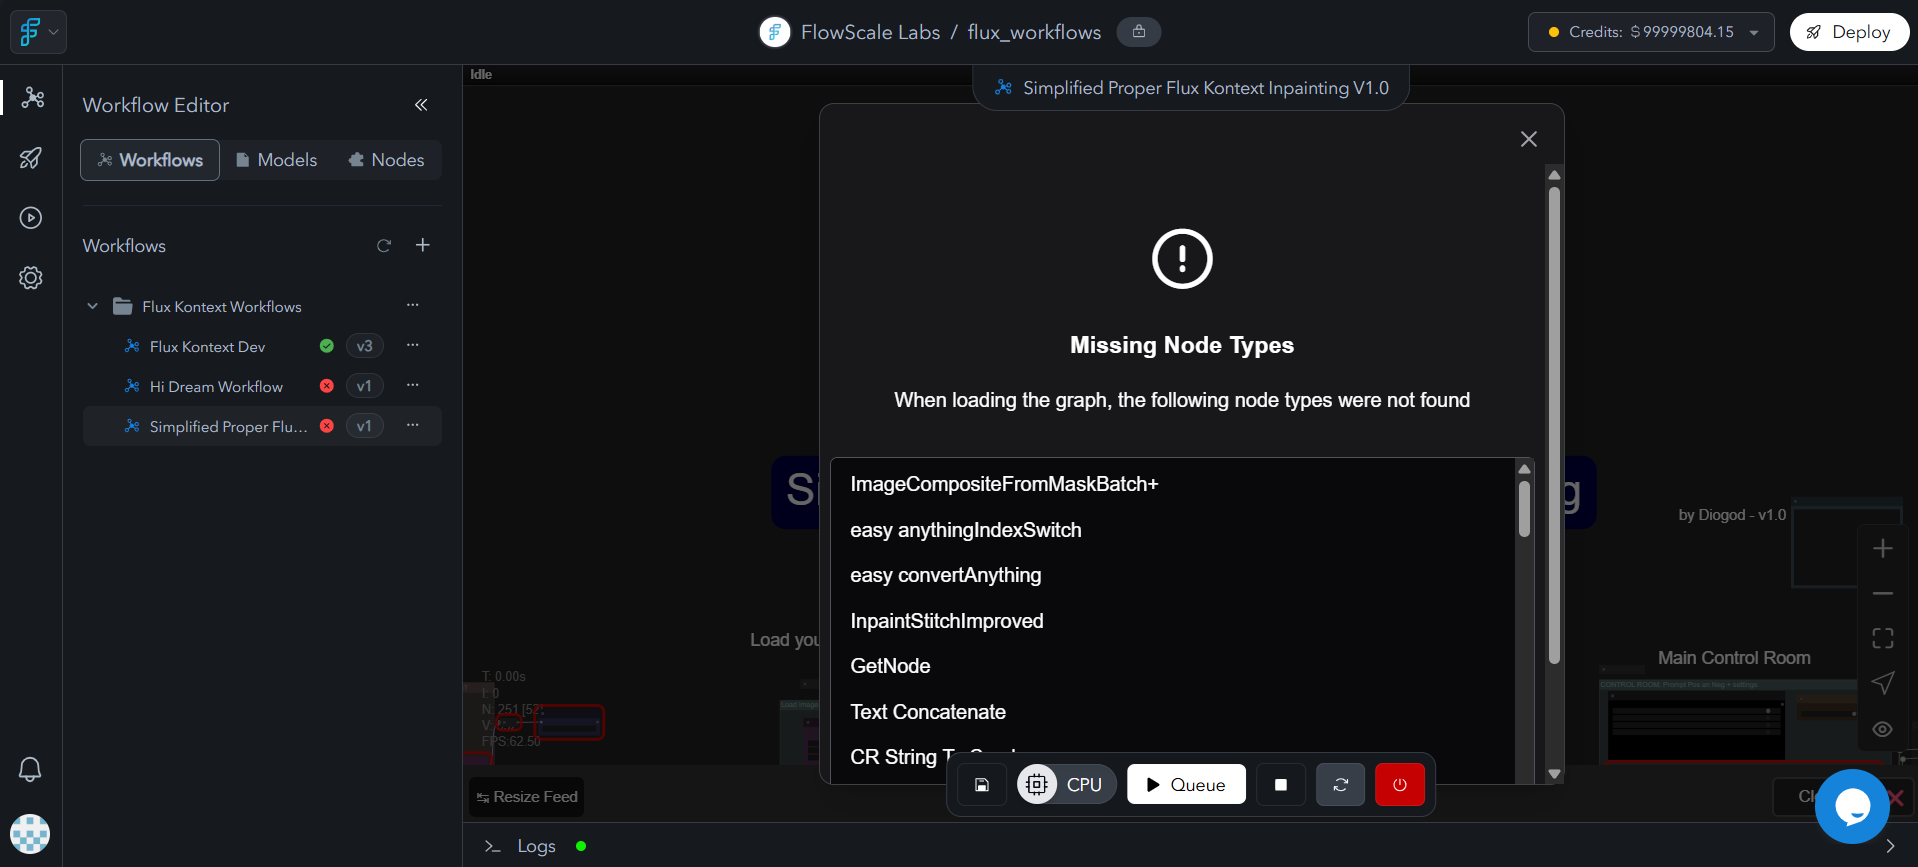
Run your workflow once to identify missing models (you'll see error messages)
## Model Management
FlowScale AI provides centralized model management with public and private model libraries for team sharing.
### Model Setup Process
Launch your ComfyUI instance in your project
Run your workflow once to identify missing models (you'll see error messages)
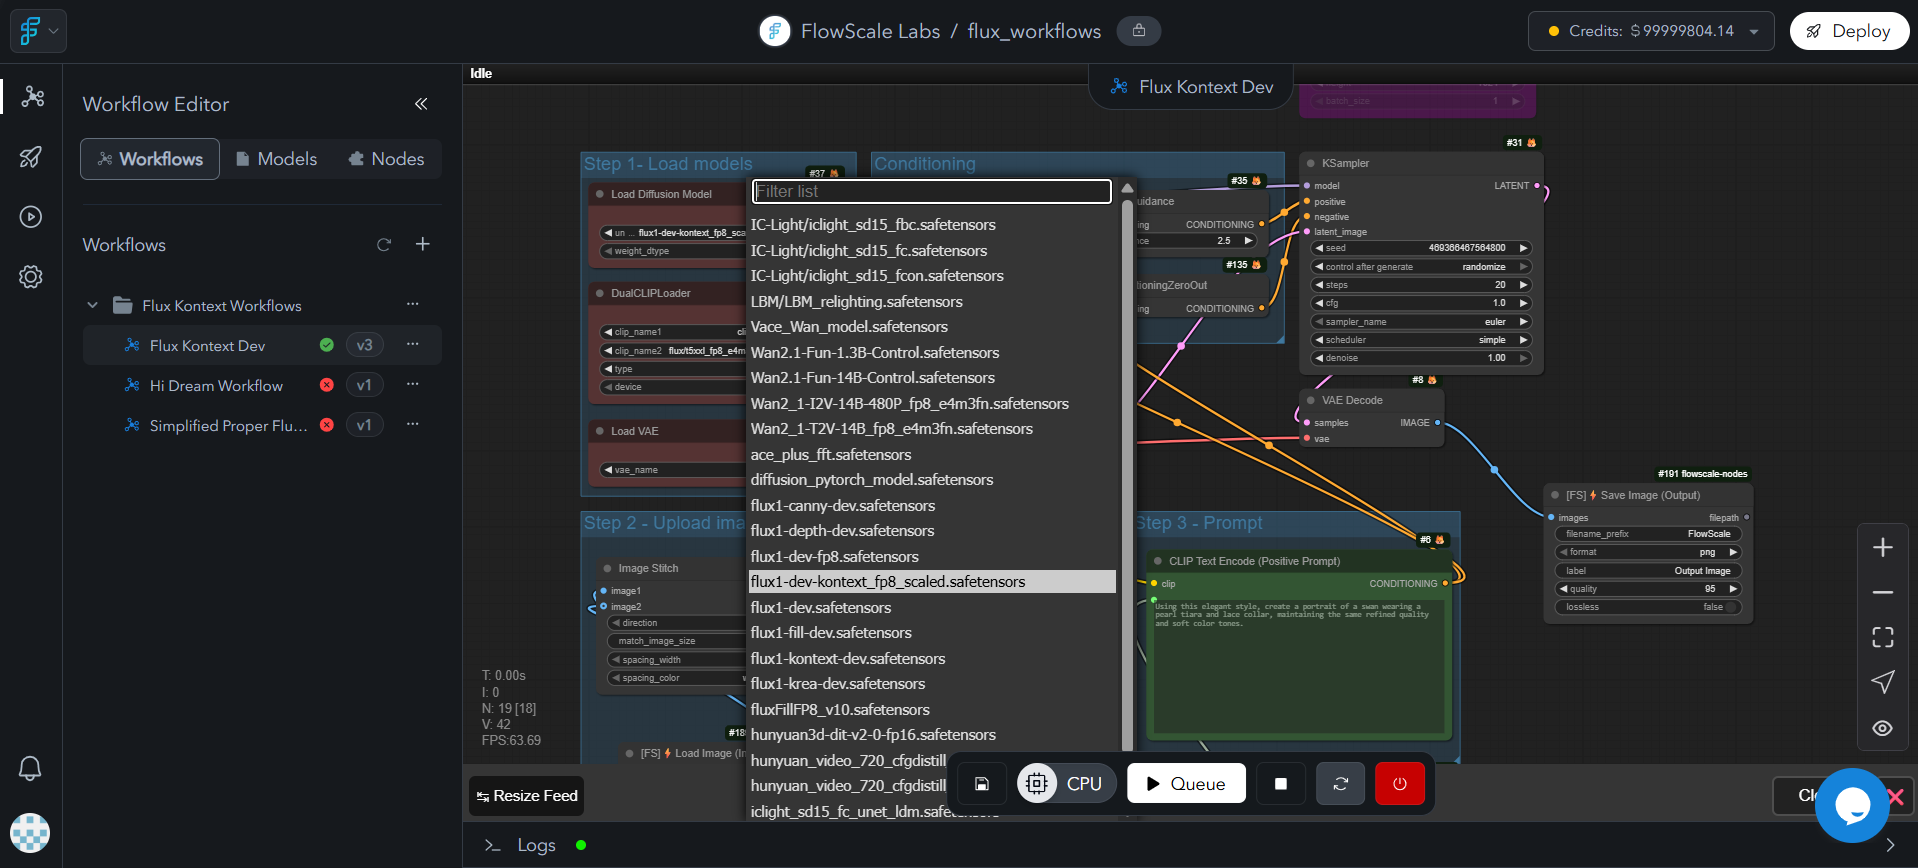
 Look for required models in the dropdown menus of the workflow nodes themselves. If models are available in the public library, they will appear in the relevant node dropdowns within your workflow
Models may appear under similar filenames—check carefully for variations or similar names.
Look for required models in the dropdown menus of the workflow nodes themselves. If models are available in the public library, they will appear in the relevant node dropdowns within your workflow
Models may appear under similar filenames—check carefully for variations or similar names.
 If models aren't found publicly, navigate to **Private Models** section
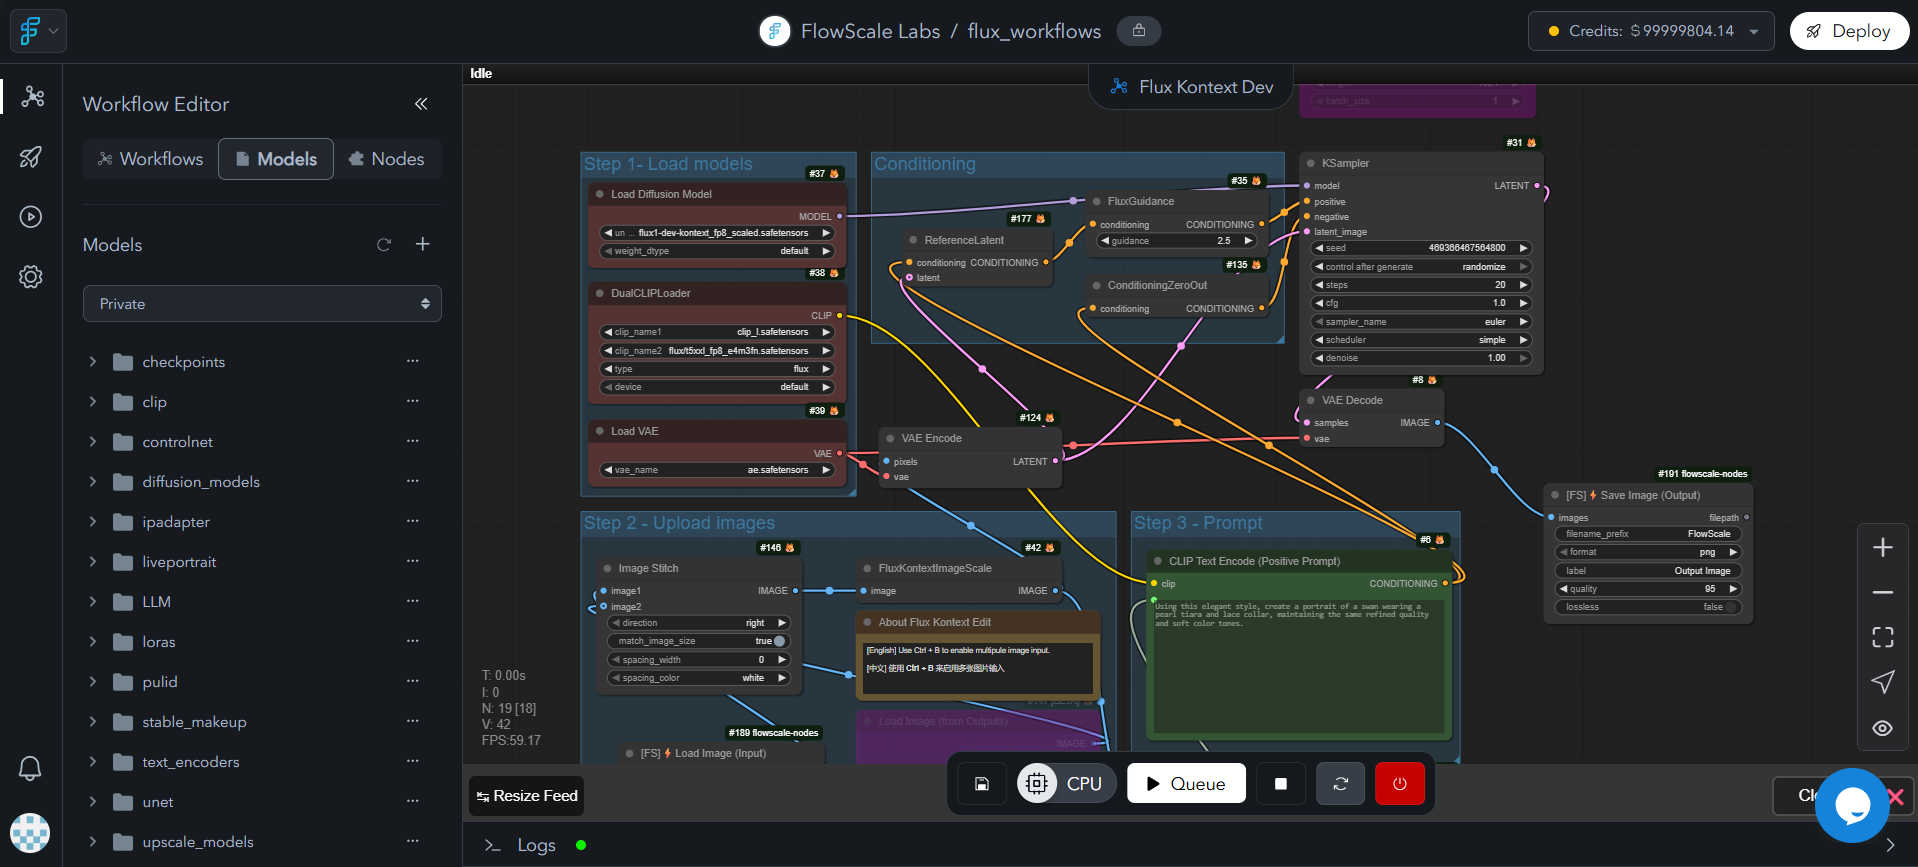 Create appropriate folder structure as required by ComfyUI or custom nodes
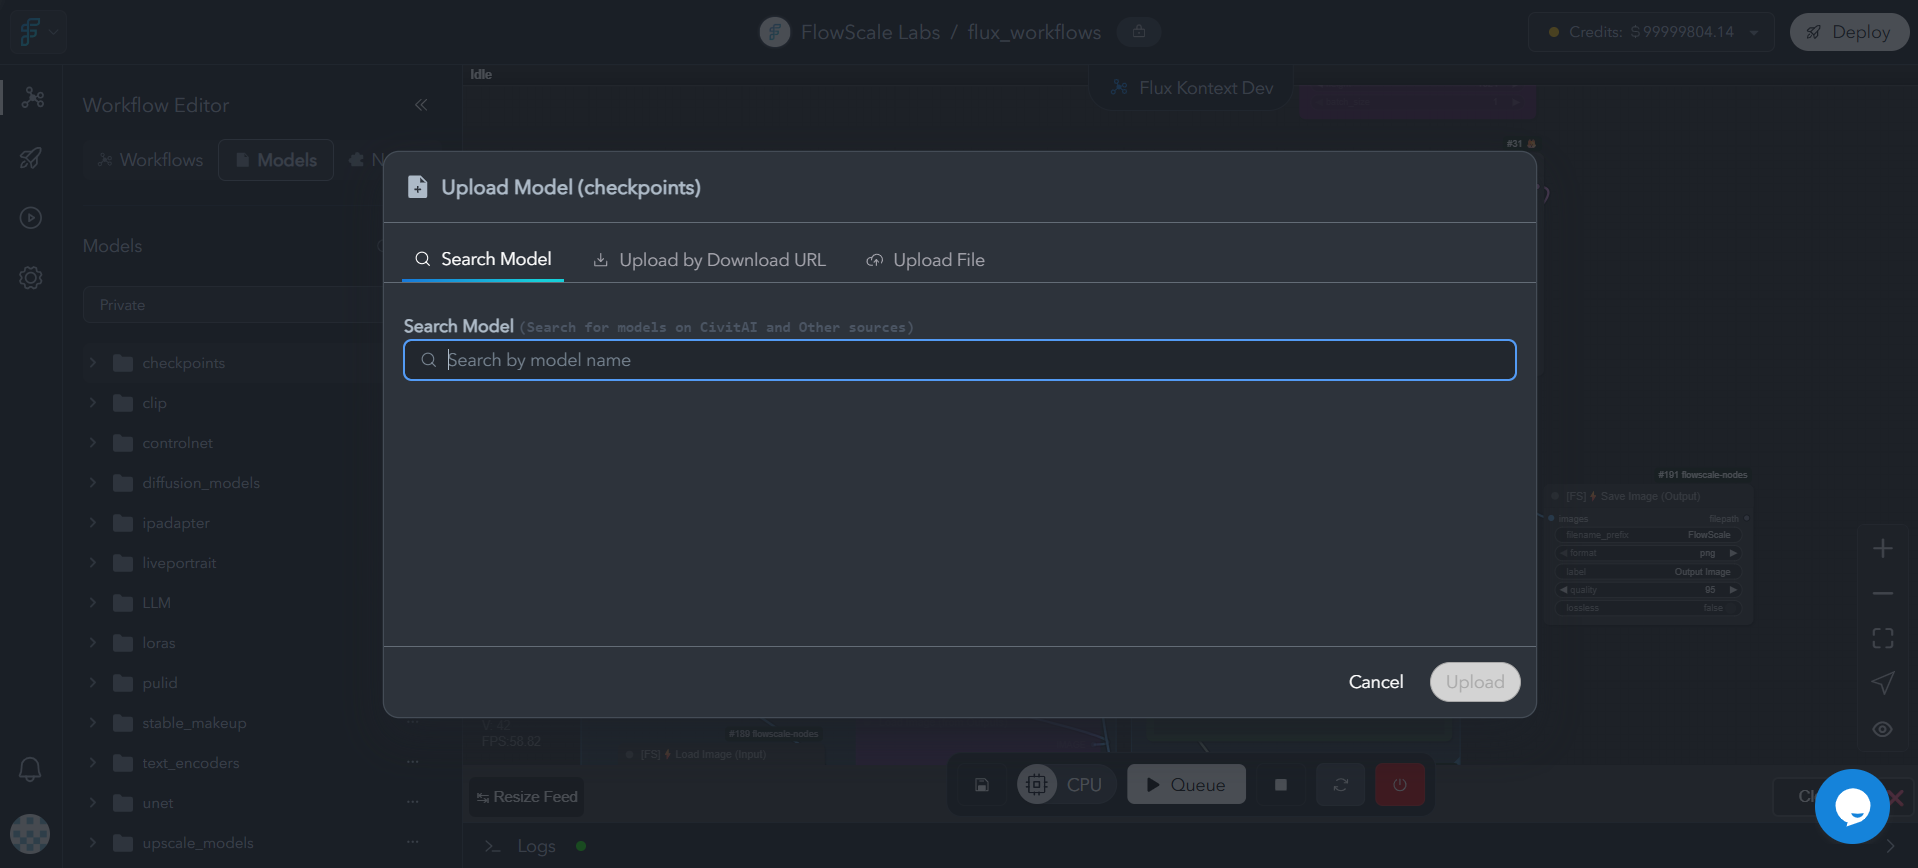
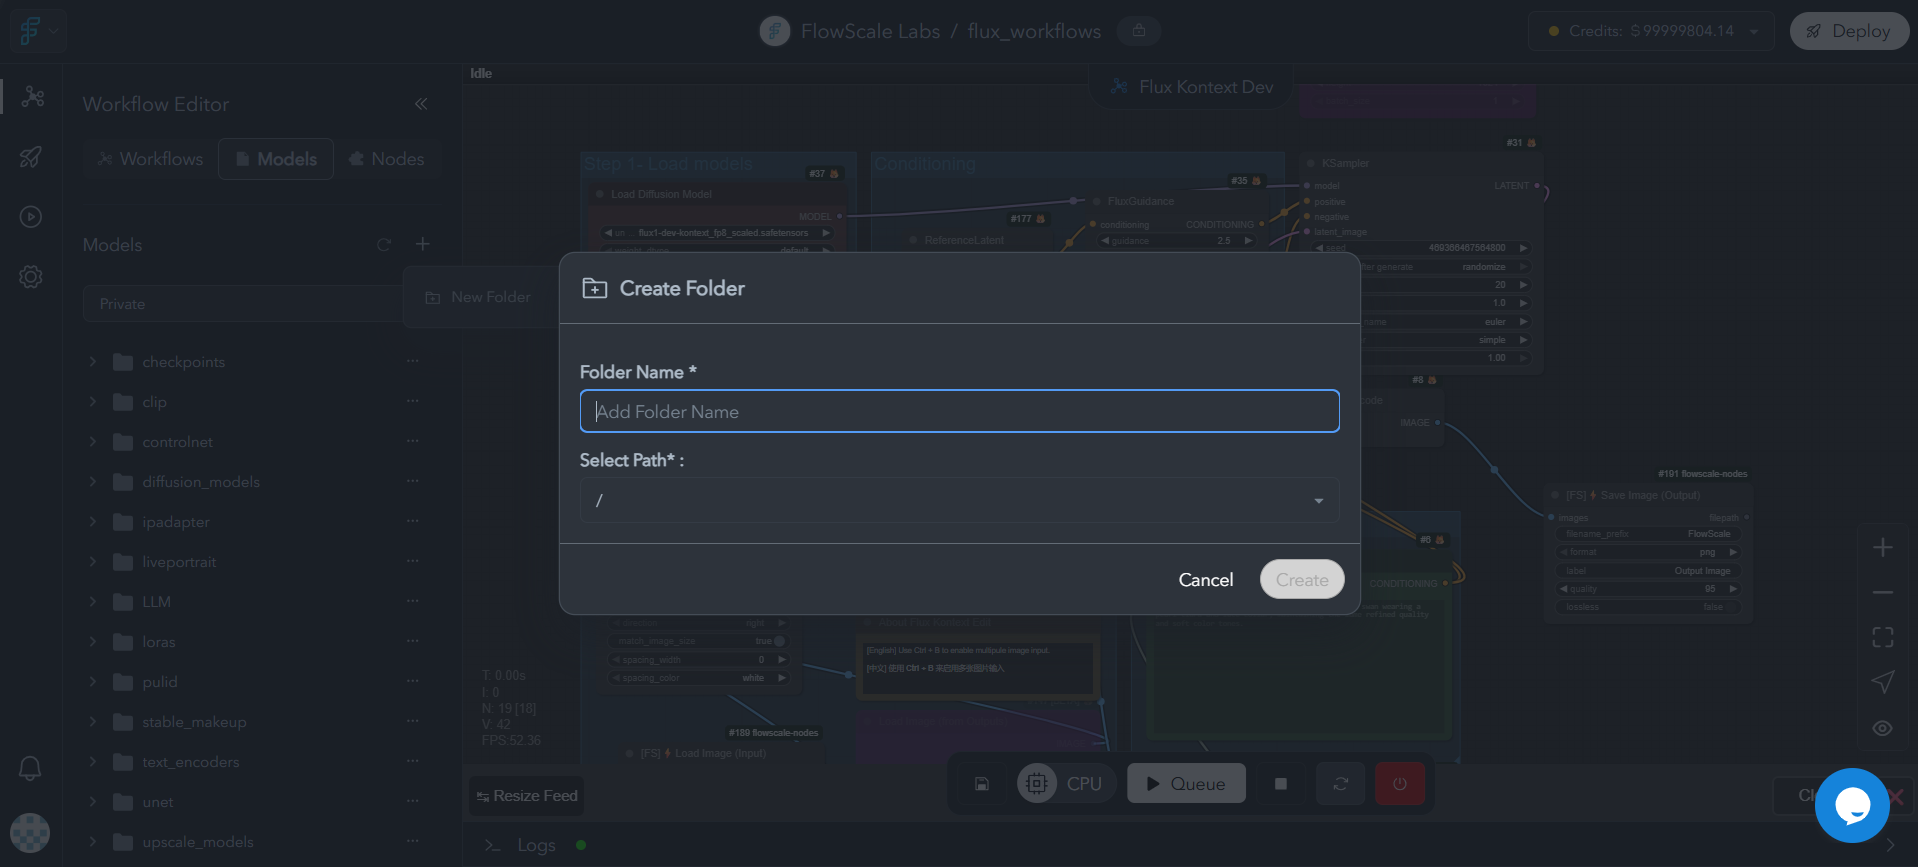 Click **"Upload Model"** and either search for models or provide download links
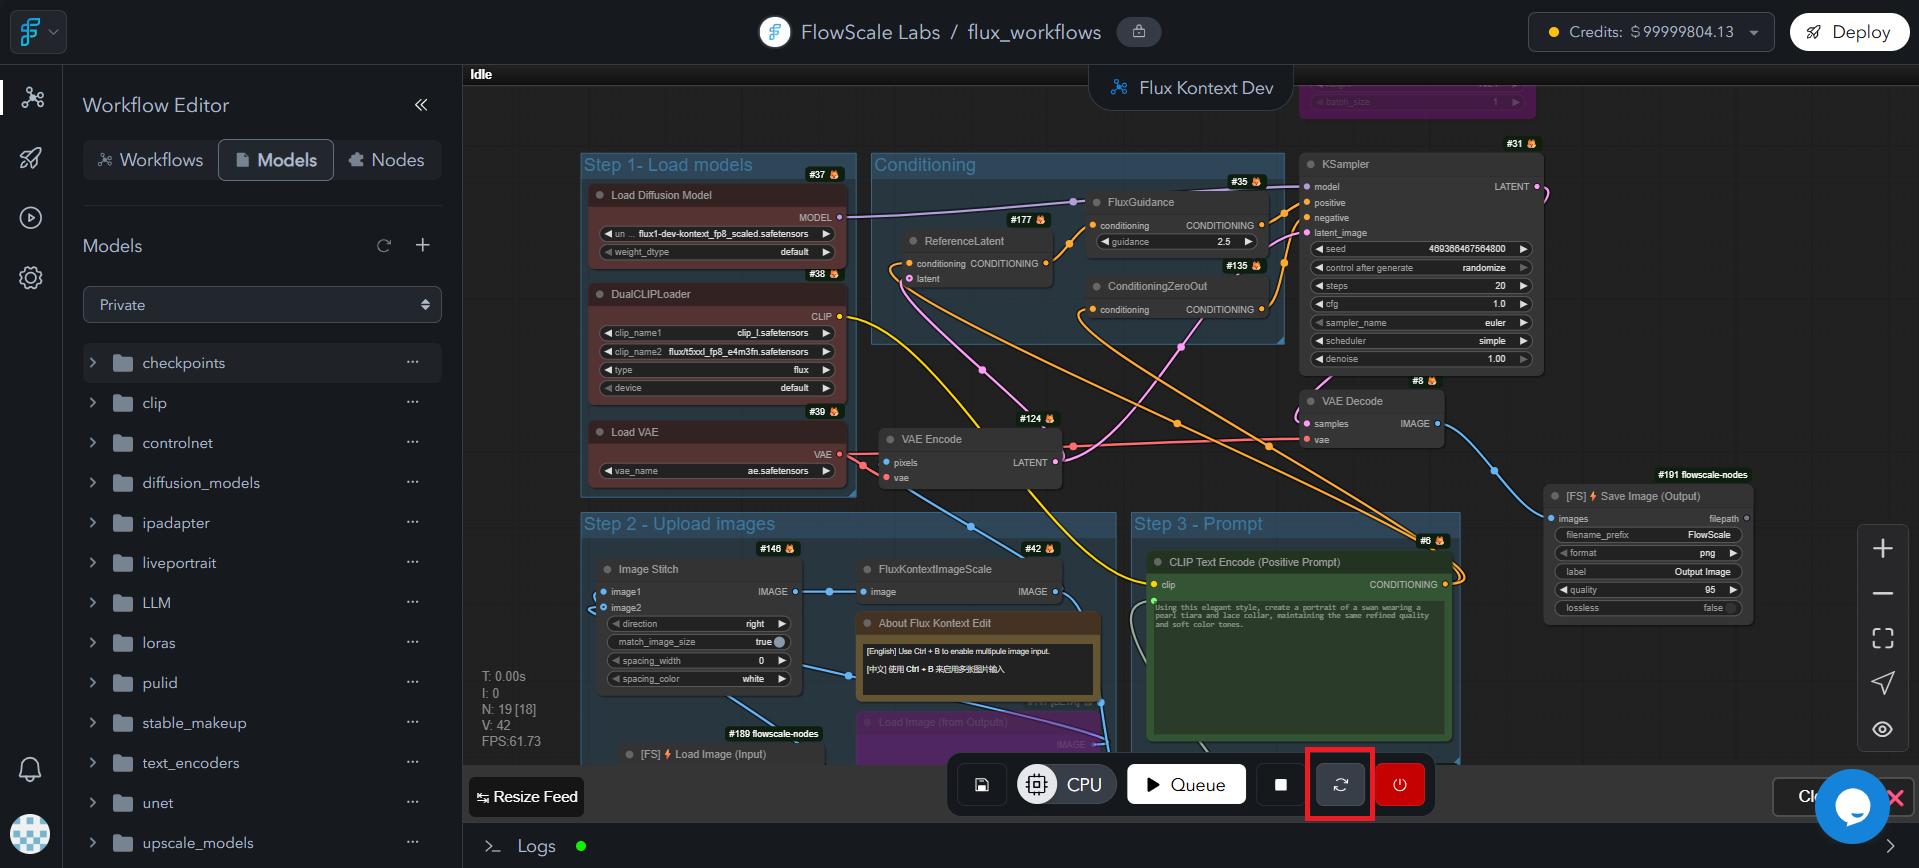
 After model download completes, refresh ComfyUI from the actions bar
 Check the workflow node dropdowns again to confirm the newly added models are now available for selection
### Model Sources
Pre-loaded models from Hugging Face, Civitai, and popular community sources
Custom models, fine-tuned checkpoints, and specialized LoRAs
Direct download from external sources using model URLs
### Folder Structure Guidelines
When creating folders for models, follow ComfyUI conventions:
* **Checkpoints**: `models/checkpoints/`
* **LoRAs**: `models/loras/`
* **VAE**: `models/vae/`
* **Custom nodes**: Check the node's GitHub repository for specific folder requirements
For custom node models, always refer to the node's GitHub repository README for correct folder naming conventions.
## Creating New Workflows
Create workflows directly in FlowScale AI for immediate team collaboration and deployment readiness.
### Quick Start Method
Click **"Create New Workflow"** button in your project
Check the workflow node dropdowns again to confirm the newly added models are now available for selection
### Model Sources
Pre-loaded models from Hugging Face, Civitai, and popular community sources
Custom models, fine-tuned checkpoints, and specialized LoRAs
Direct download from external sources using model URLs
### Folder Structure Guidelines
When creating folders for models, follow ComfyUI conventions:
* **Checkpoints**: `models/checkpoints/`
* **LoRAs**: `models/loras/`
* **VAE**: `models/vae/`
* **Custom nodes**: Check the node's GitHub repository for specific folder requirements
For custom node models, always refer to the node's GitHub repository README for correct folder naming conventions.
## Creating New Workflows
Create workflows directly in FlowScale AI for immediate team collaboration and deployment readiness.
### Quick Start Method
Click **"Create New Workflow"** button in your project
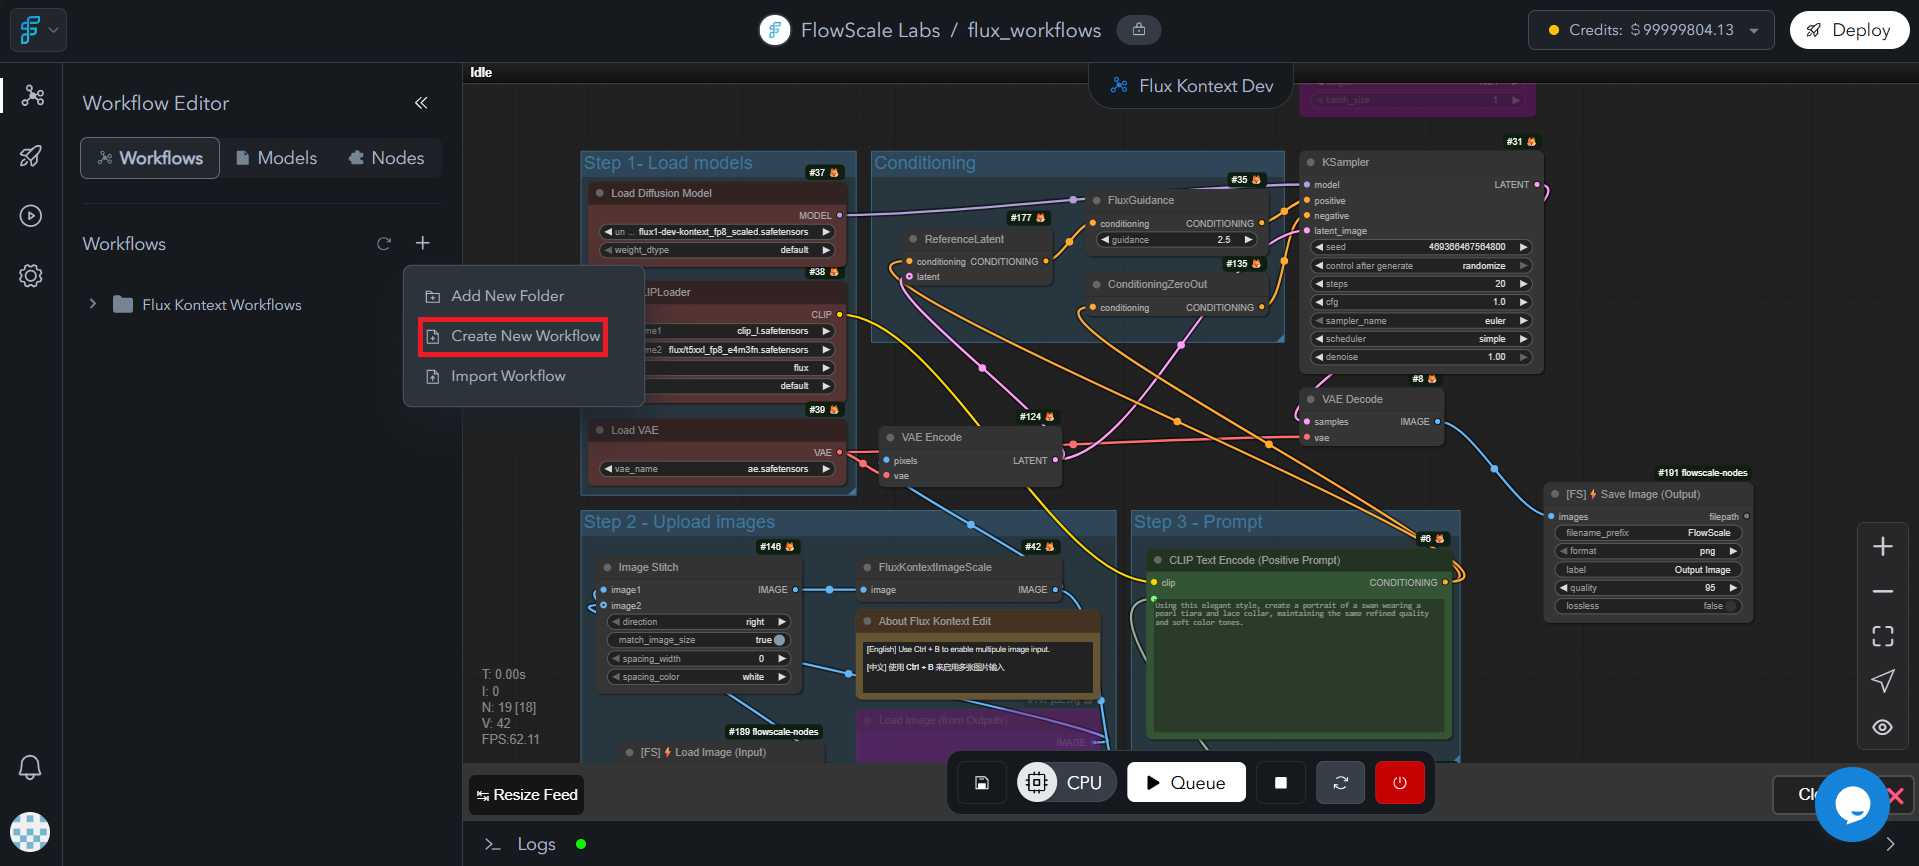 A basic text-to-image workflow loads automatically in the ComfyUI workspace
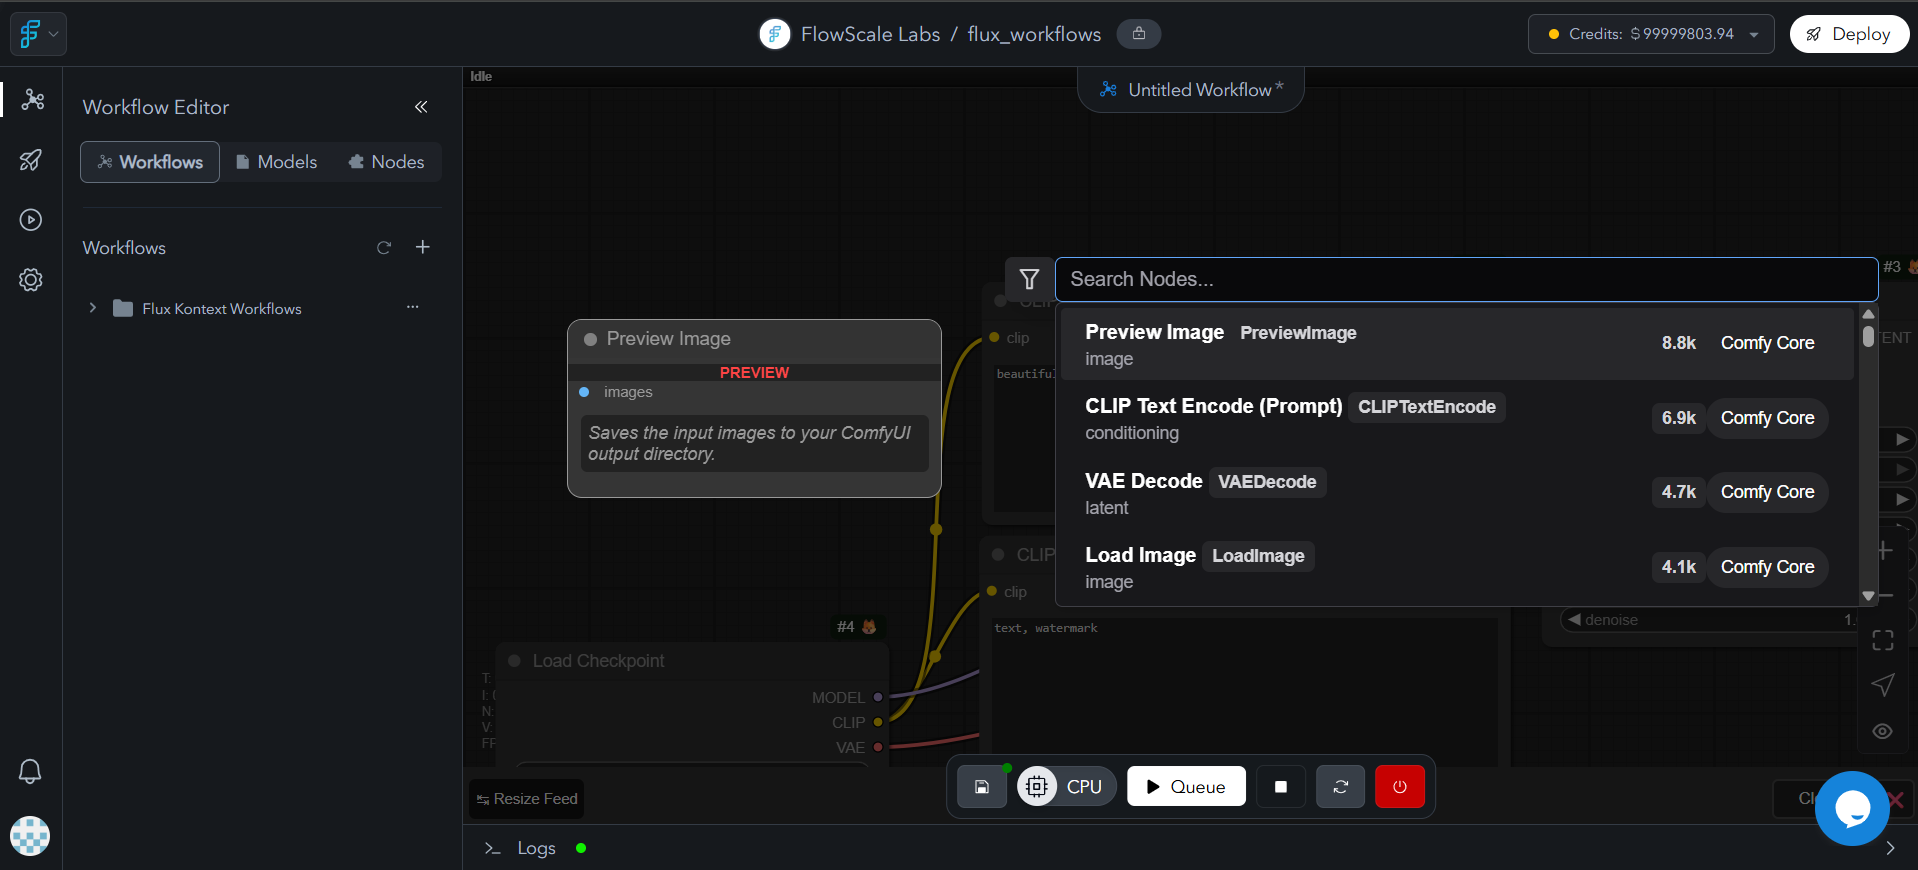
Modify the workflow by adding, removing, or connecting nodes as needed
A basic text-to-image workflow loads automatically in the ComfyUI workspace
Modify the workflow by adding, removing, or connecting nodes as needed
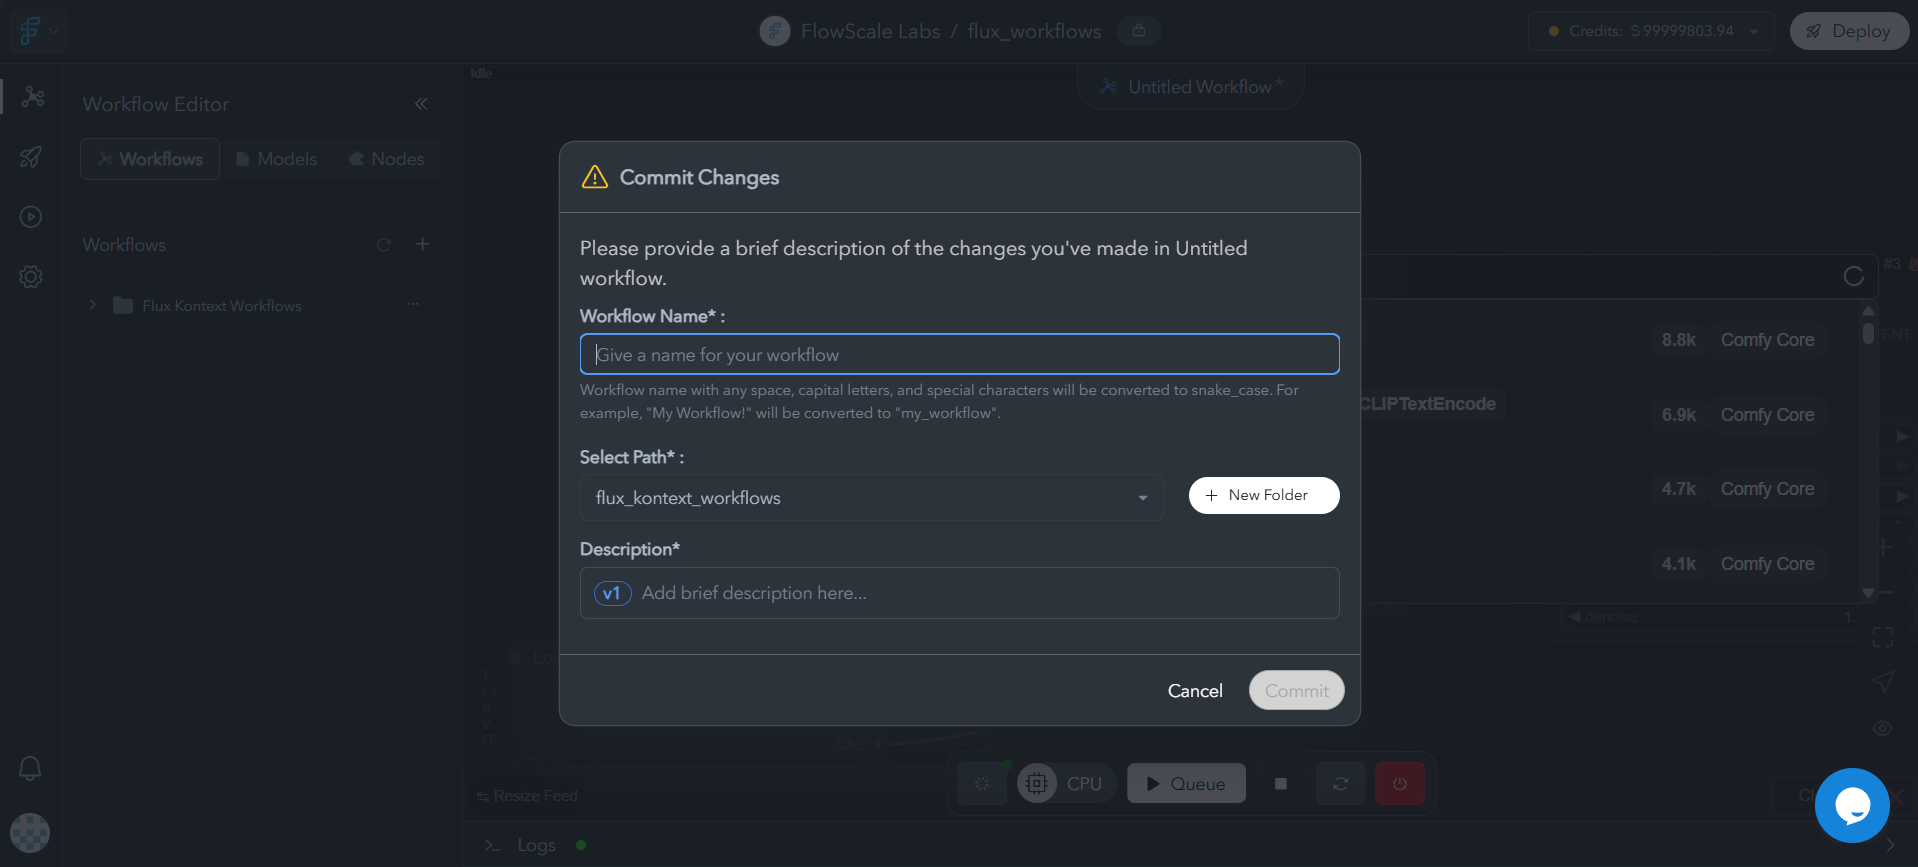
 Click **"Save"** in the actions bar and provide a descriptive commit message
 ## Next Steps
Transform workflows into production APIs and interactive interfaces
## Next Steps
Transform workflows into production APIs and interactive interfaces