Get Started
Build Workflows
Run ComfyUI on Cloud GPUs and build your own AI workflows
FlowScale allows users to build, customize, and manage powerful AI workflows using ComfyUI on cloud GPUs. In this guide, we will cover how to start ComfyUI on FlowScale, build and import workflows, manage cloud GPU resources, and handle AI models.
Table of Contents
1. Accessing ComfyUI
After creating your first project in FlowScale, you can easily access and start ComfyUI to build your AI workflows.Steps to Start ComfyUI on FlowScale
- Sign in to FlowScale and open the Projects page.
-
Select your project. Once you click on a project, you’ll land on the workflow editor screen.
- At the top, you’ll see the project name and organization name.
- The left sidebar has three main tabs:
- Workflows: Manage and organize your workflows within folders.
- Models: Access public or private AI models for your workflows.
- Nodes: Manage custom ComfyUI nodes required for building workflows.
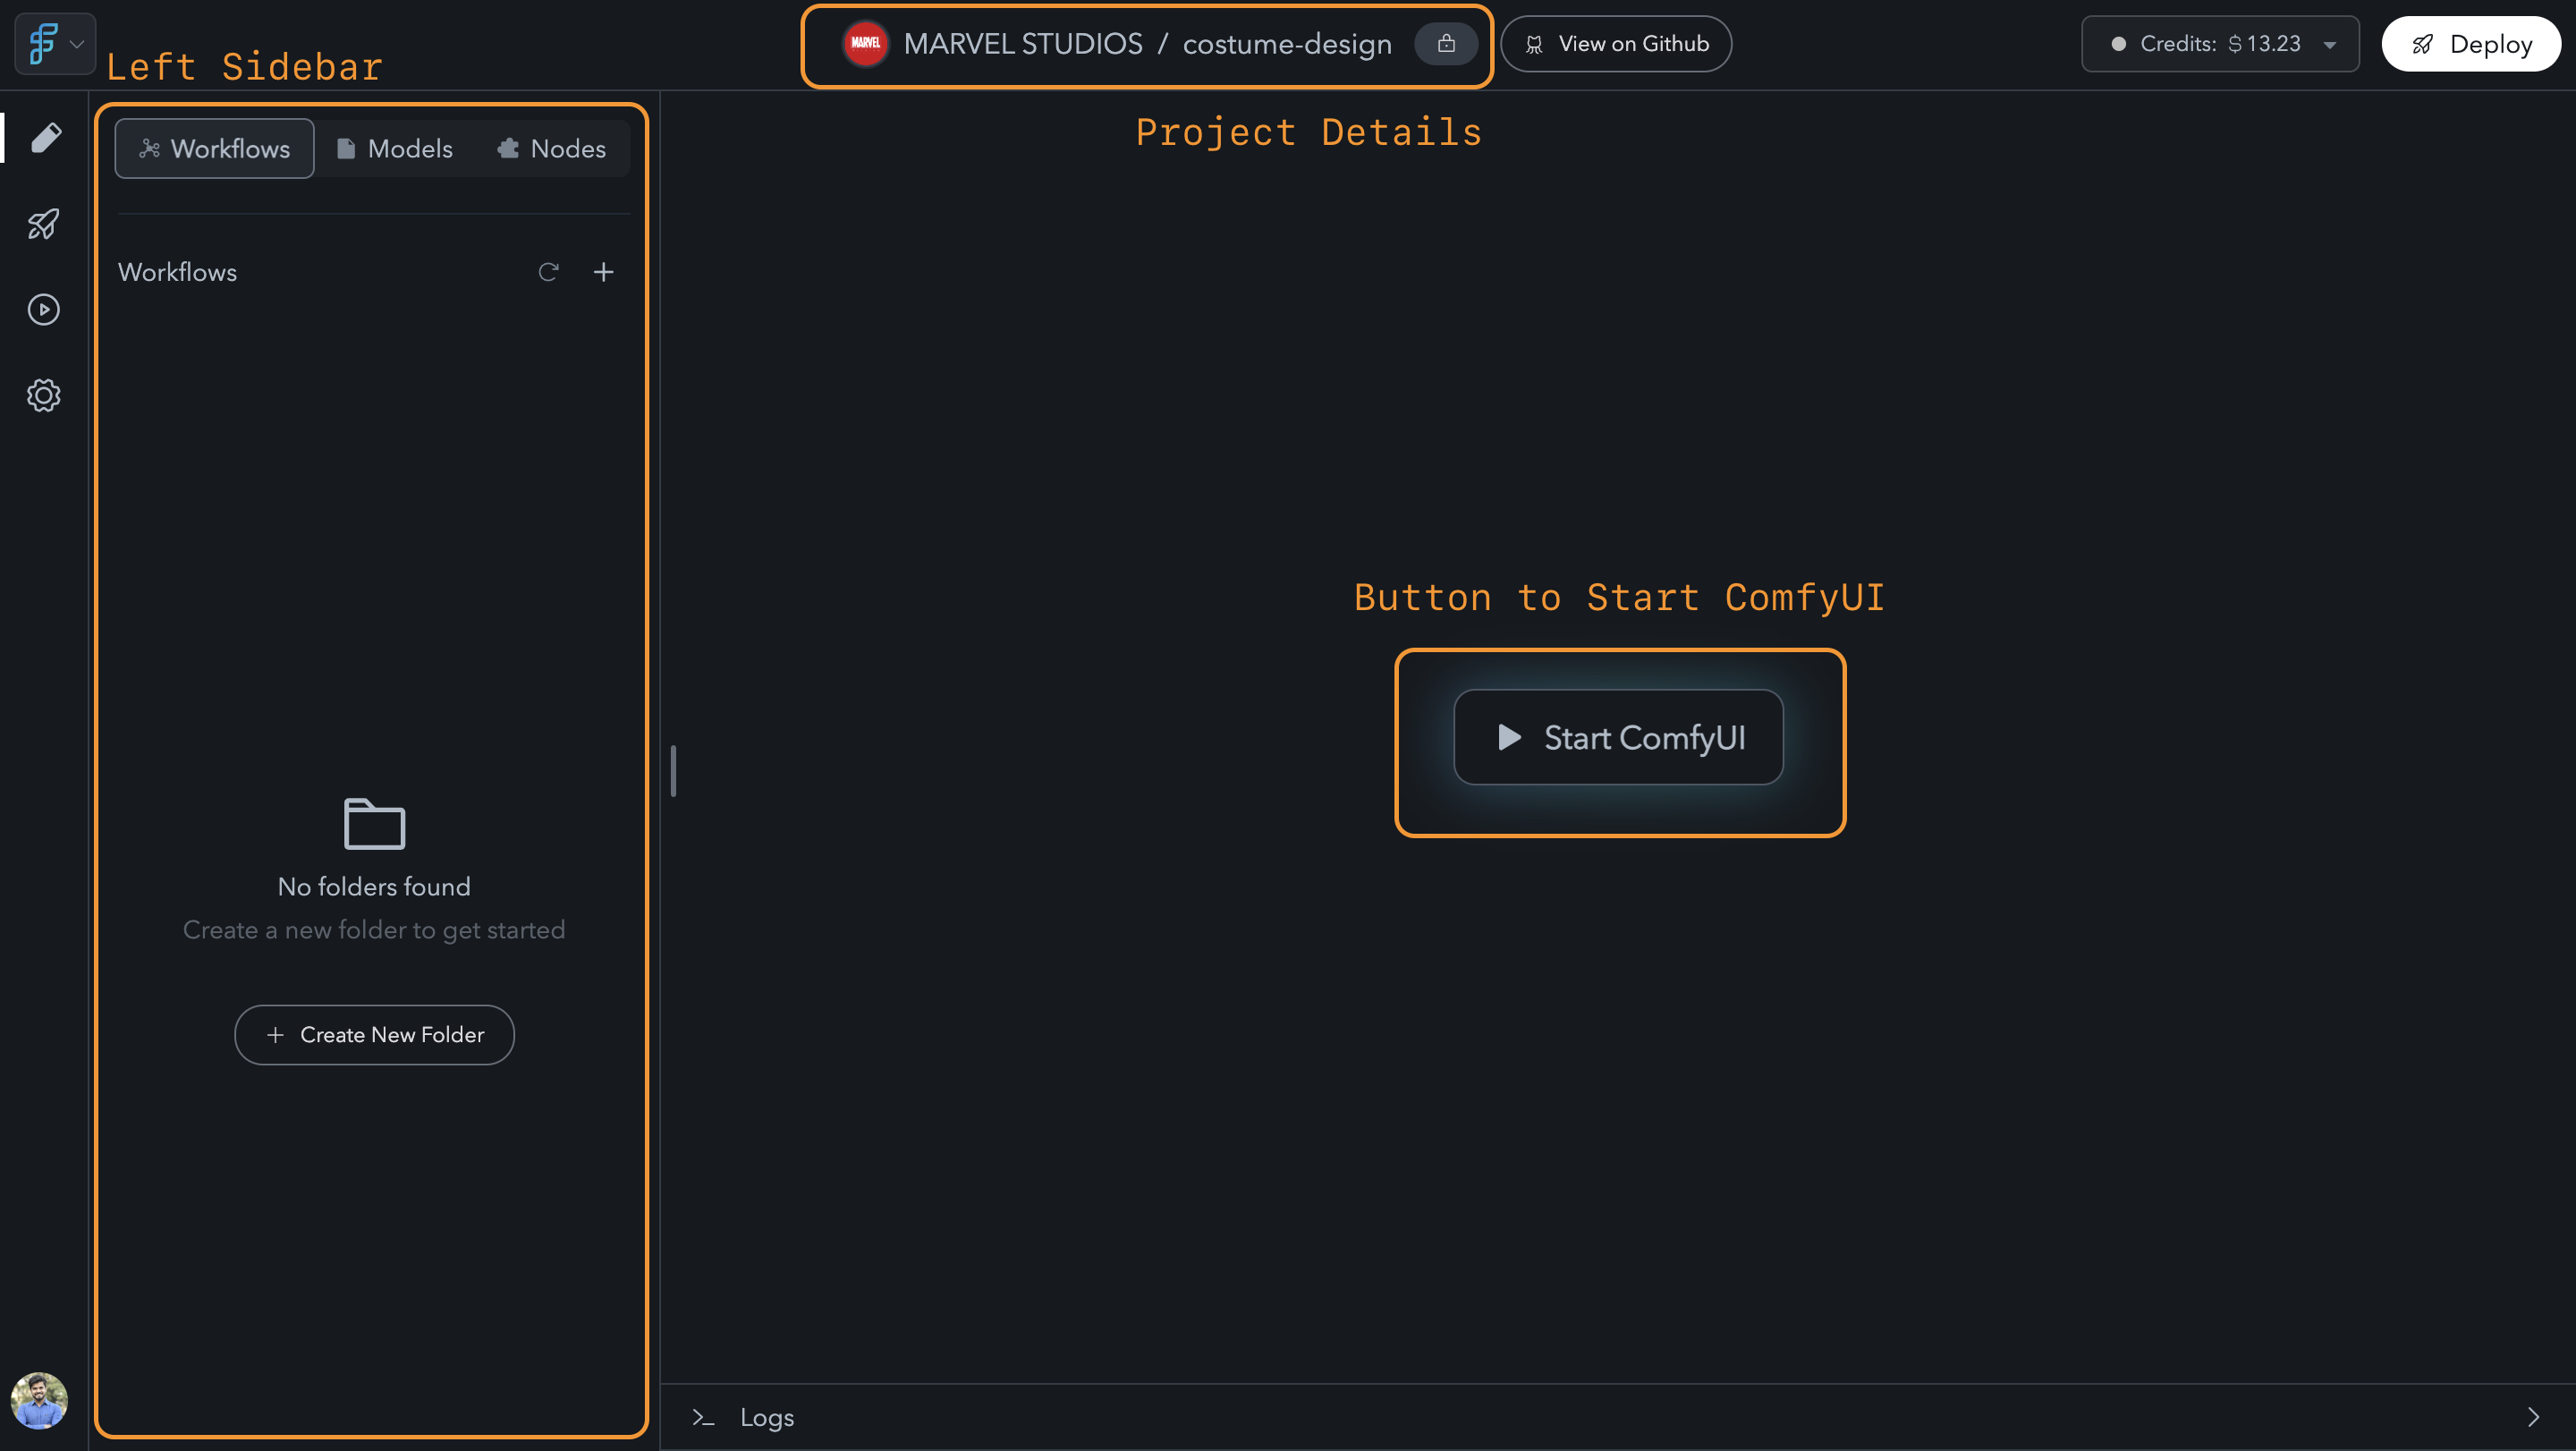
Workflow Editor
-
On the right side of the screen, there’s a “Start ComfyUI” button.
- Click this button to launch ComfyUI.
- Once clicked, an action bar will appear at the bottom, displaying a message: “ComfyUI Starting, please wait.”
- A loader will indicate the startup process, and logs will be displayed at the bottom to monitor system activities.
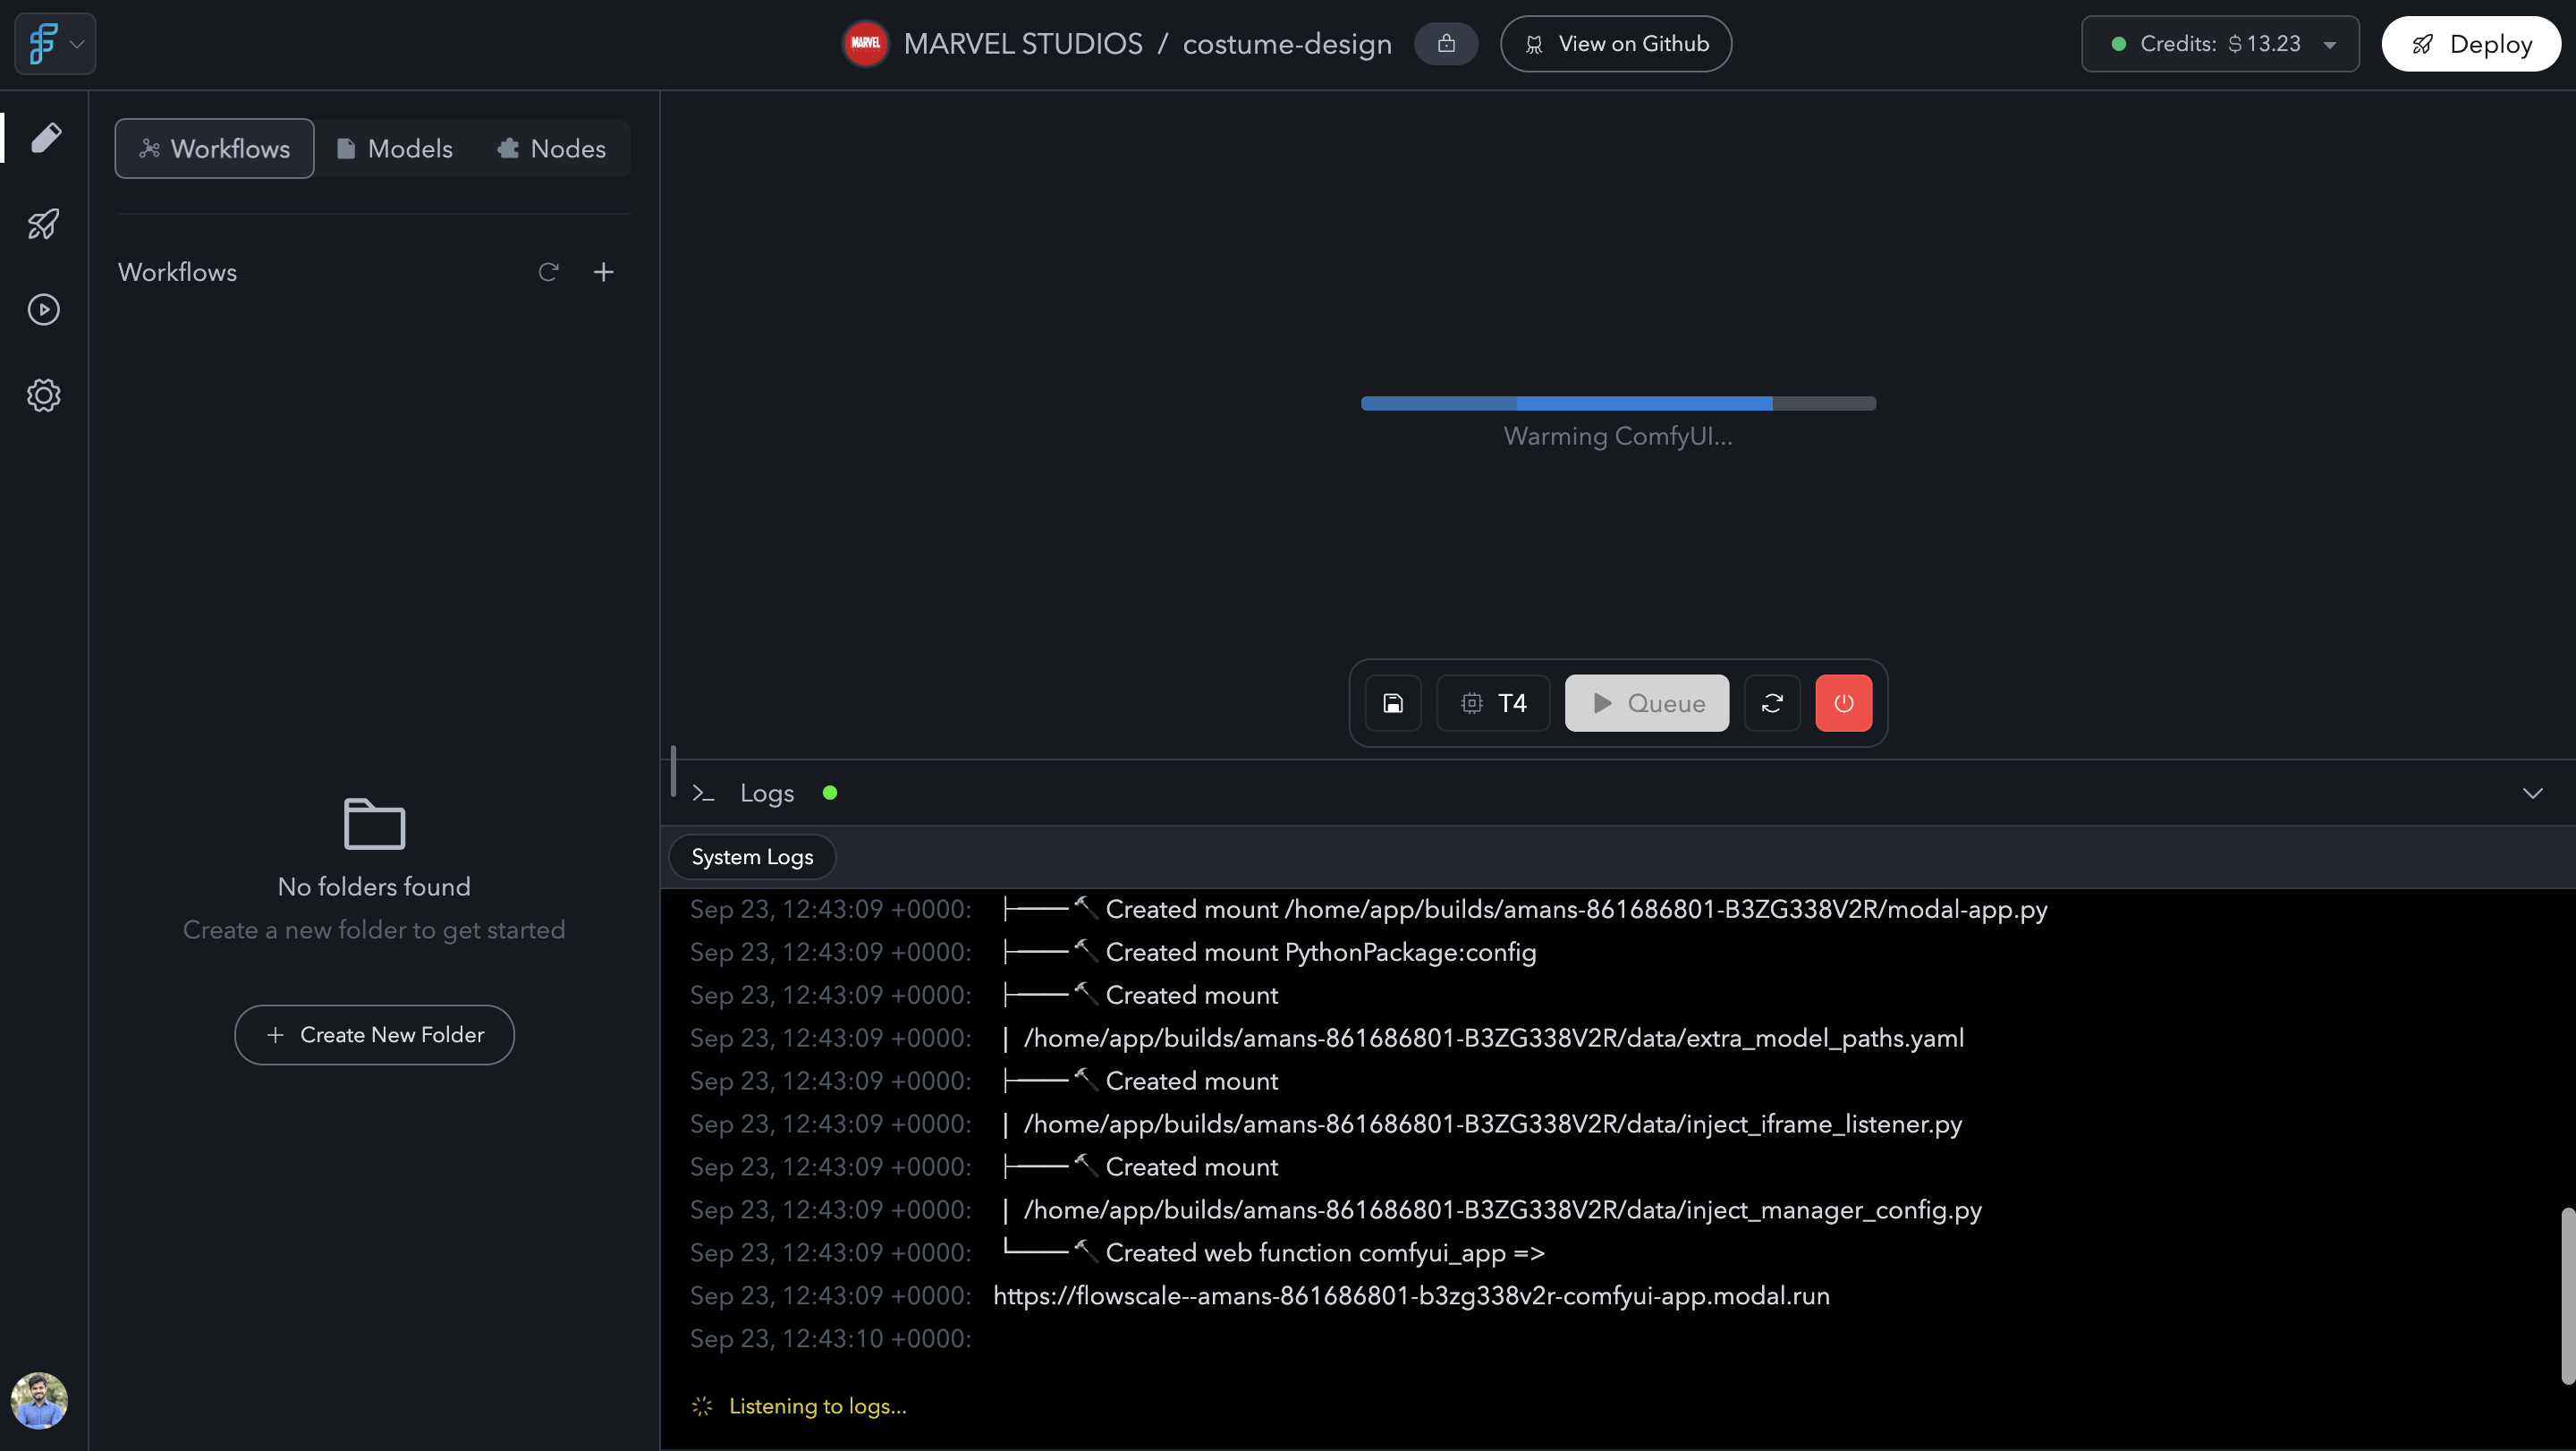
ComfyUI Starting Progress
-
After the instance is fully set up, the ComfyUI interface will appear, ready for workflow building.
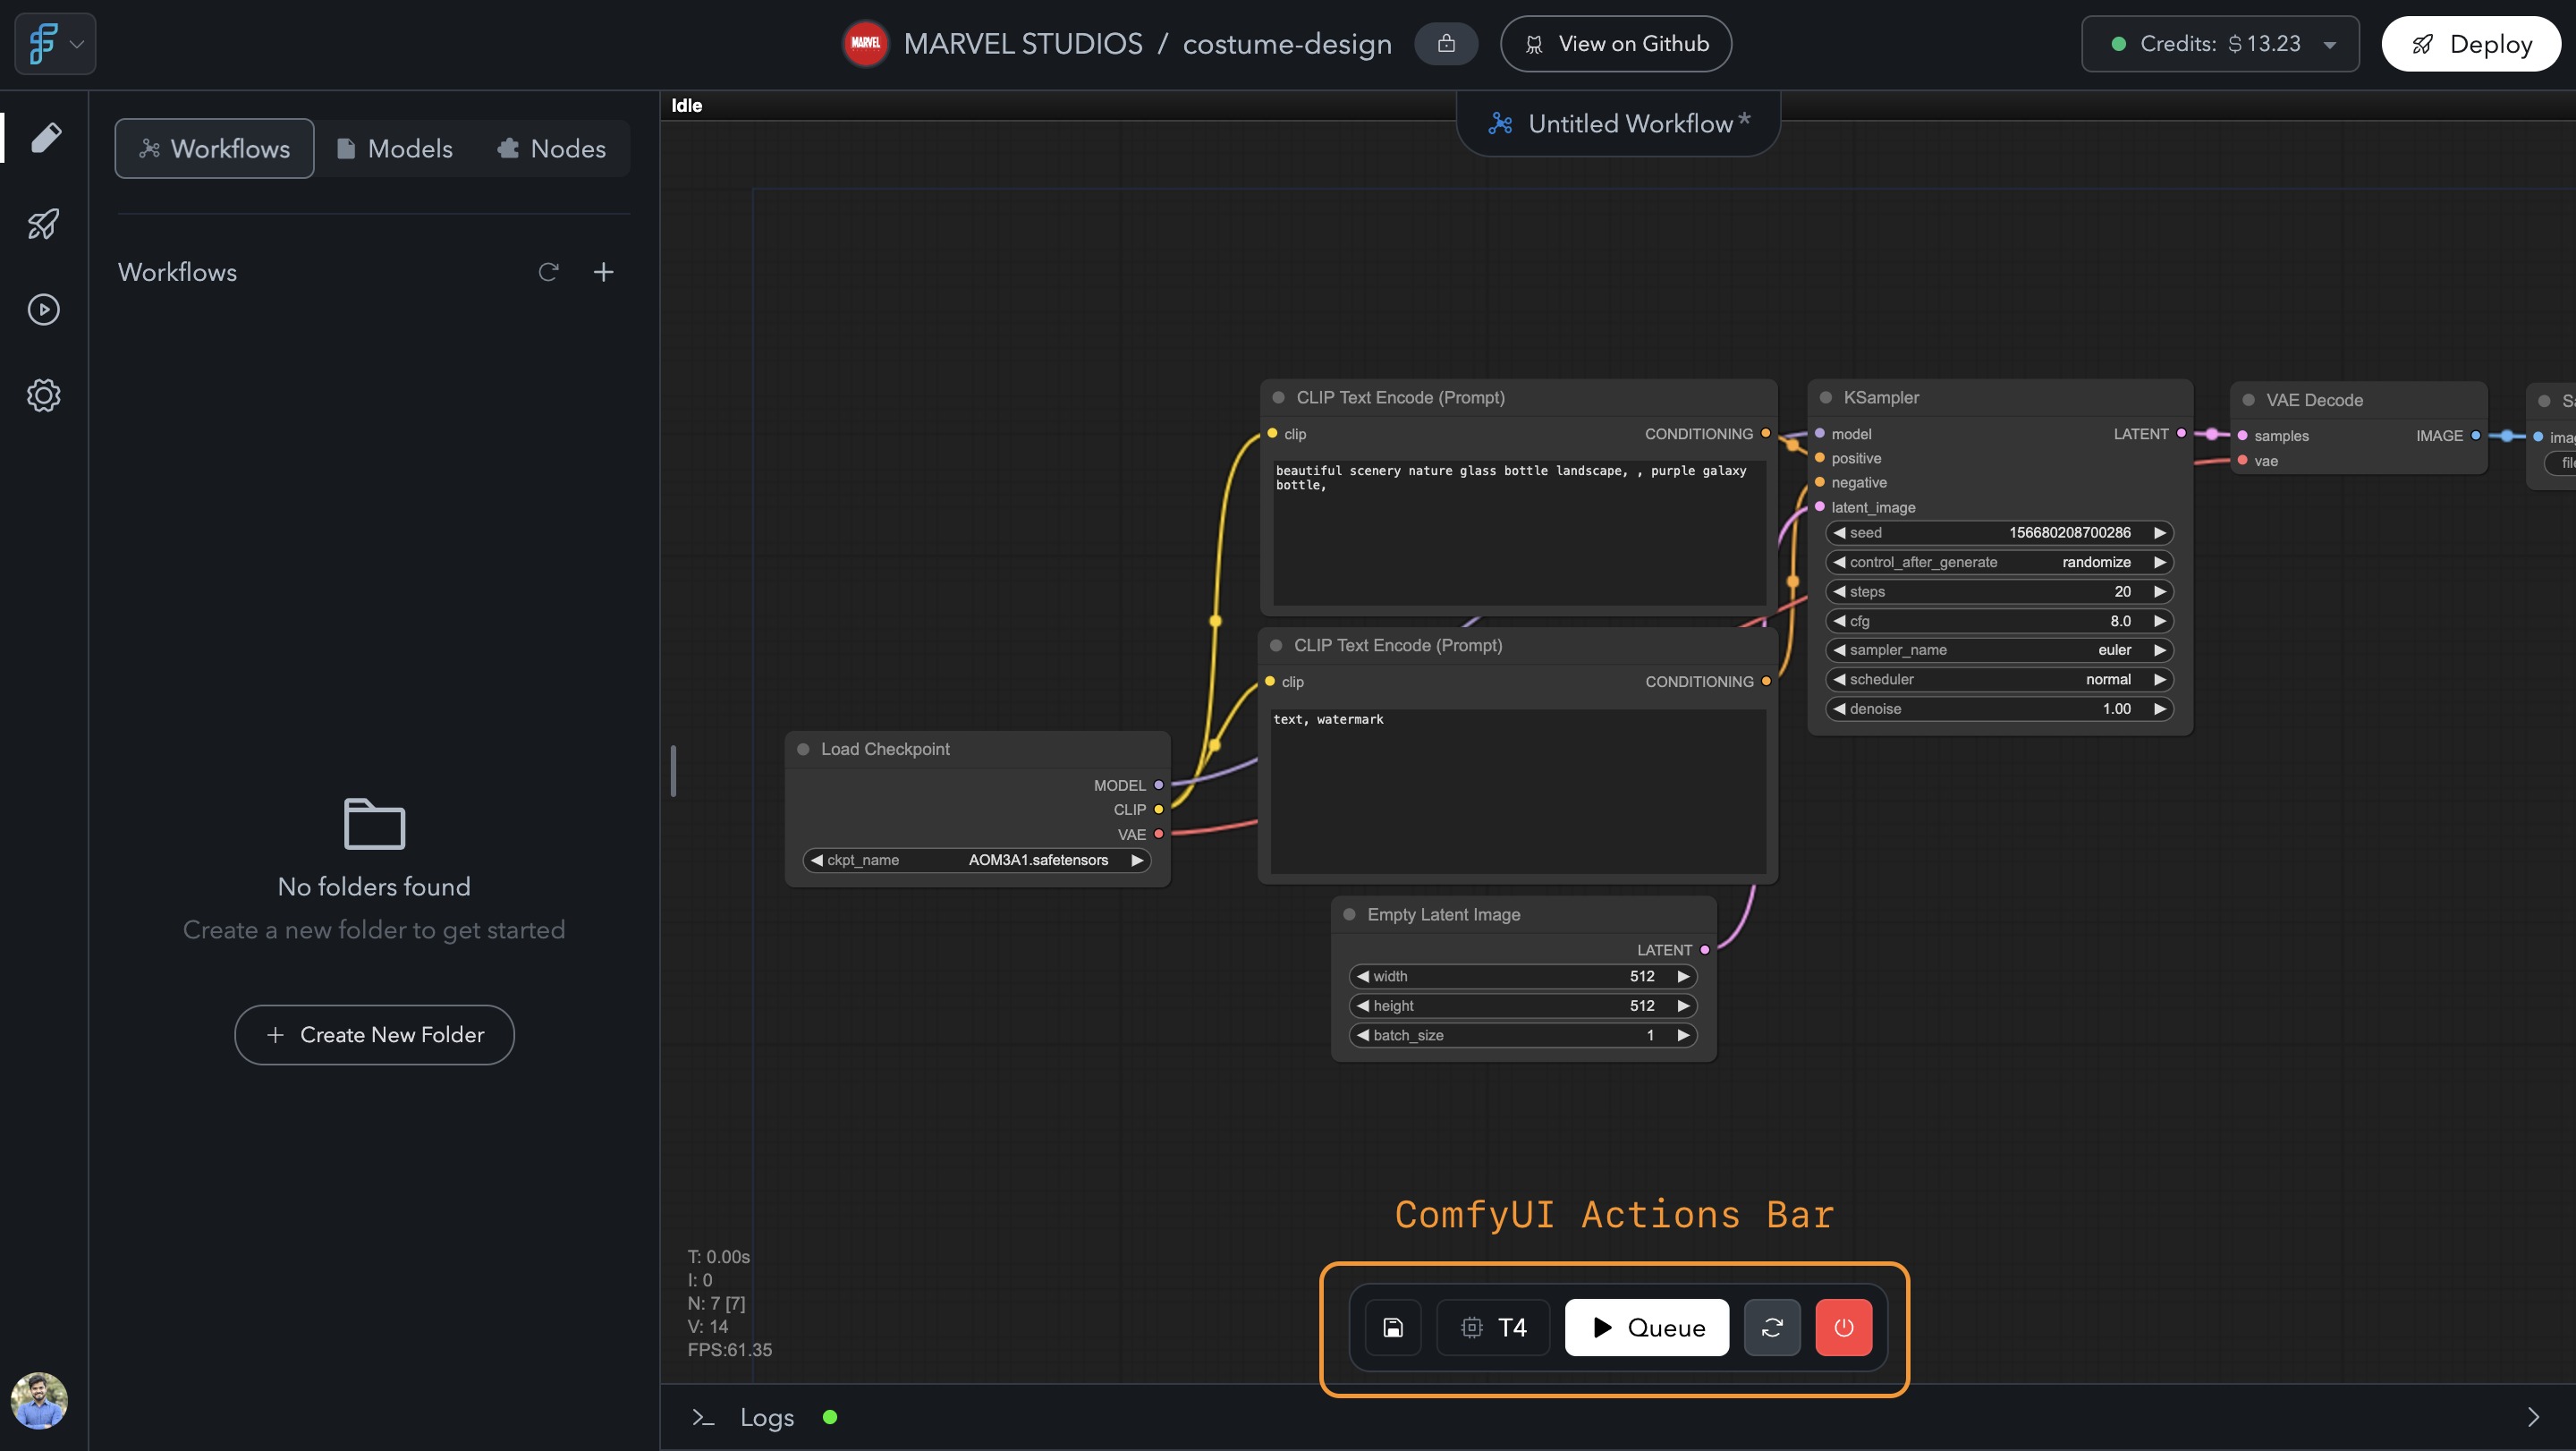
ComfyUI Interface
Running ComfyUI on Cloud GPUs
By default, ComfyUI starts on a T4 GPU, but you can change the GPU type in your project’s settings.-
Open Project Settings:
Navigate to the Project Settings tab and go to GPU Settings. -
Select GPU Type:
- You’ll see a GPU Type dropdown. By default, the T4 is selected.
- Available options include:
- T4 (default)
- L4
- A100 40 GB
- A100 80 GB
- H100
- A10G
-
Switch GPU:
Select a different GPU type, save changes, return to the editor, and click the “Stop” button to stop the current ComfyUI instance.- Click “Start ComfyUI” again to launch the new instance with the selected GPU.
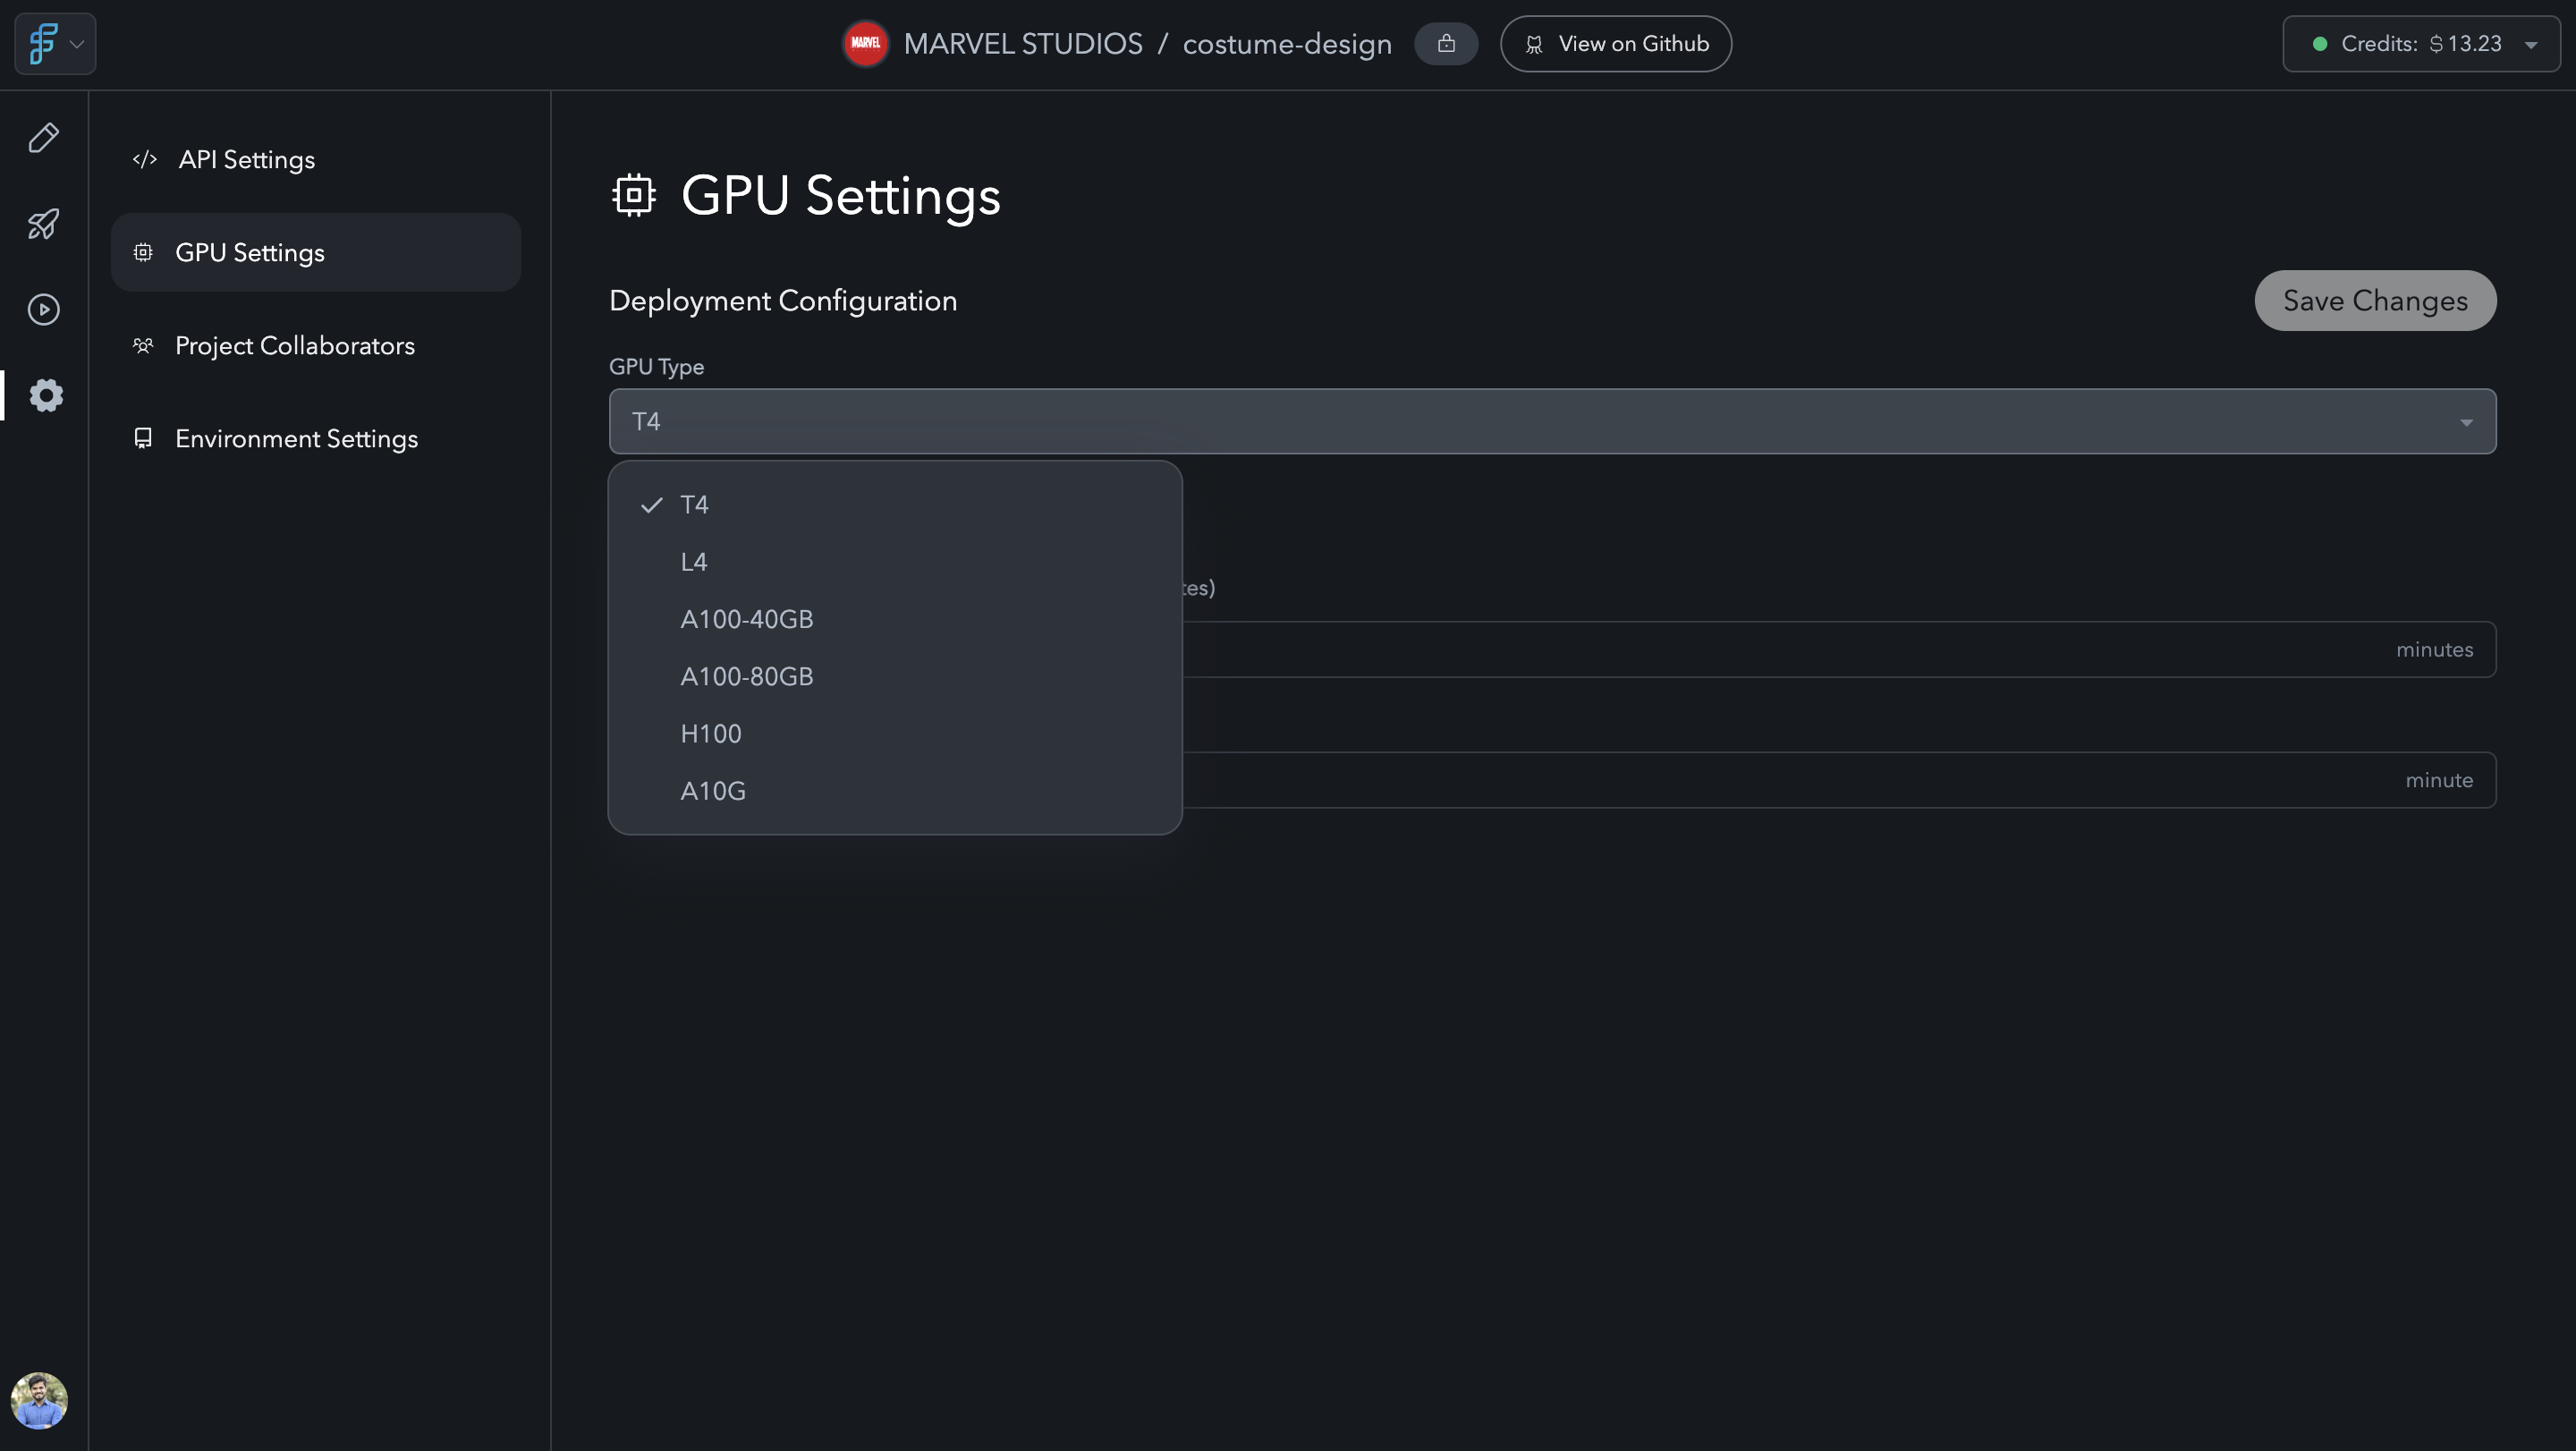
Project Settings -> GPU Settings
2. Building Workflows
FlowScale allows users to build workflows either from scratch or by importing existing workflows. This section covers both options in detail.Step-by-Step Instructions for Building a New Workflow from Scratch
-
Launch ComfyUI:
After starting ComfyUI, a default workflow is automatically loaded into the editor.- The workflow is labeled “Untitled Workflow”, and a star icon indicates that the workflow is unsaved.
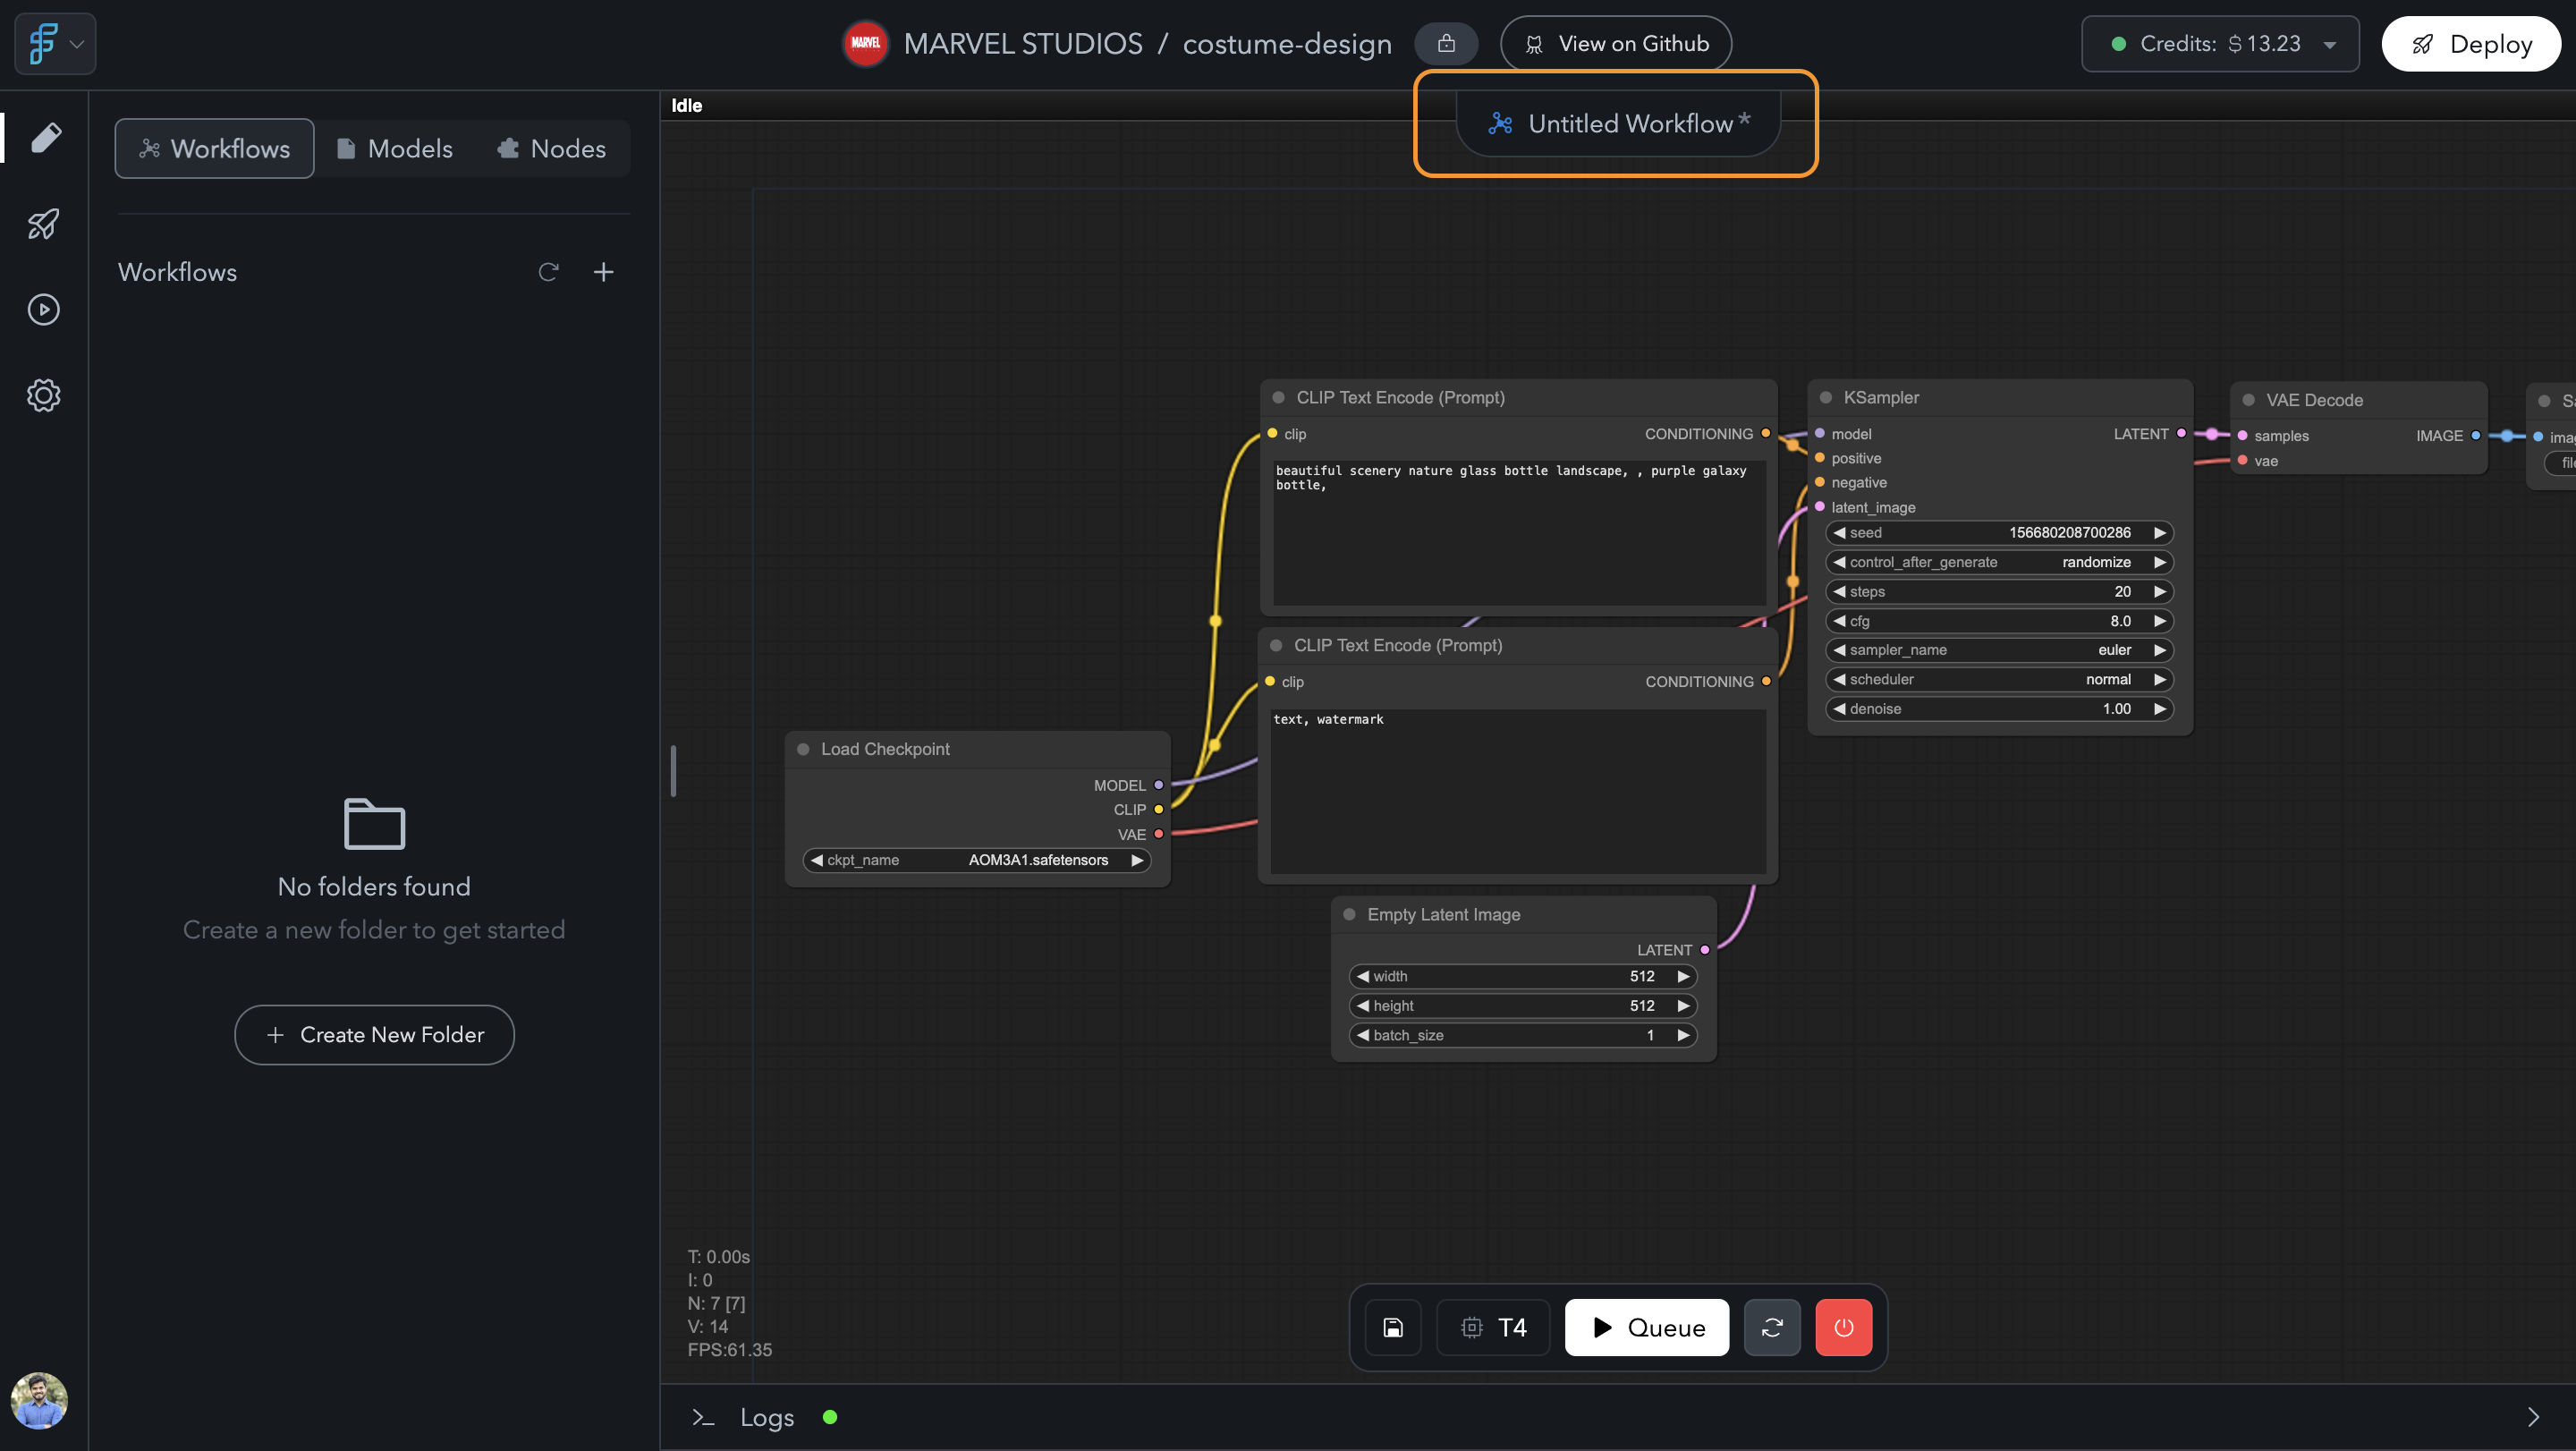
New Untitled Workflow
-
Editing the Workflow:
- Make any changes to the default workflow.
- When changes are made, the “Save Changes” button on the action bar will become active.
-
Add AI Models:
Switch to the Models tab on the left sidebar to select AI models. You can choose from FlowScale’s public models or upload private models.- To access public models, simply select Public Models from the dropdown.
- To add private models, follow the steps in the Private and Public Models section below.
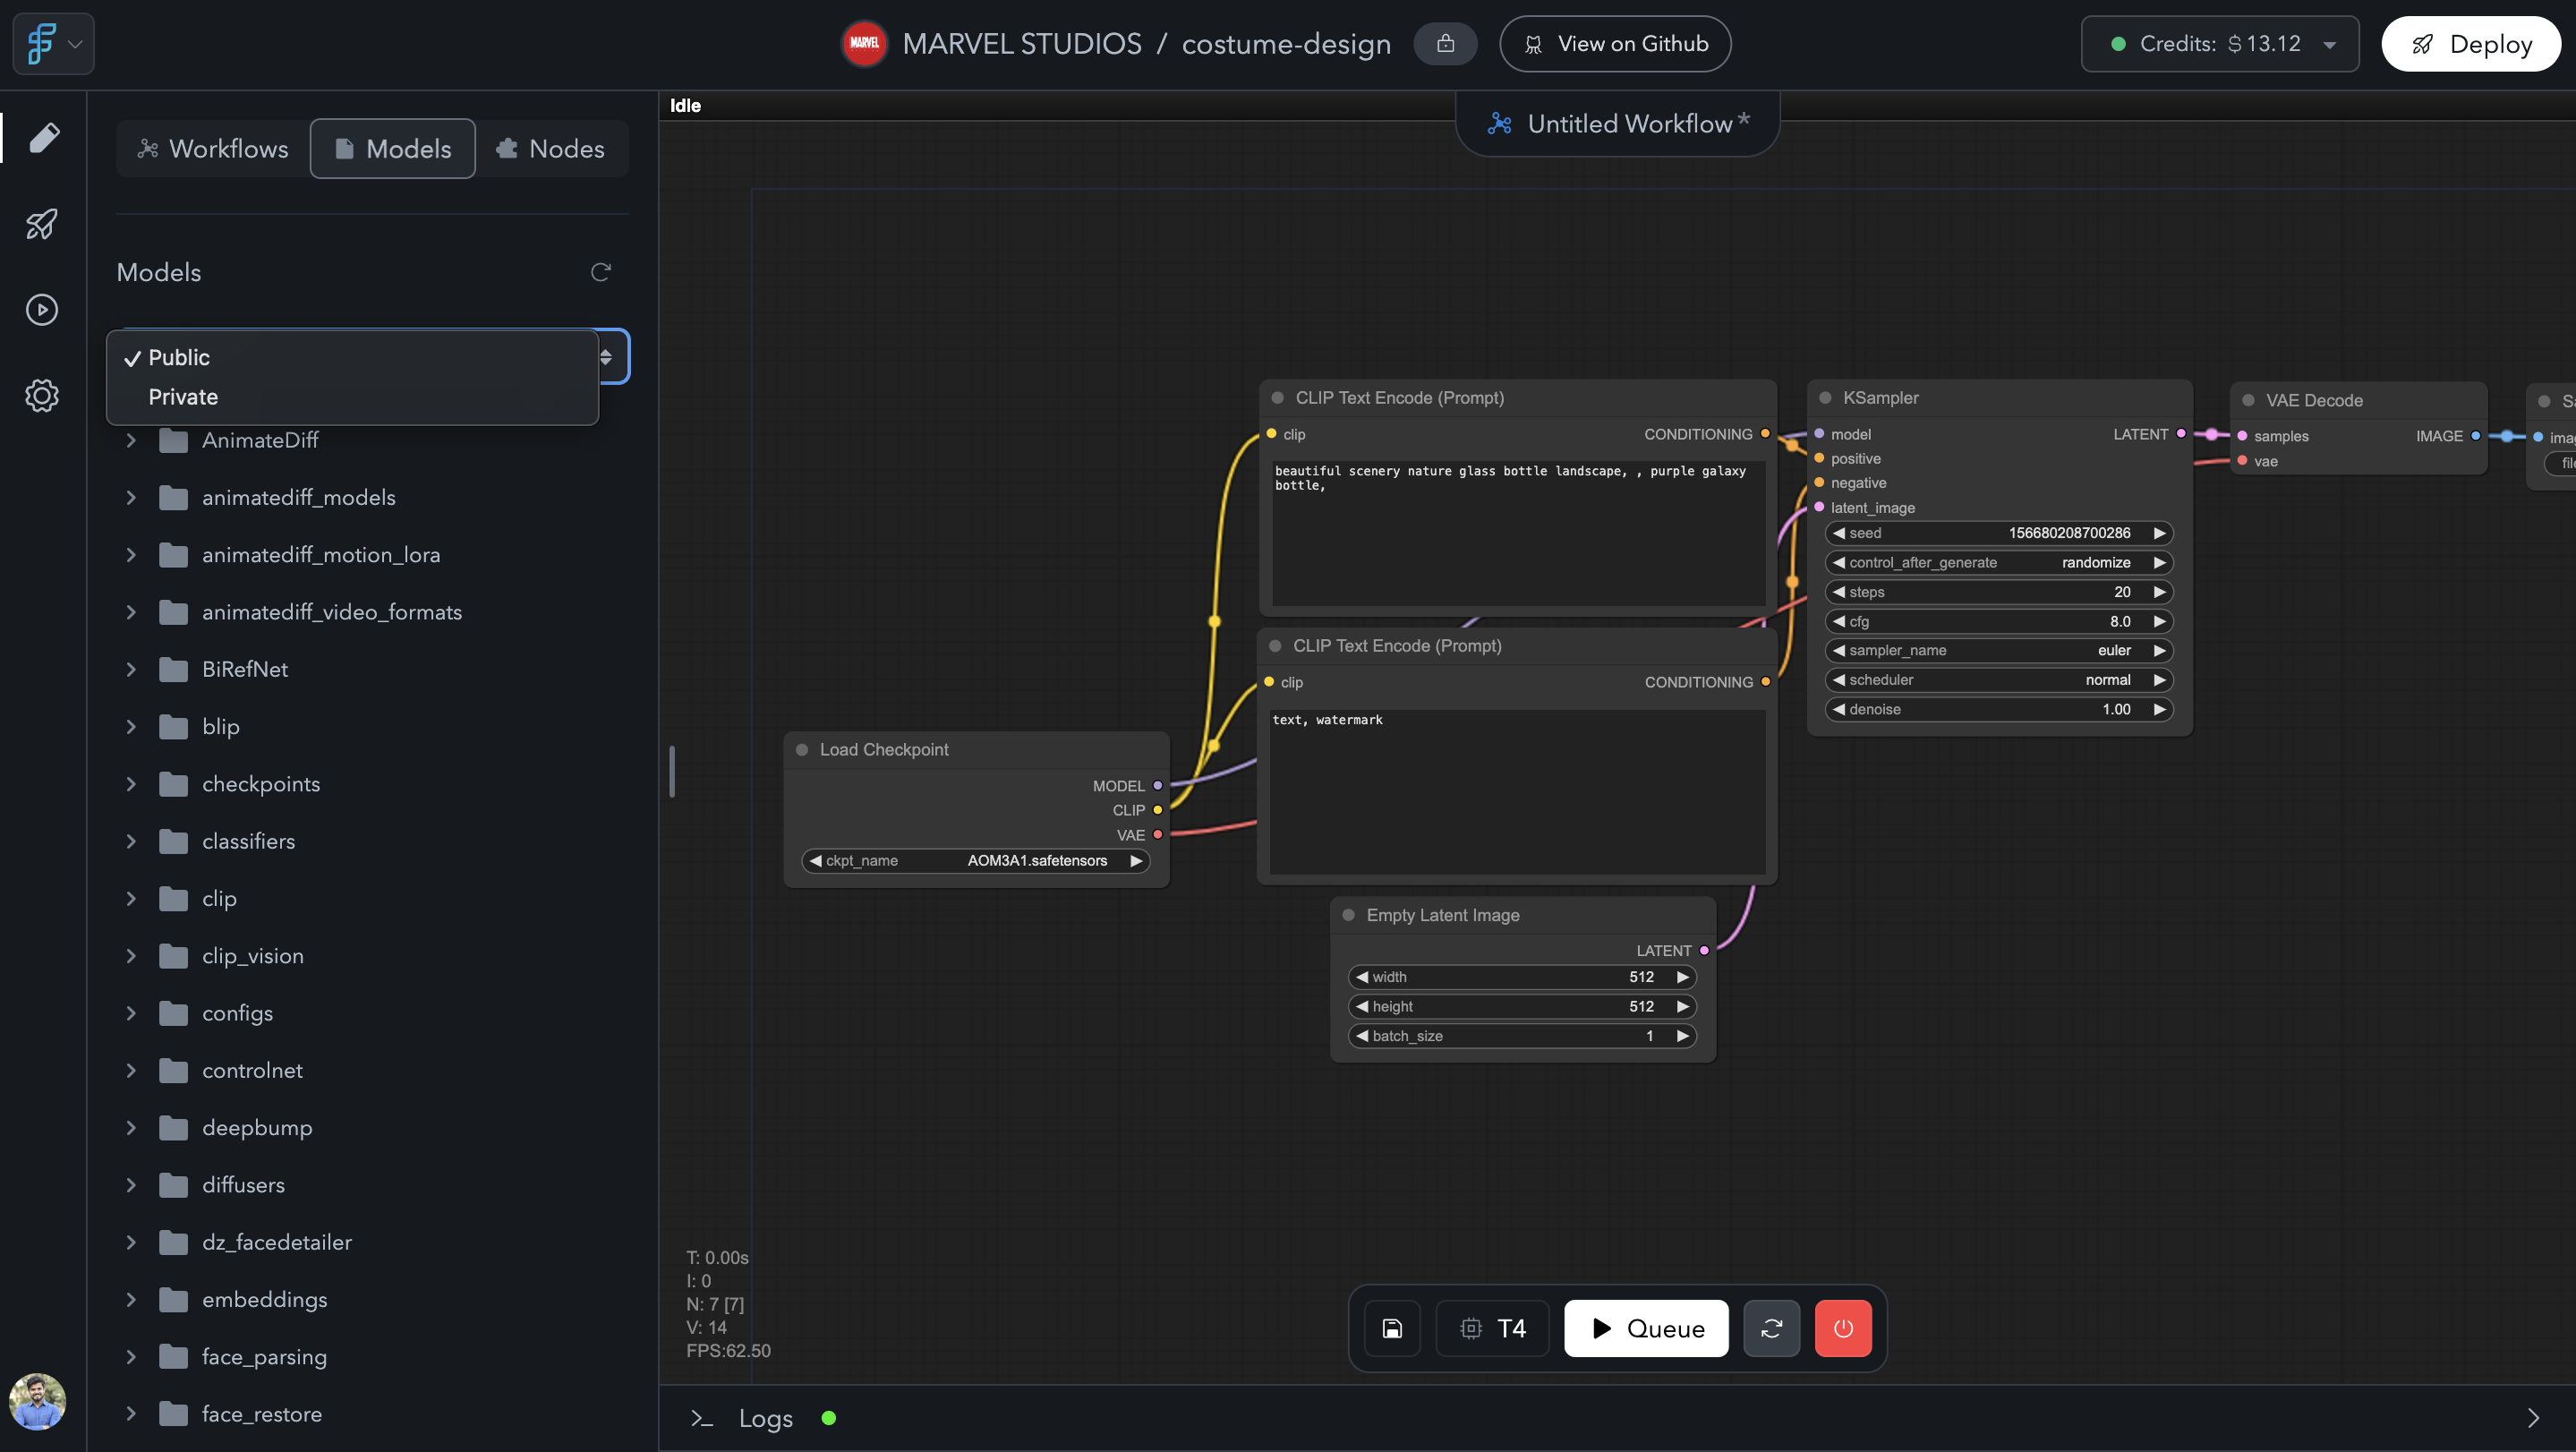
Switch from Public to Private models
-
Add Custom Nodes:
Use the Nodes tab in the sidebar to add custom nodes required for the workflow.- Click the “+” button to add new nodes.
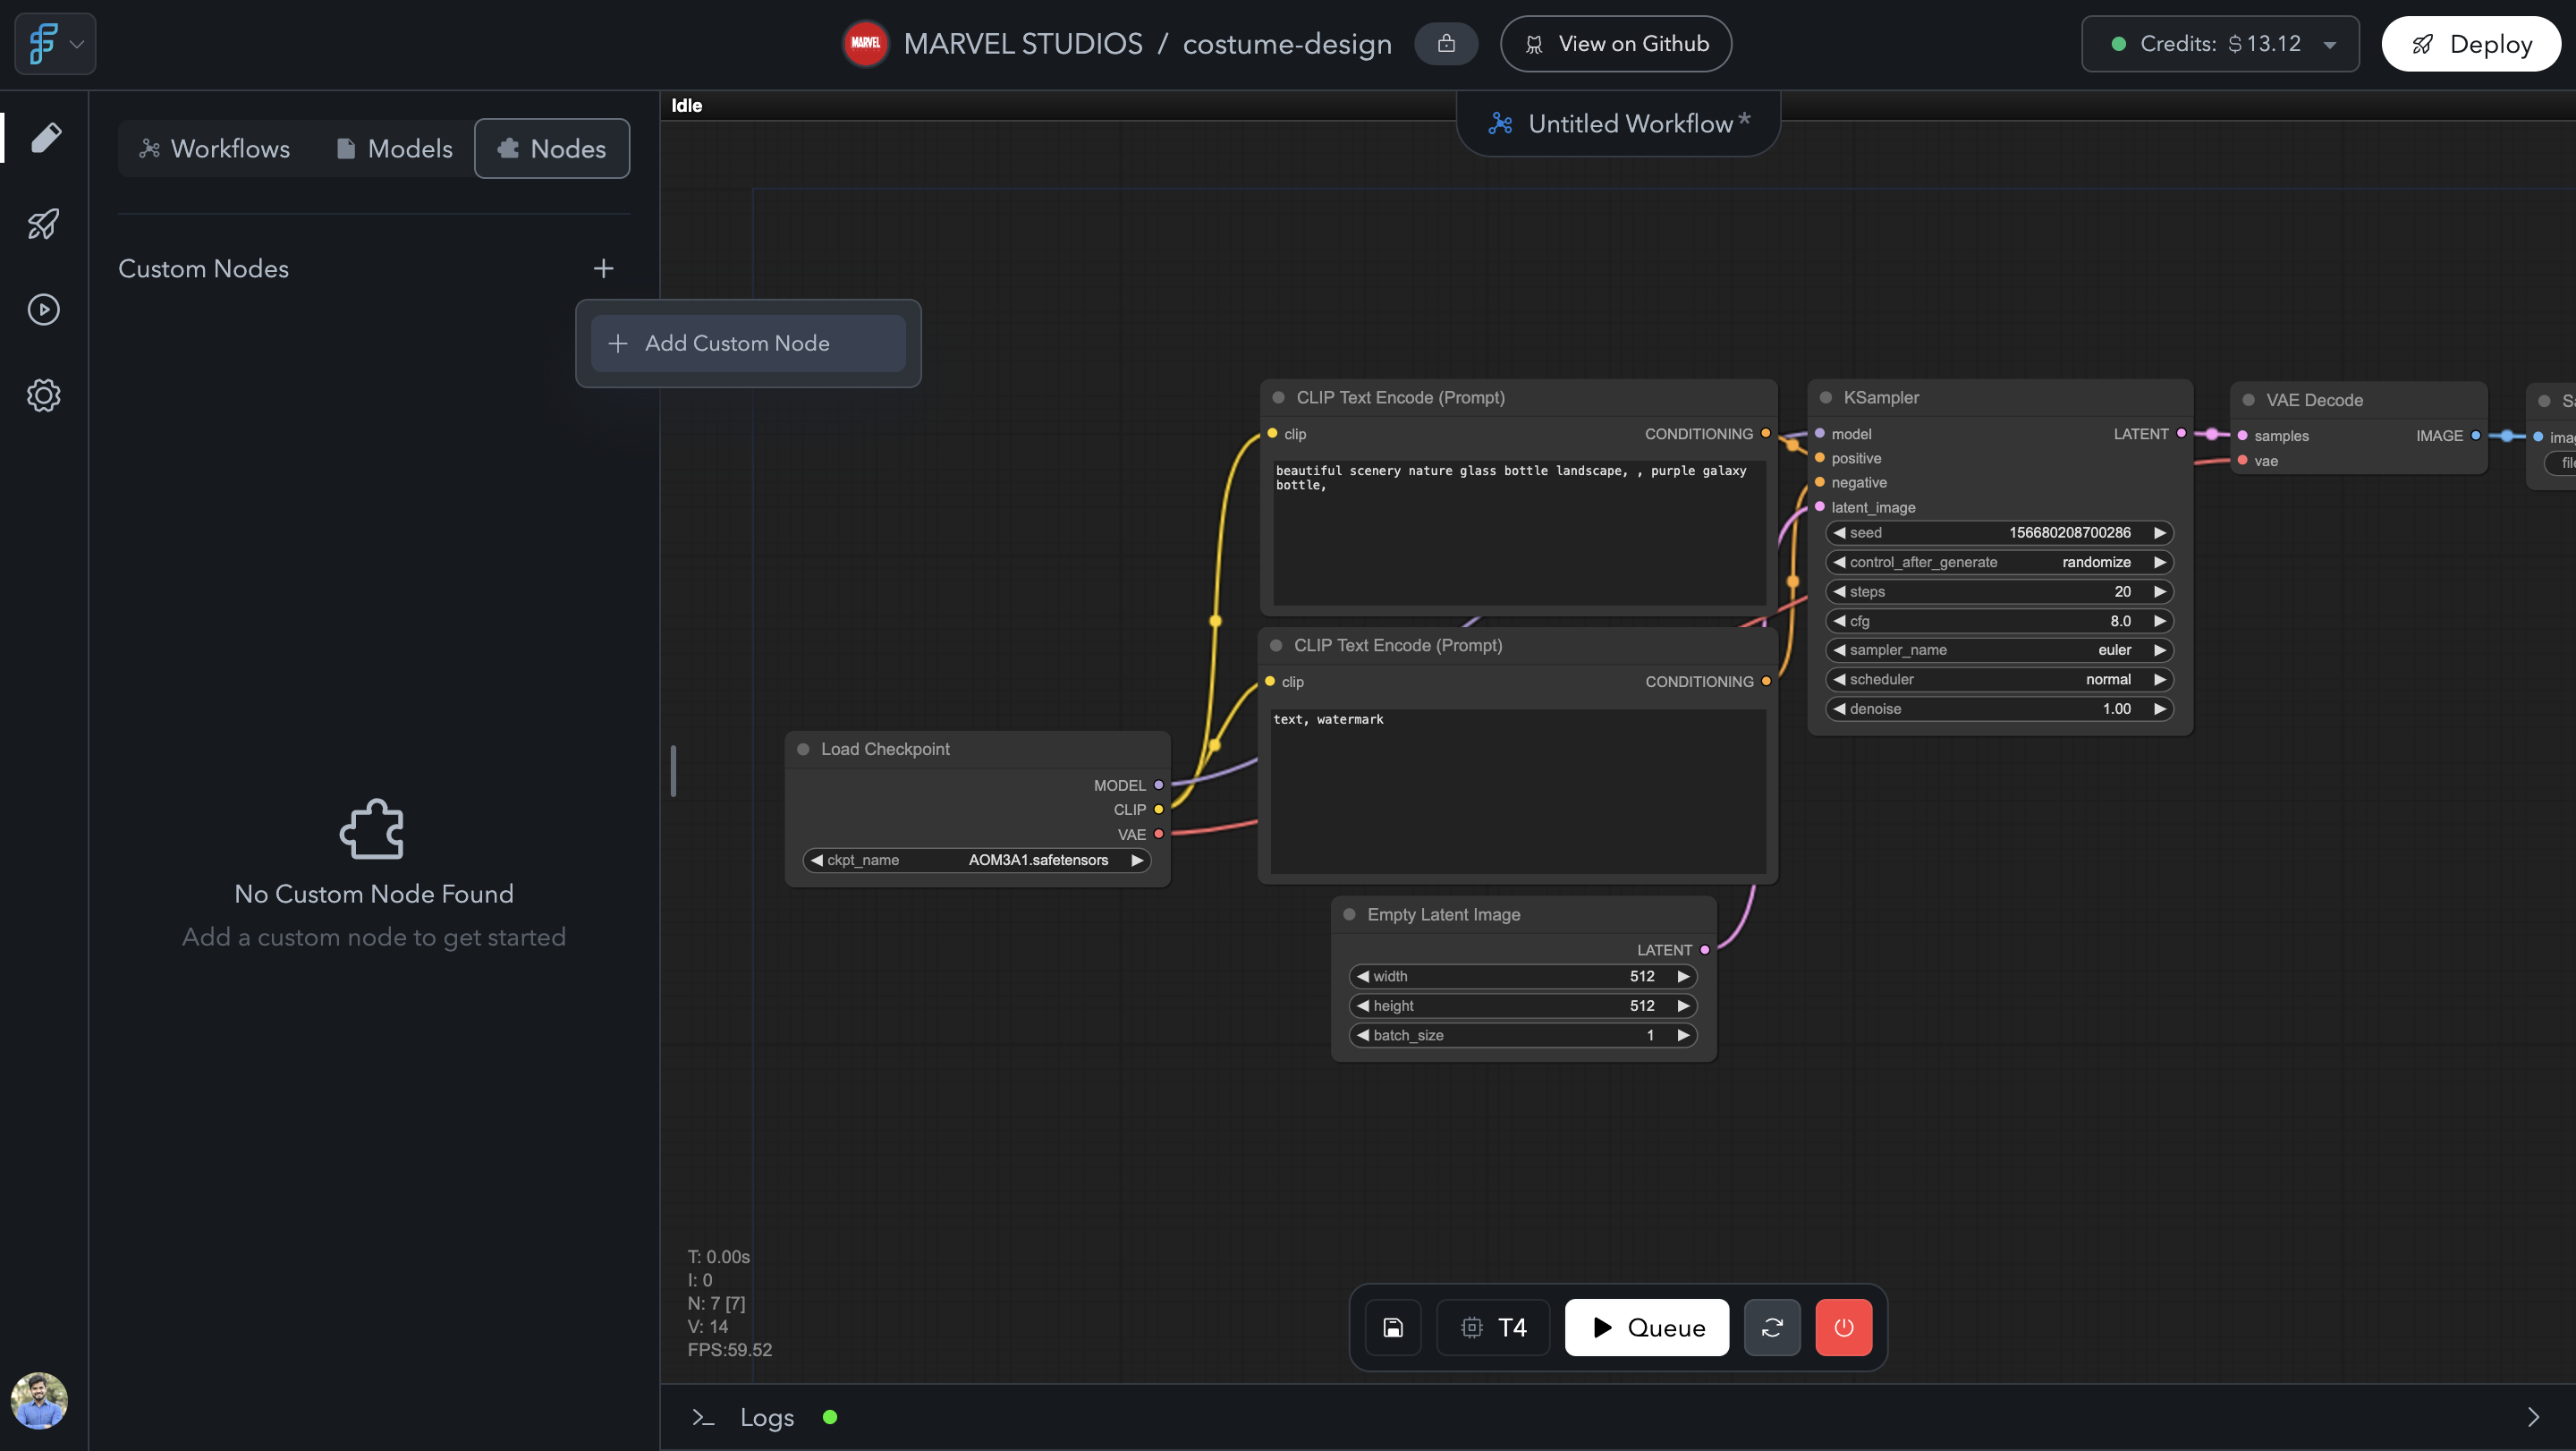
Add new node
- You can search for popular custom nodes by name, and FlowScale will automatically pull the required GitHub repository for installation. Once you select your node, click on “Save” to add it to your project.
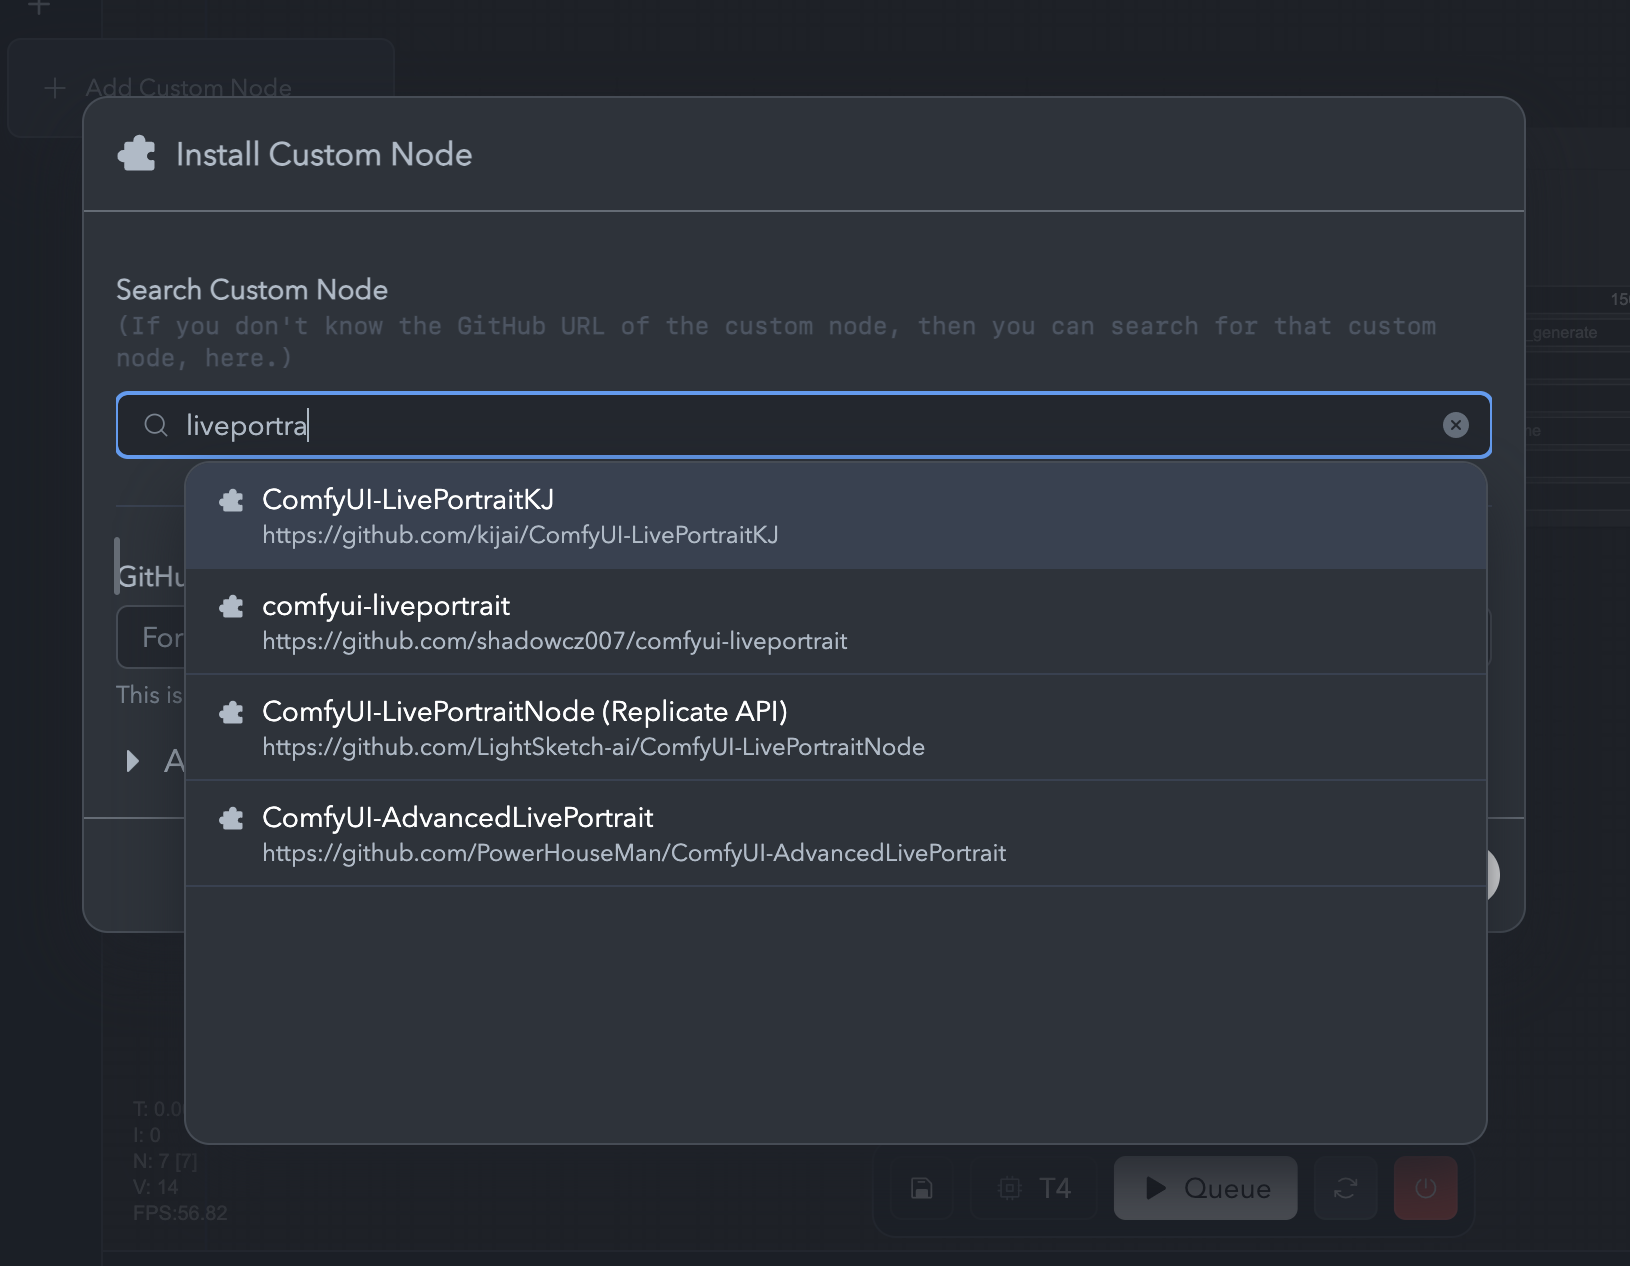
Search custom nodes to add
-
Save Your Workflow:
Once your workflow is complete, click “Save Changes” button on the action bar.A popup will appear asking for:
ComfyUI Action Bar
- Workflow Name
- Select Path (Choose or create a folder in the workflow tab to save the workflow)
- Description of the workflow
After saving, two files will be created in the selected folder: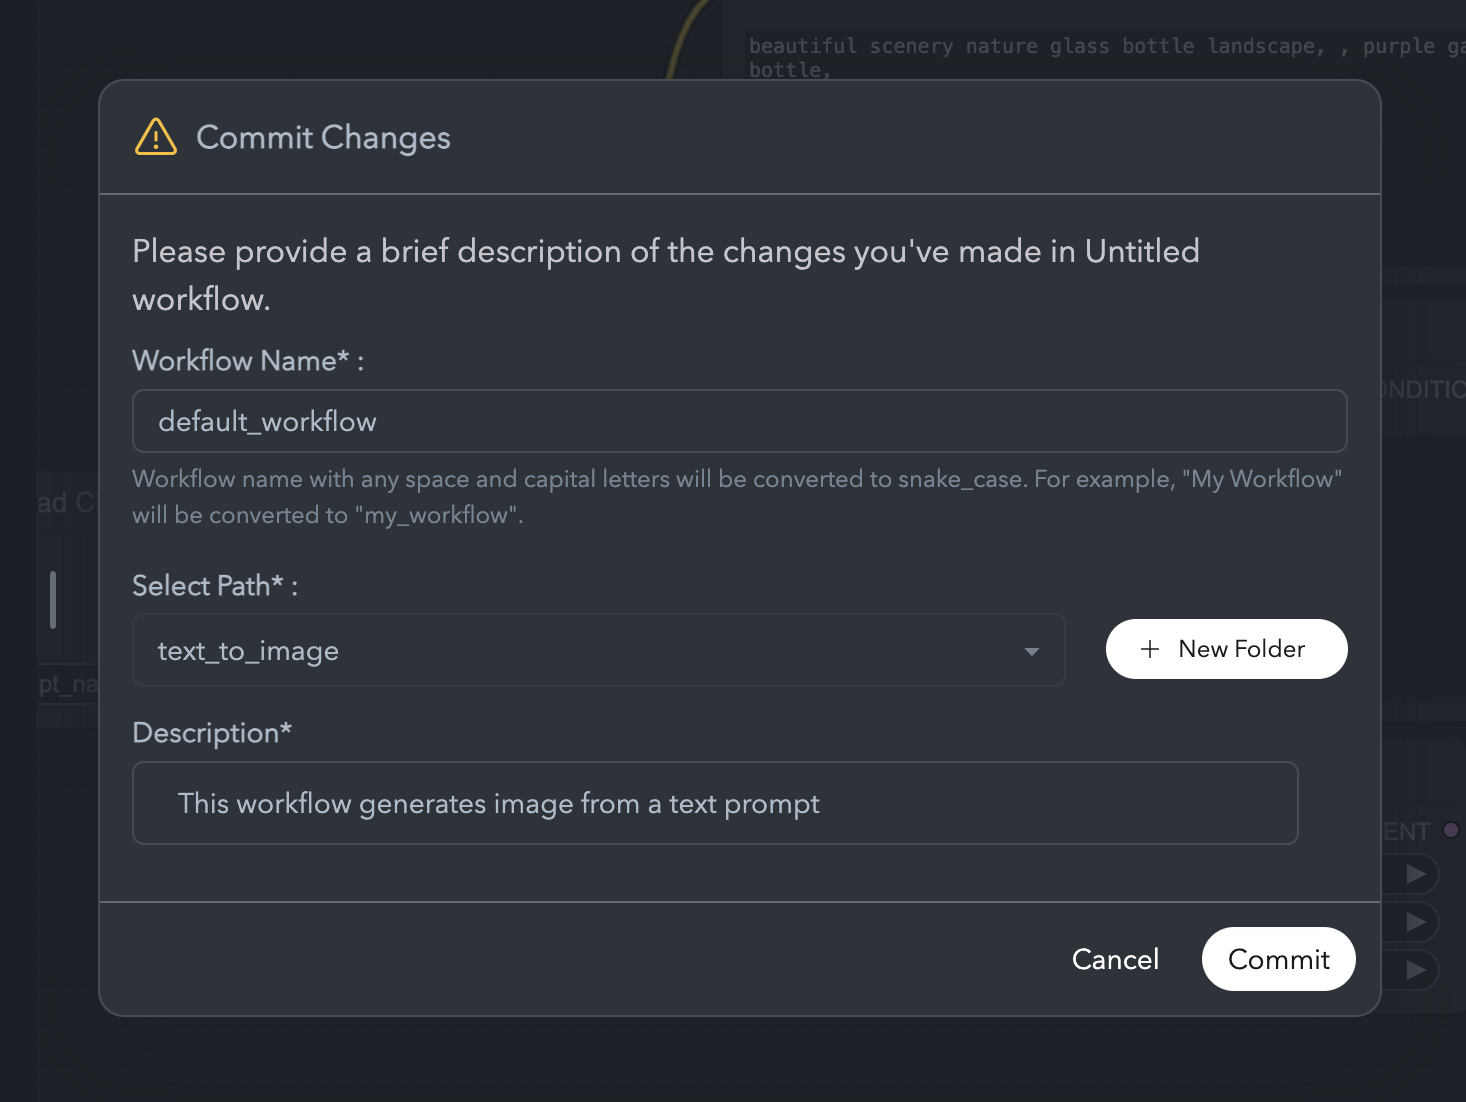
Commit Changes
- The main workflow file (for ComfyUI).
- An API JSON file, which will be used for future API & Sharable Apps deployments.
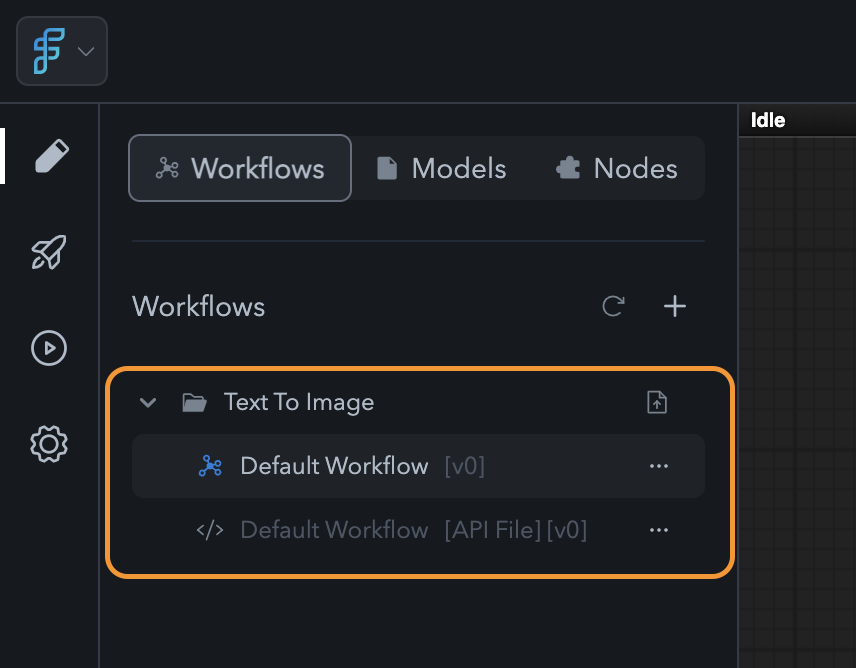
Saved Workflows
Importing Existing ComfyUI Workflows into FlowScale
-
Import a Workflow:
In the Workflows tab, click the “+” button and select “Import Workflow”.- A dialog box will open, prompting you to upload a workflow file (JSON) from your local machine.
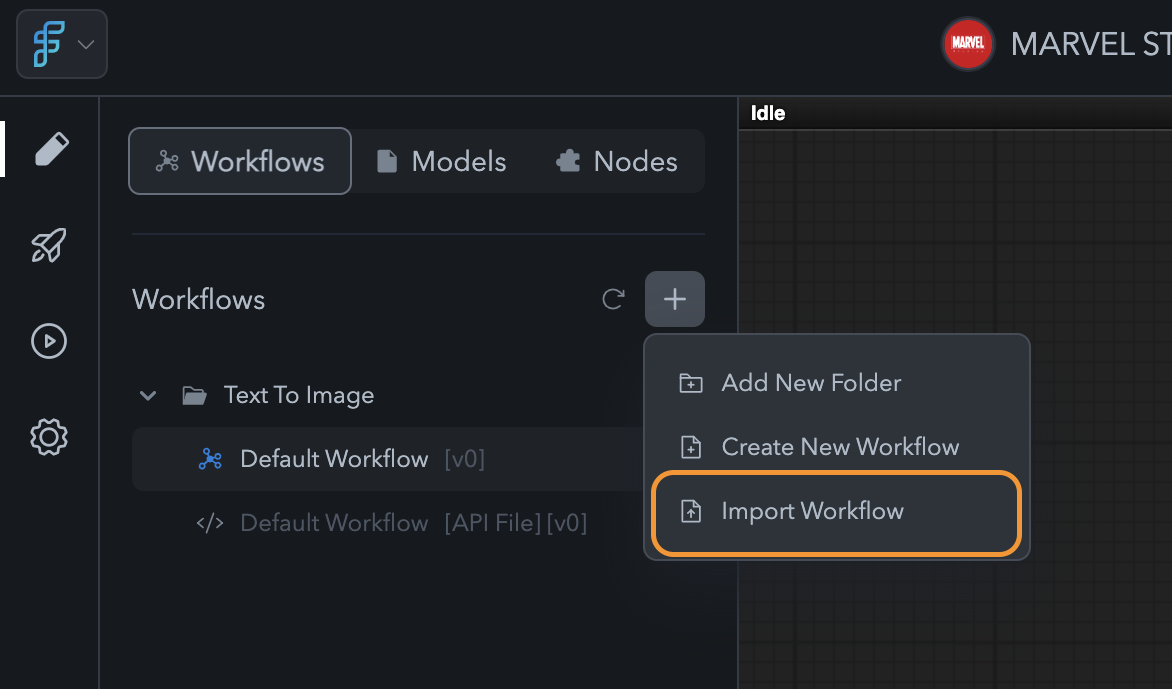
Import Workflow Button
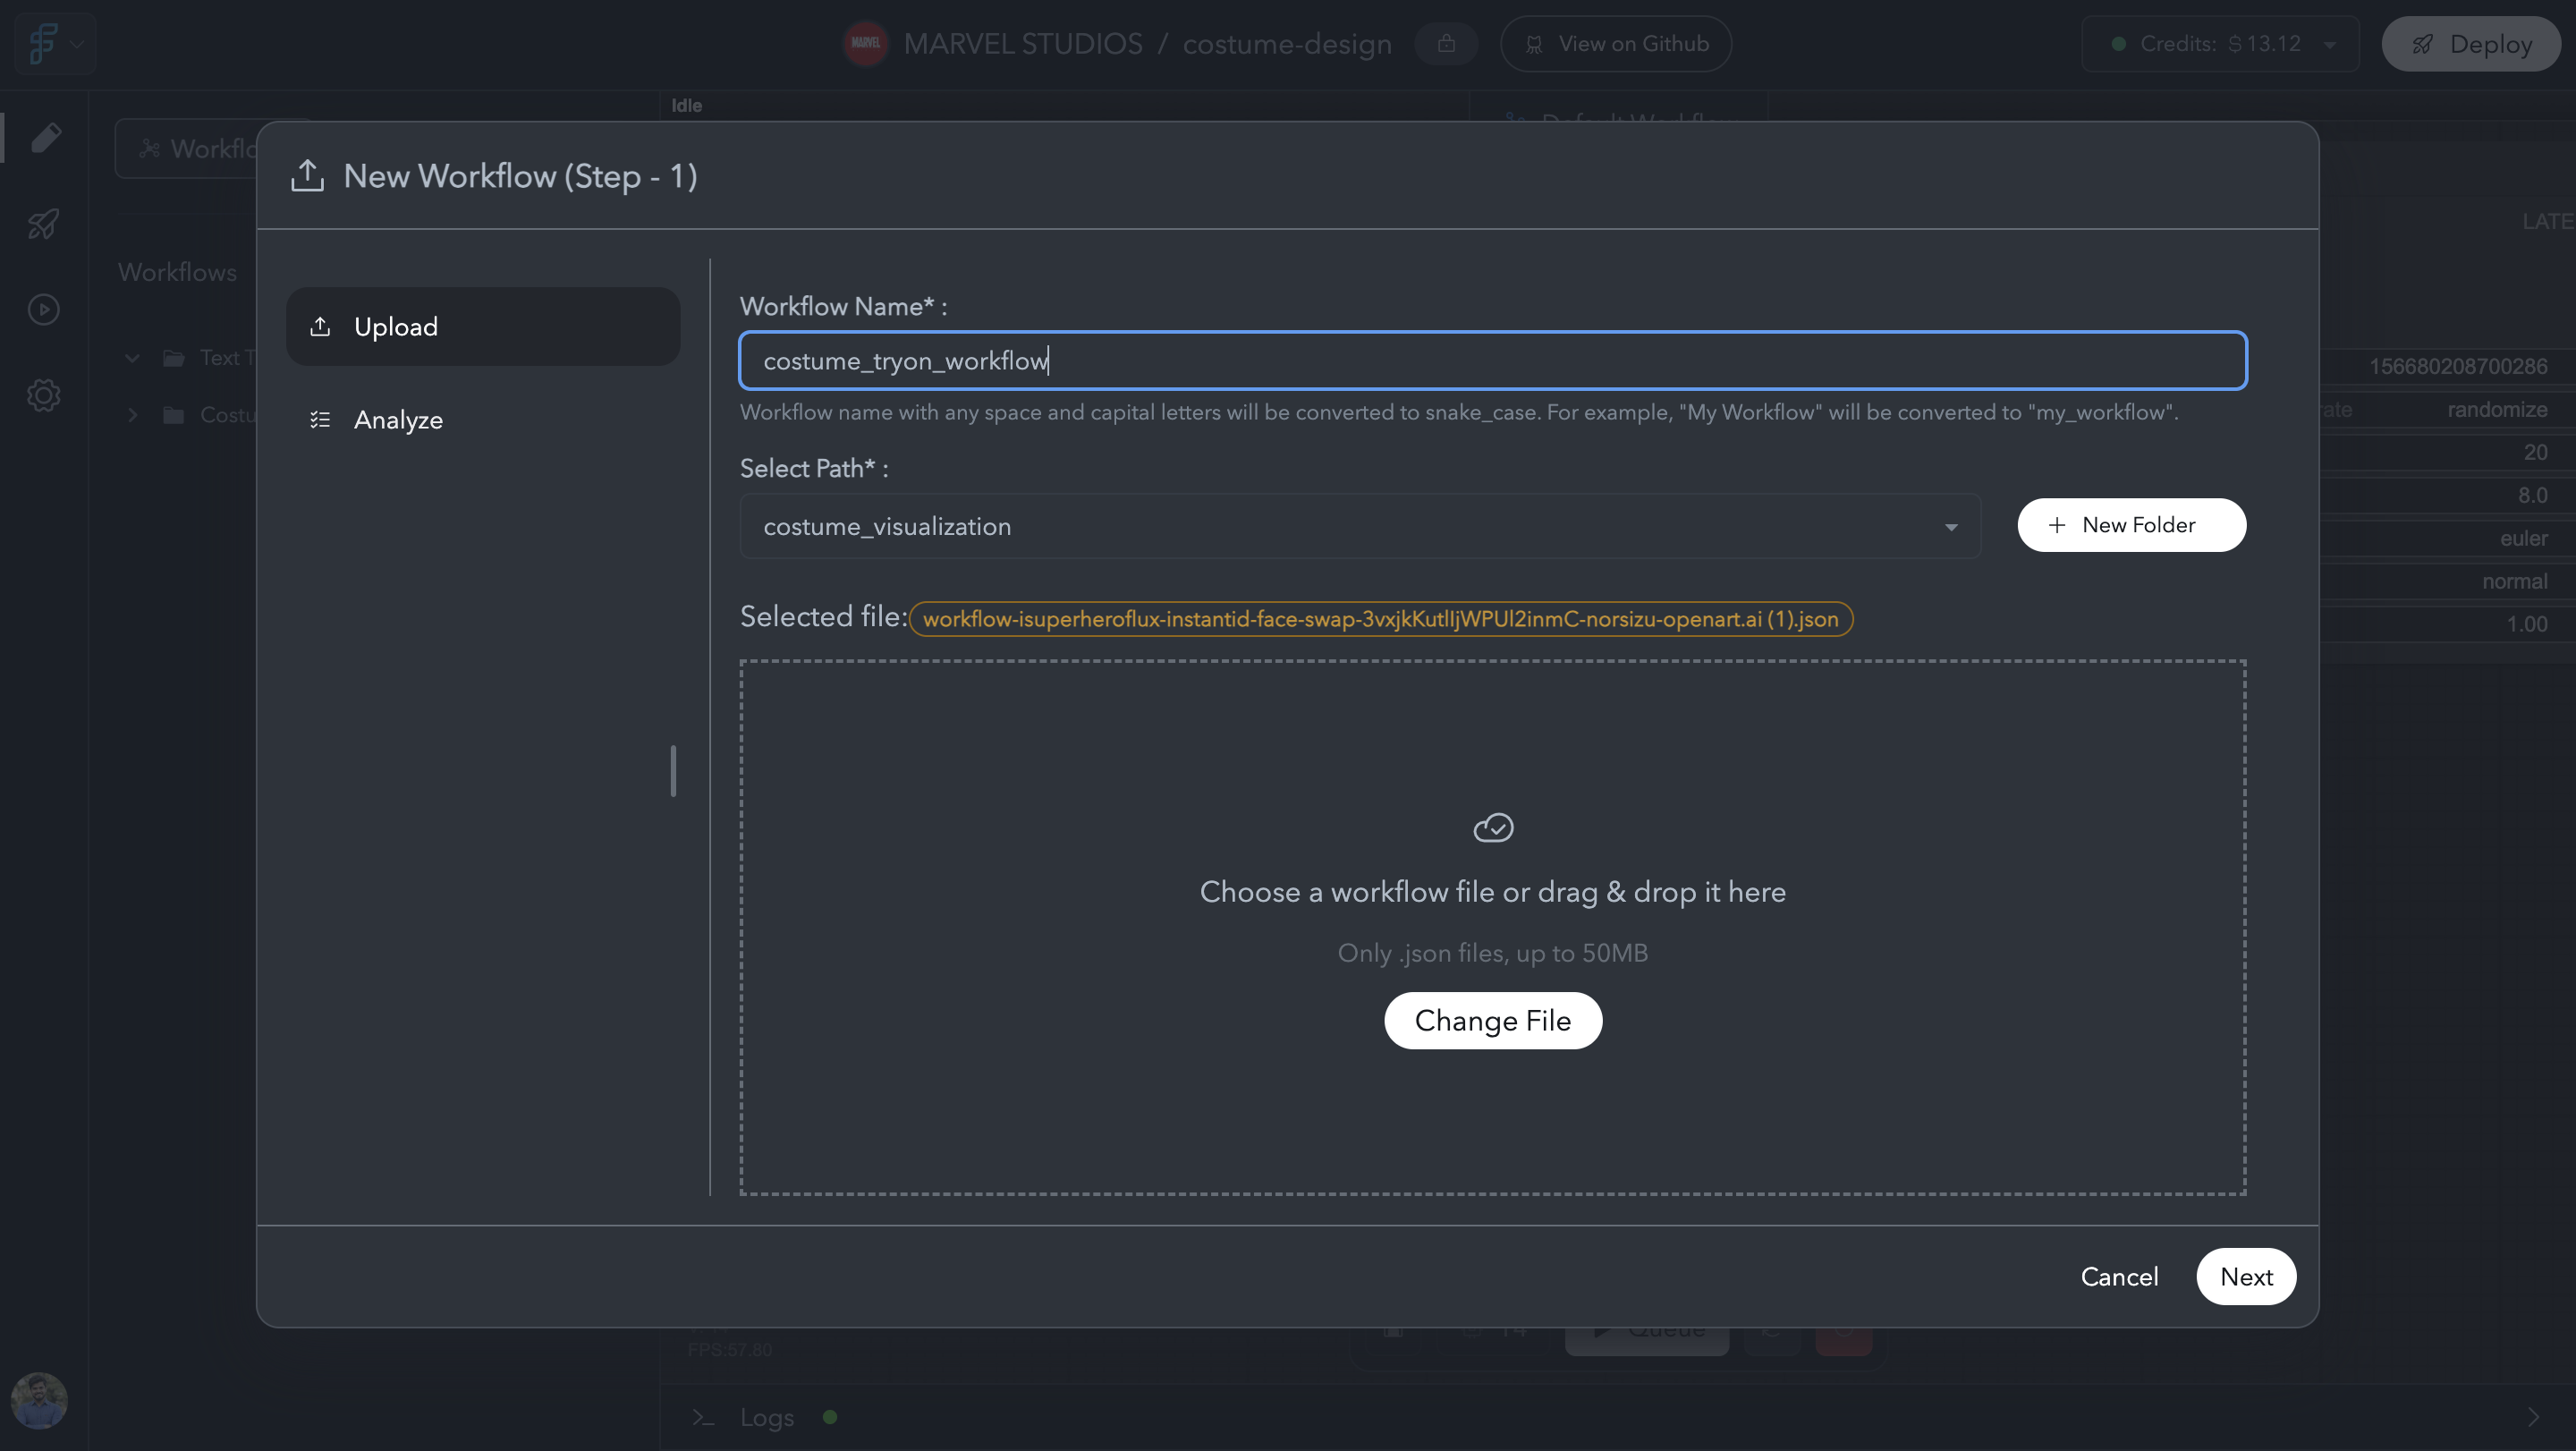
Import Workflow
-
Analyze and Add Nodes to Project:
After uploading the workflow, FlowScale will automatically analyze it. This process identifies:- Custom nodes that need to be added to the project.
- Conflicting nodes (if there are duplicate or overlapping nodes).
This will add the nodes to your project. After this, you will have to install the nodes to ensure they are fully functional in ComfyUI.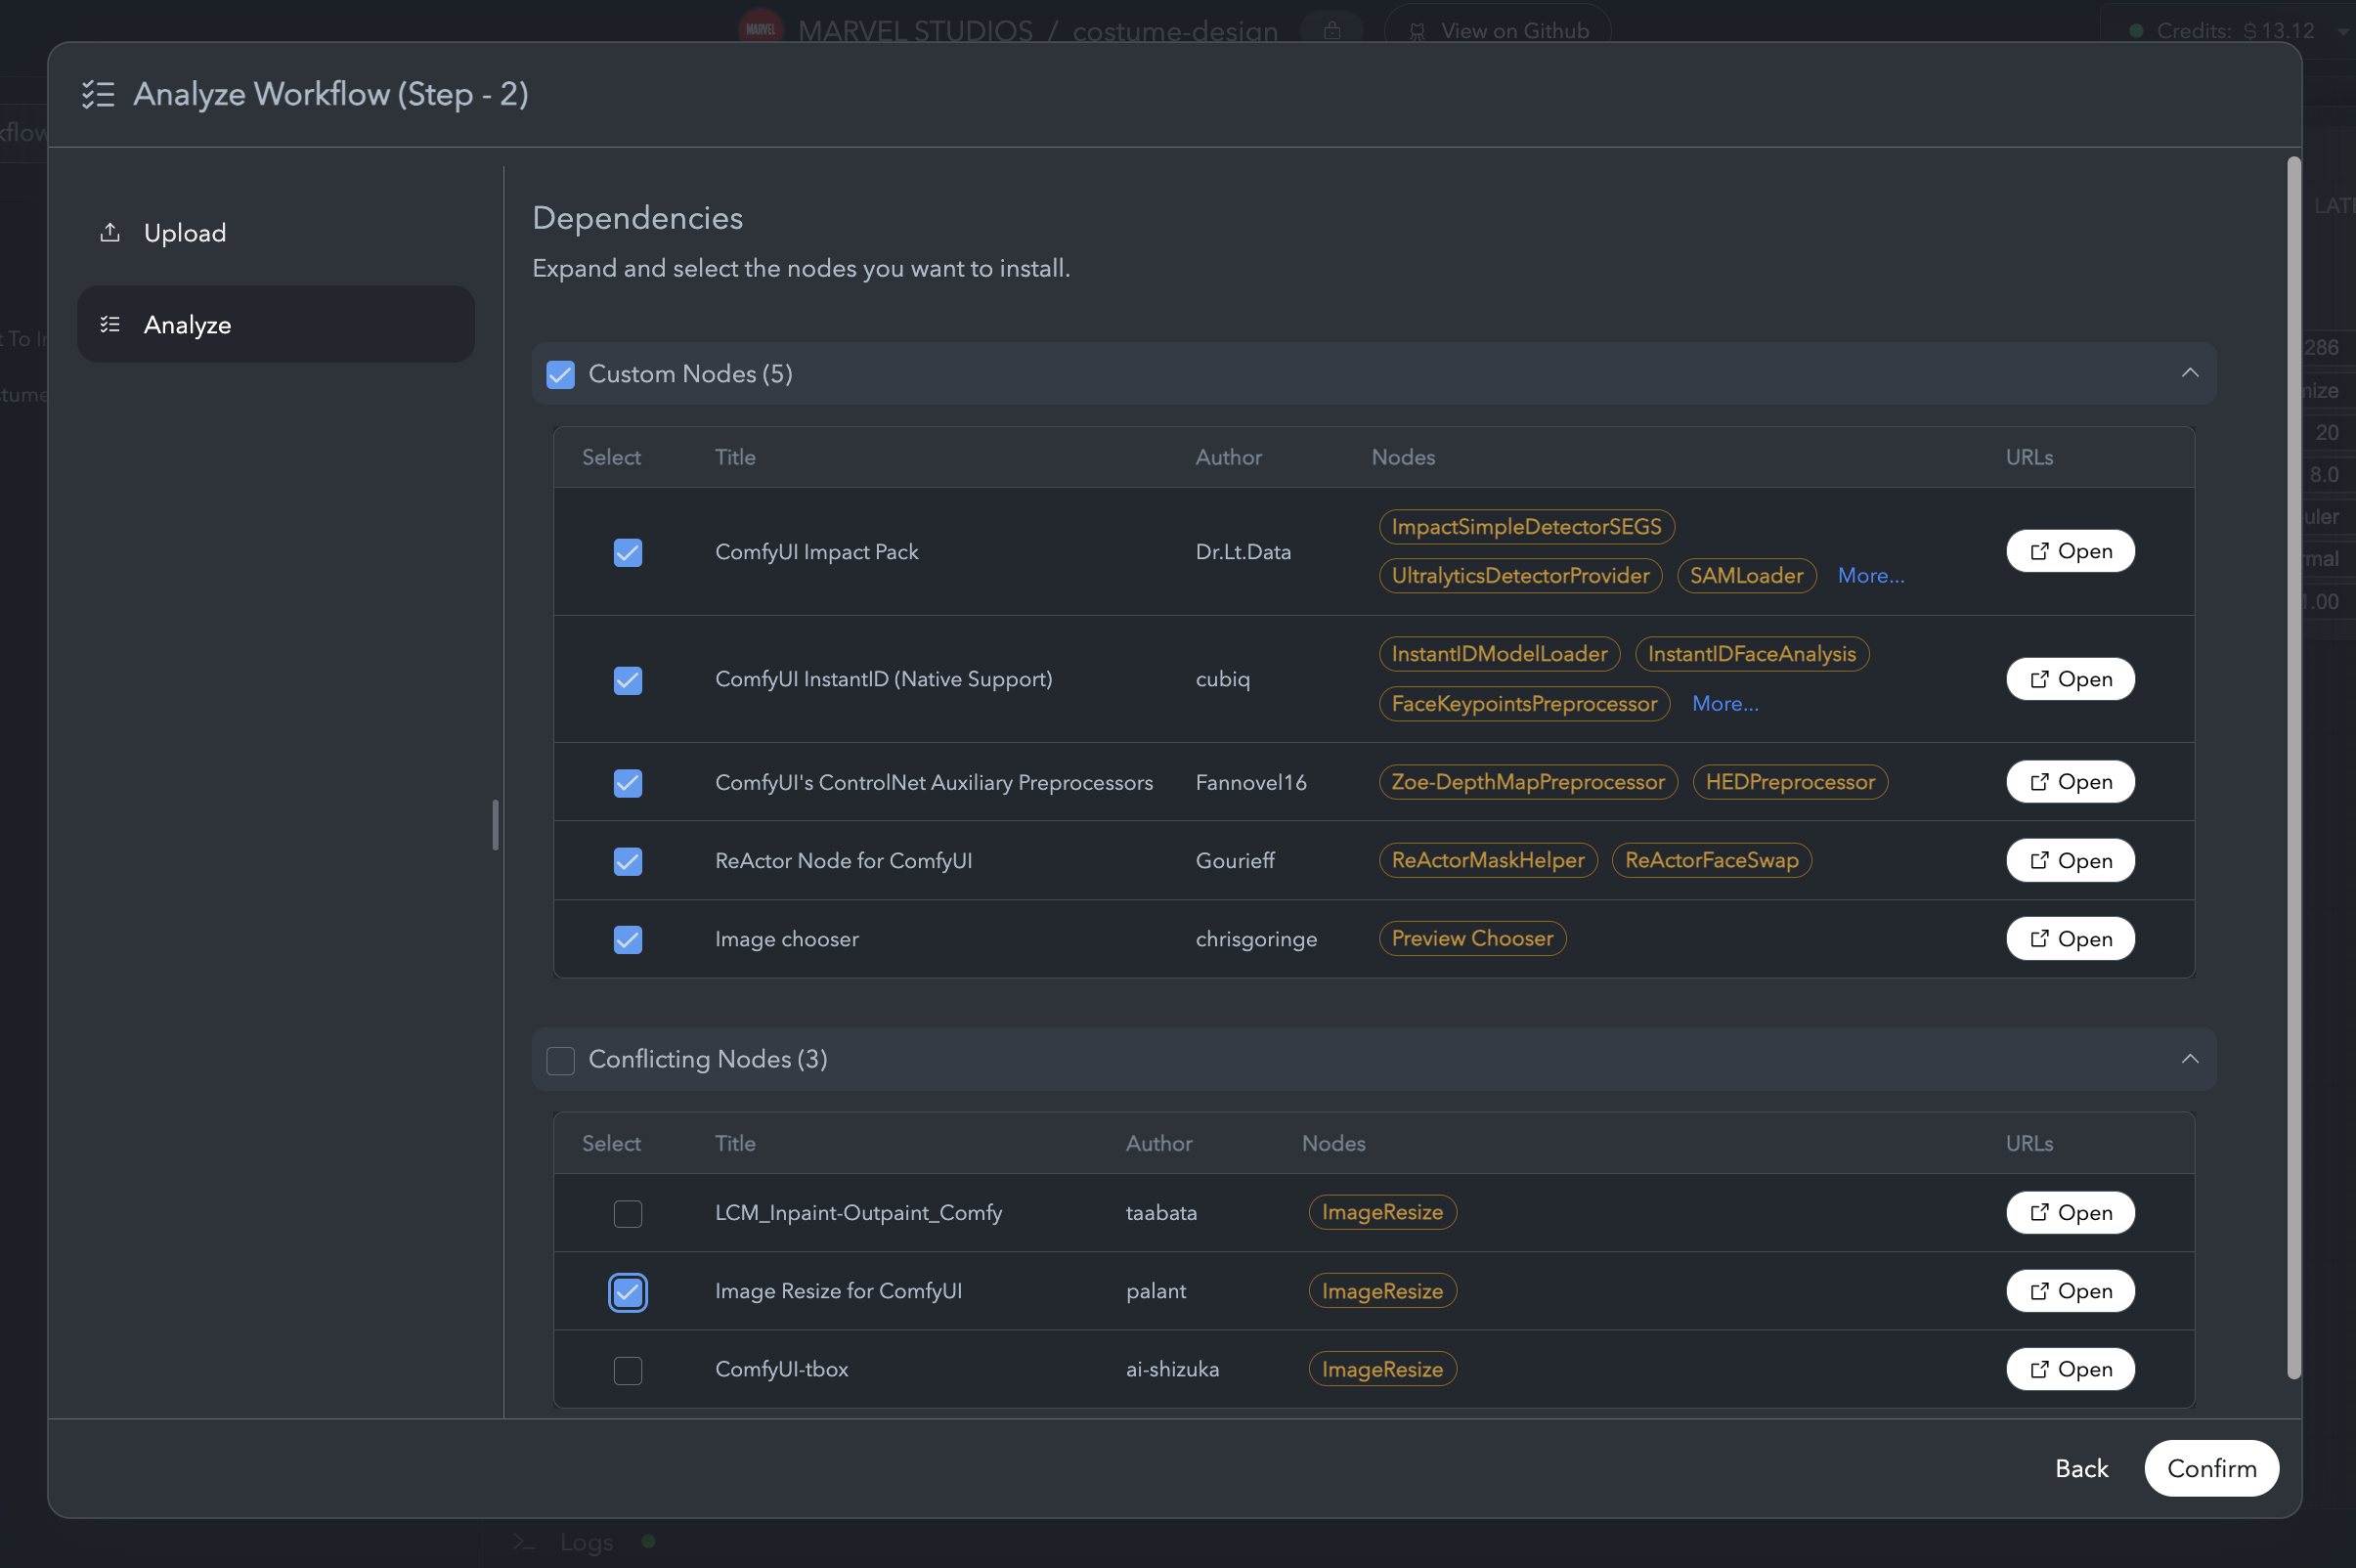
Analyze Workflow
-
Install Nodes:
To ensure the nodes from the imported workflow are fully installed, you can:- Shut down the current ComfyUI instance, then restart ComfyUI (Stop ComfyUI from Actions Bar and Start it again). This will automatically install all nodes.
- Alternatively, click the three-dot menu on individual nodes in the Nodes tab and select Reinstall.
3. Cloud GPU Usage
FlowScale supports running ComfyUI workflows on cloud GPUs. Managing your GPU usage effectively ensures cost-efficiency and optimal performance.Checking GPU Usage
-
Monitoring GPU Activity:
At the top right of the screen, there’s a Credits indicator.- A green dot next to the credits indicates that the GPU is currently in use.
- A gray dot means the GPU is idle, and you are not being charged for usage.
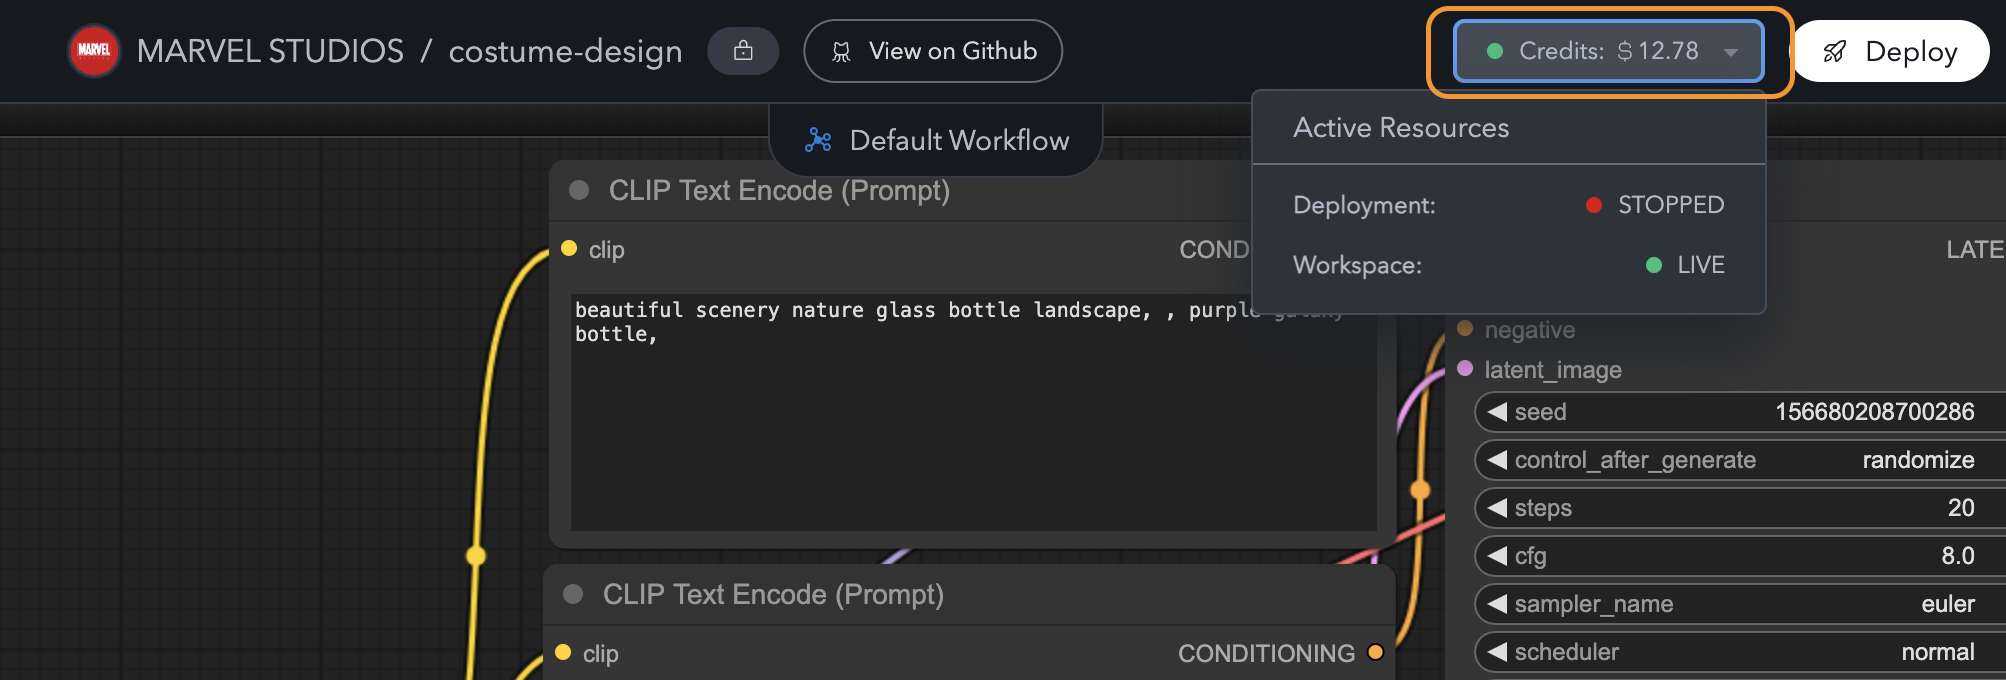
Realtime GPU Activity
-
Viewing GPU Type in Use:
The GPU type being used (e.g., T4) is displayed in the action bar at the bottom of the screen. This helps you track which GPU is being charged.
ComfyUI Action Bar
Limits and Usage Caps
- Currently, there are no usage caps or limits on GPU usage for specific plans.
- However, be mindful of the GPU type you select as higher-end GPUs incur greater costs.
4. Managing Private and Public Models
FlowScale allows users to work with both public and private AI models. Public models are available by default, while private models can be added manually.Public Models
- Go to the Models tab on the left sidebar.
-
Select Public Models from the dropdown.
- These models are supported by FlowScale out of the box and can be used in any workflow.
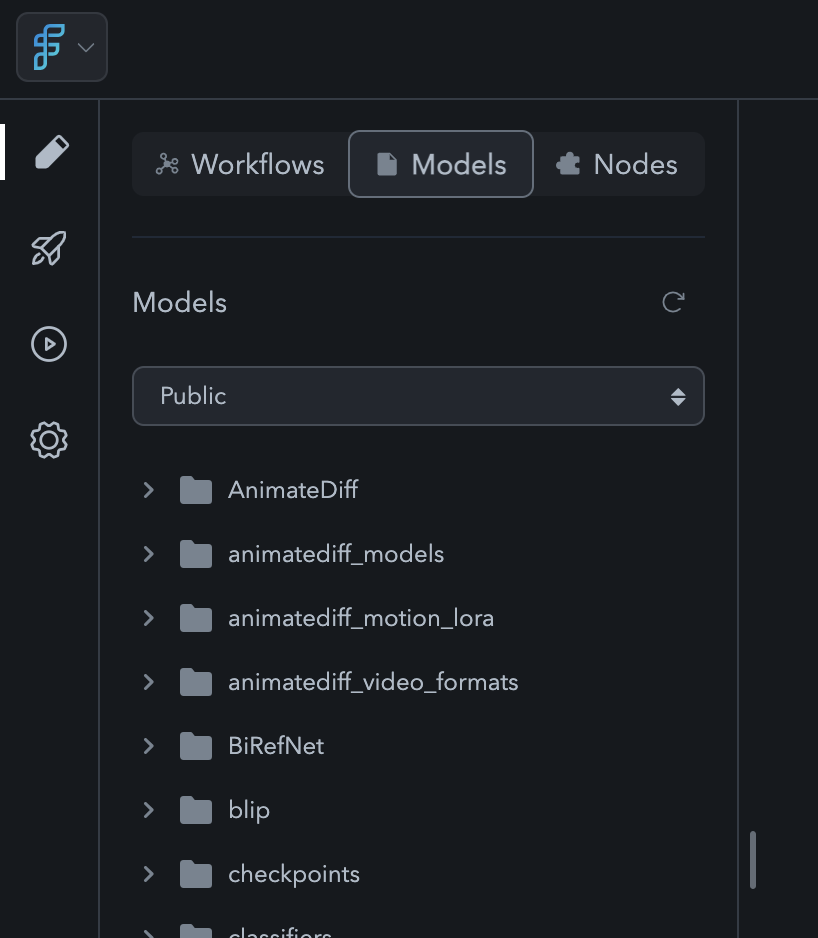
Default Public Models
Adding Private Models
-
To add a private model of your own, switch to Private Models in the dropdown.
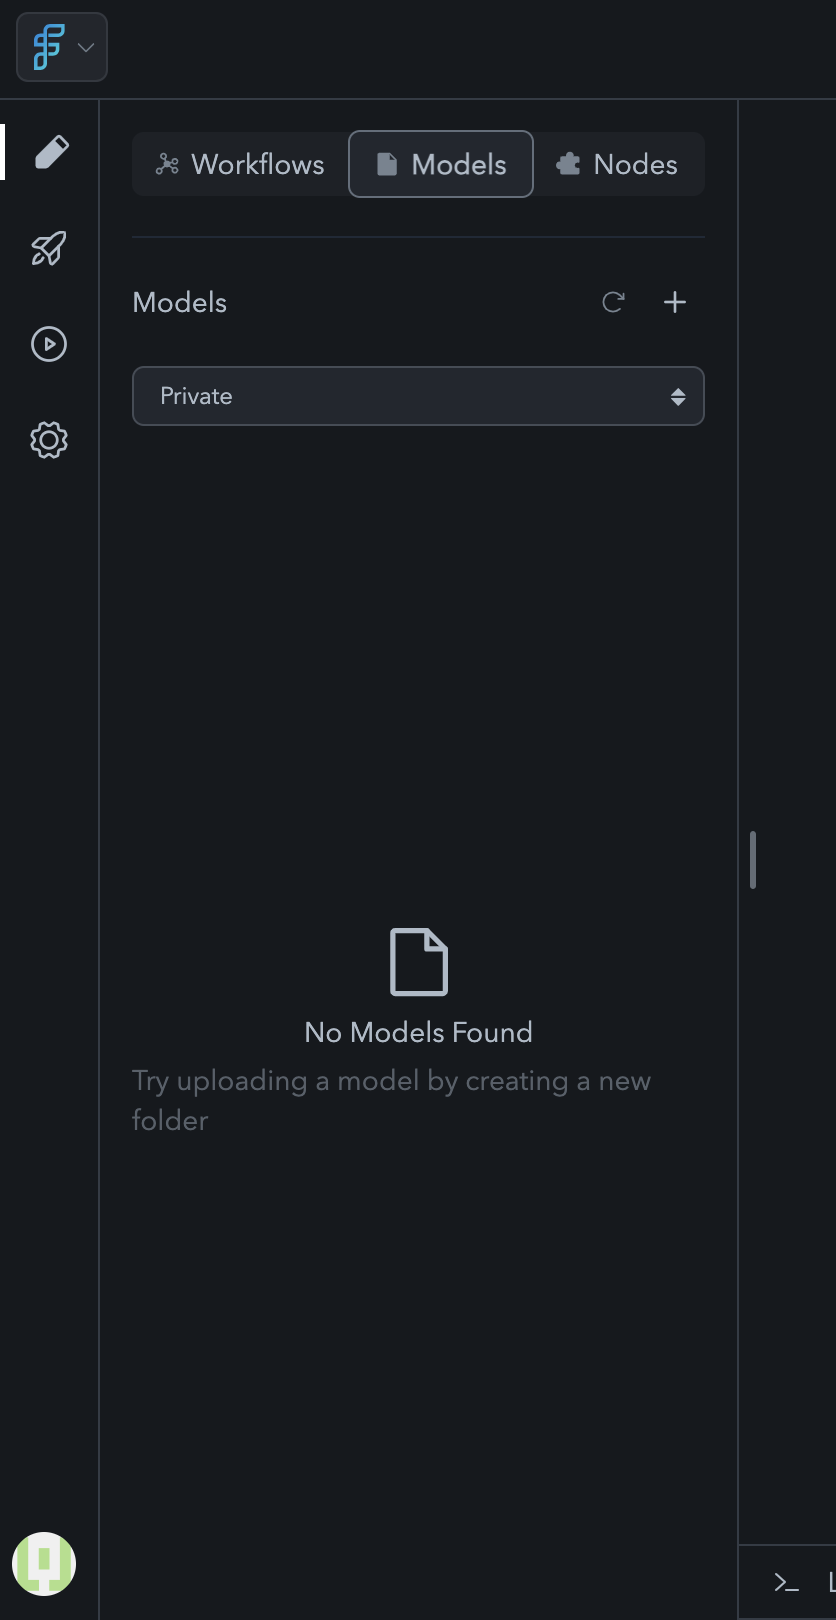
Private Models
-
Click the “+” button to add a new folder for organizing your private models (e.g., “Checkpoints” or “ControlNet”).
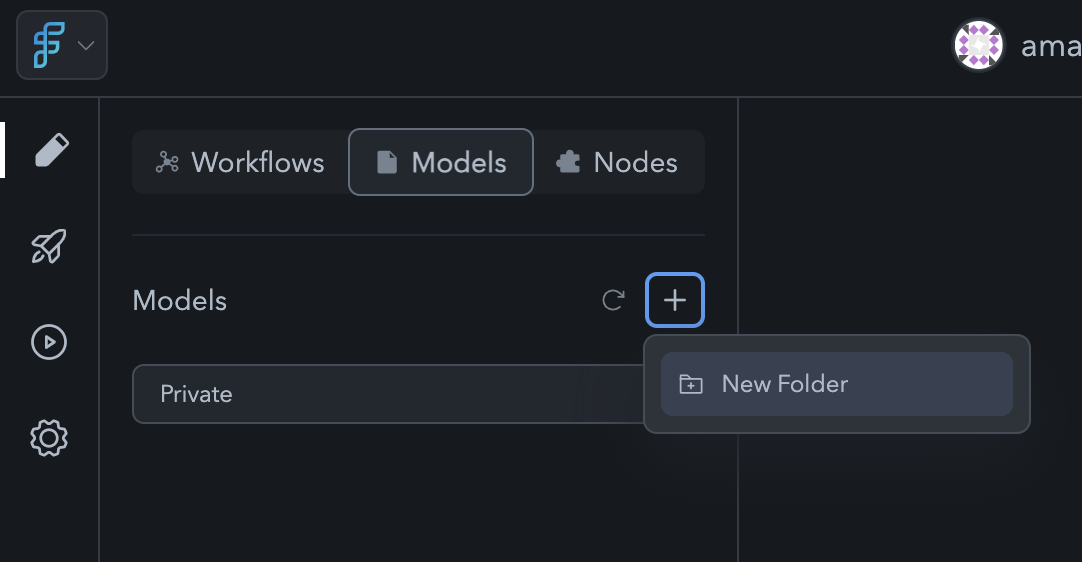
Create Folder
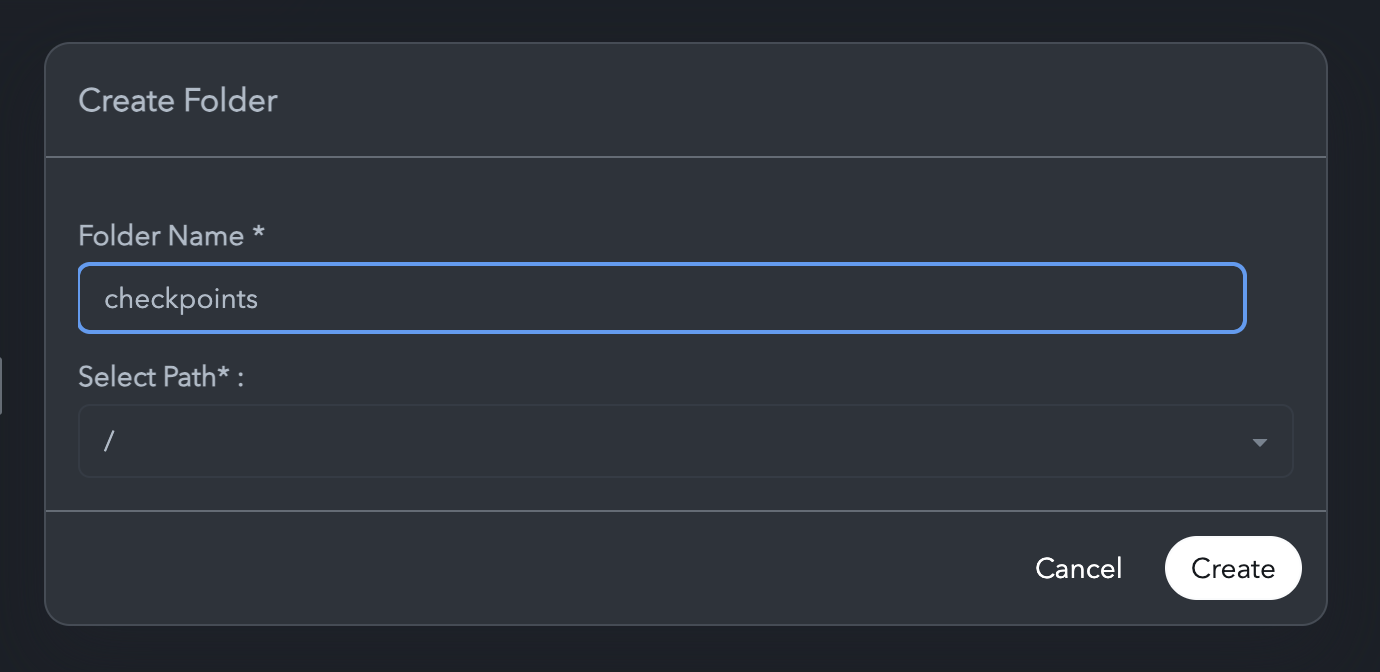
Folder name
-
Inside the folder, click the three-dot menu and select Upload to add a new model file.
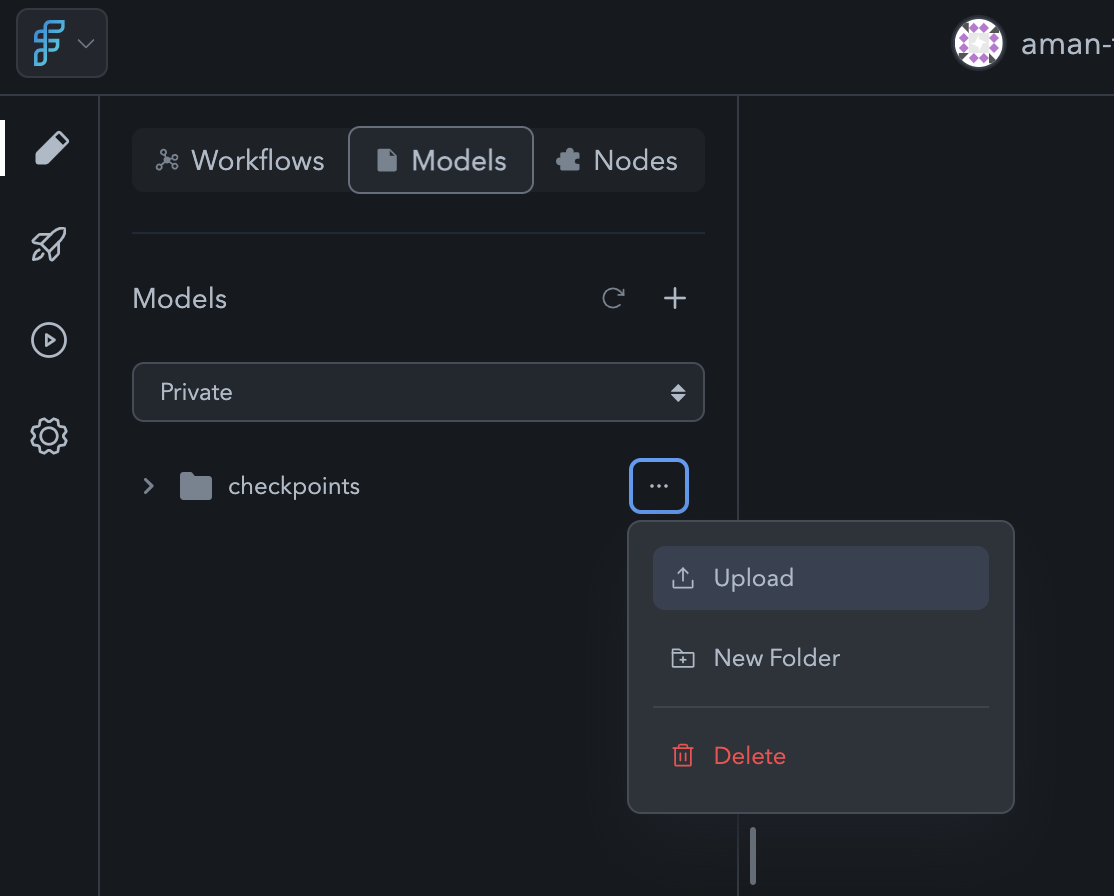
Upload Model
-
You can search for models using the search bar provided, or directly provide a model download url.
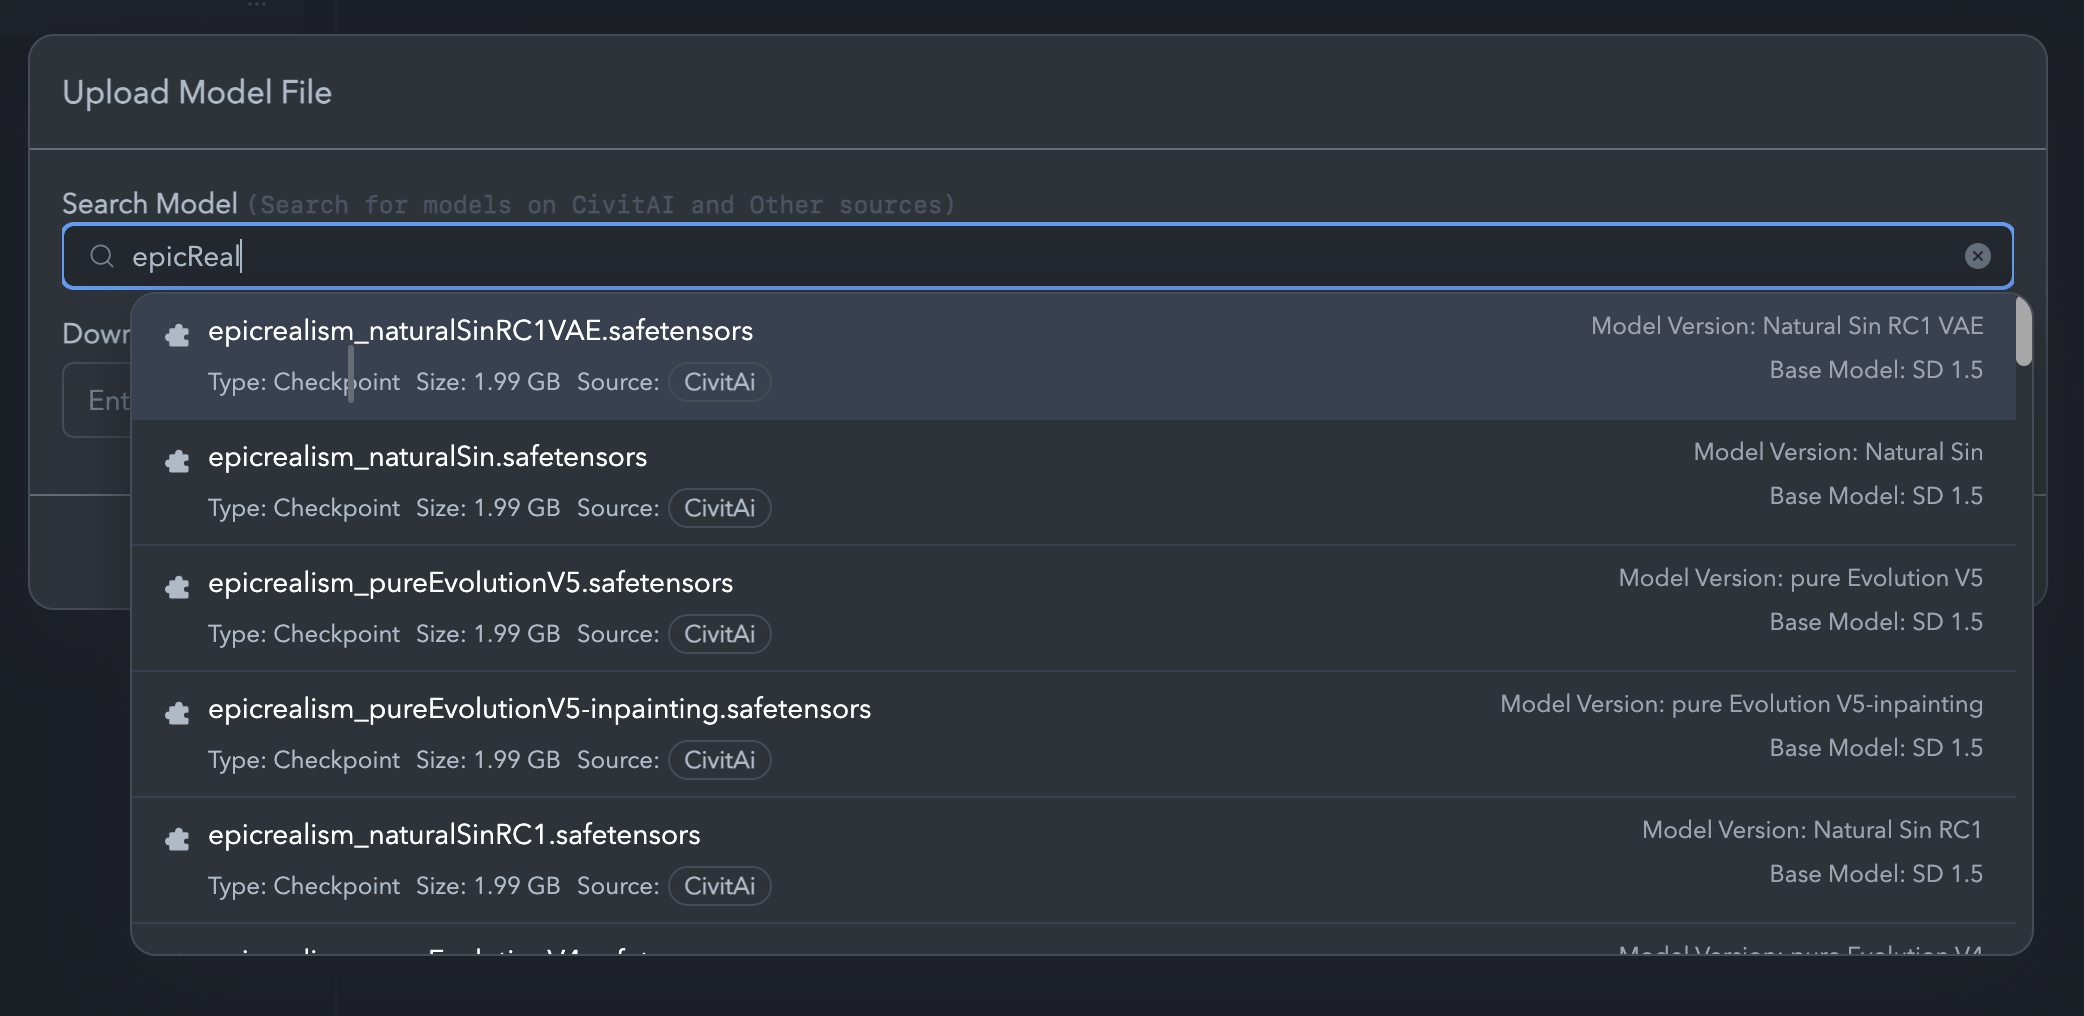
Search Model
- If you are uploading a model from CivitAI, you will need to enter your CivitAI API key to complete the download. (This is how you can find your CivitAI API key: How to setup CivitAI API Key?) Once you provide the necessary details, click on Upload button.
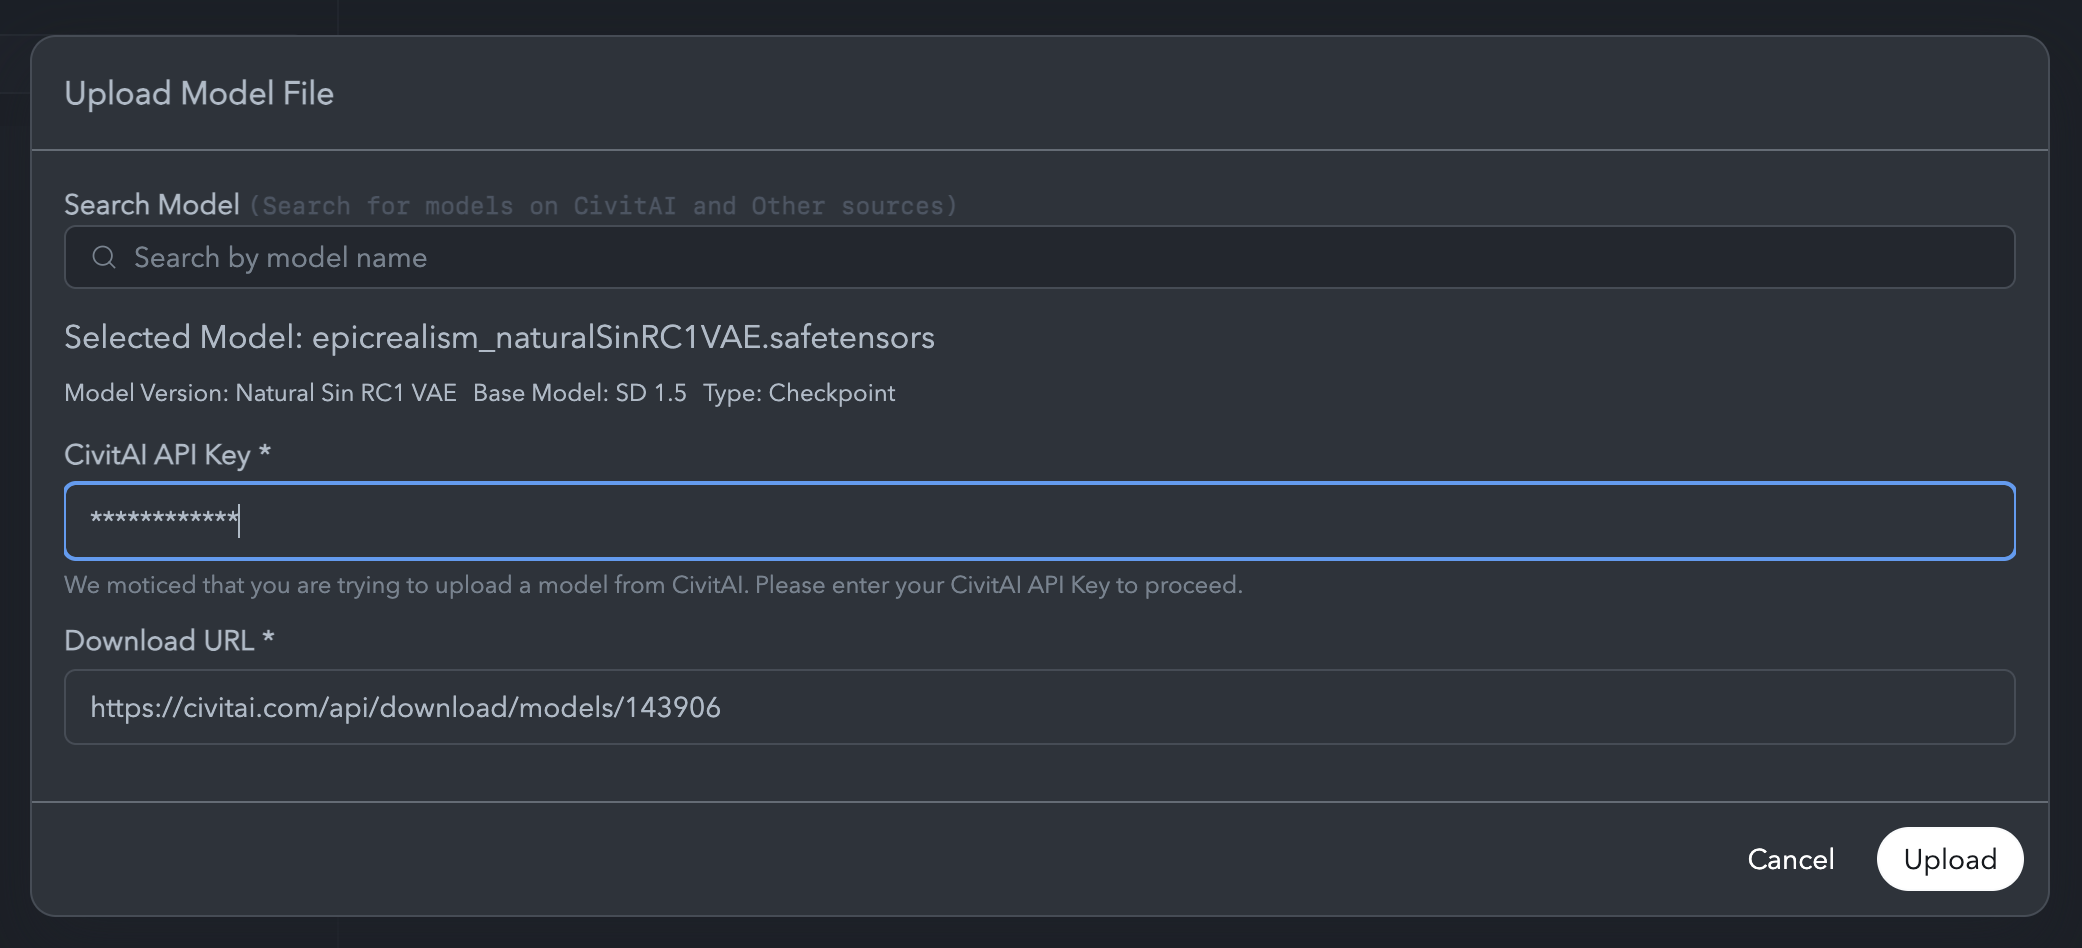
CivitAI Models
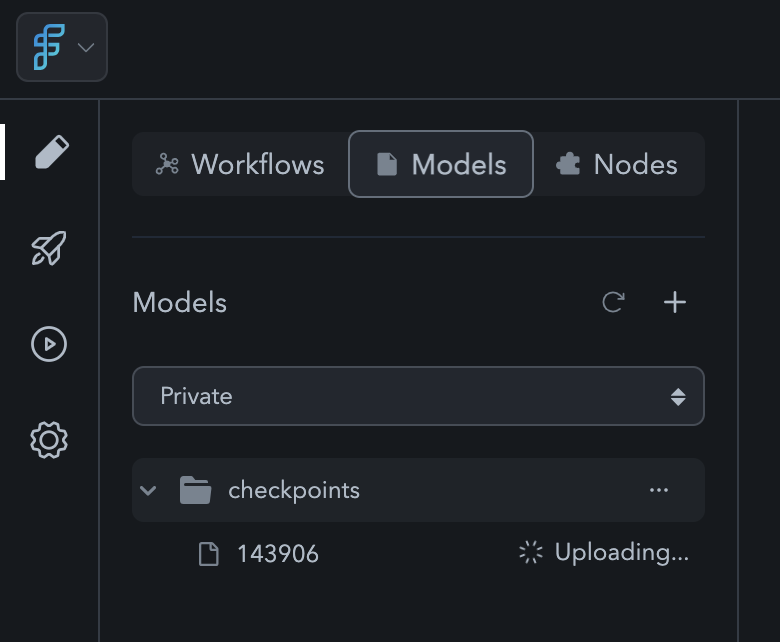
Uploading Model
- Make sure to keep refreshing the models tab to see if the model is uploaded successfully.
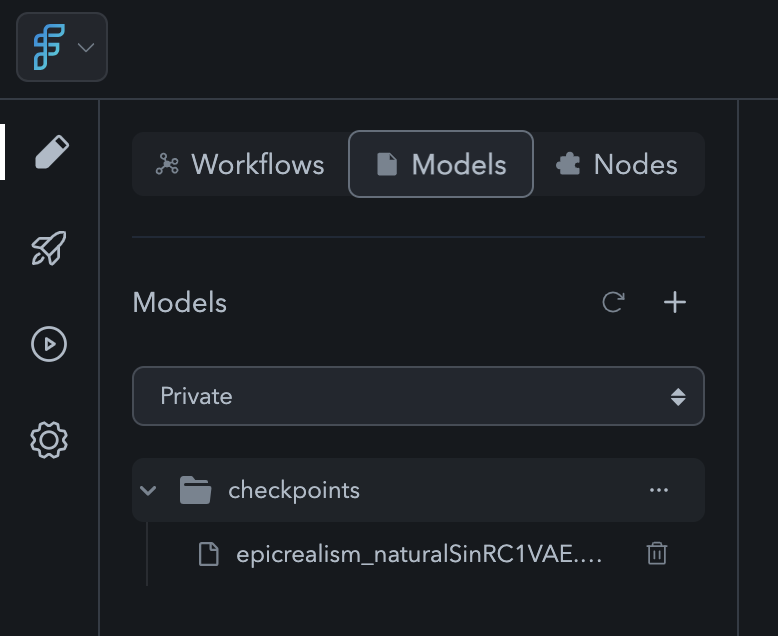
Uploaded Model
-
Once uploaded, click Refresh ComfyUI on the action bar to see the new model in ComfyUI.

ComfyUI Action Bar

