Get Started
Setup Workspace
Setup your Organization, add team members, and create your first Project
This guide will walk you through the essential steps for setting up your workspace in FlowScale, including how to create an organization, manage your team, and start your first project. By the end of this tutorial, you’ll have your organization fully configured, team members invited, and your first project ready for workflow creation.
Table of Contents
1. Organization Setup
Setting up your organization is the first step after signing up for FlowScale. This process ensures you have a workspace to manage your projects, team members, and subscriptions.Steps to Create an Organization
-
Sign Up:
Go to flowscale.ai and click the “Get Started” button. You will be redirected to a GitHub login page, where you must sign up or sign in using your GitHub account.- Prerequisite: You must have an existing GitHub account to sign up for FlowScale.
- GitHub Permissions: When signing in, you will be prompted to grant permissions so that FlowScale can integrate with your GitHub account. This allows FlowScale to manage repositories and workflow data seamlessly.
-
Choose a Subscription Plan:
After signing in, you’ll be redirected to the Pricing Page where you can choose the Pro Plan ($50 per user/month). Fill out your billing information and complete the purchase.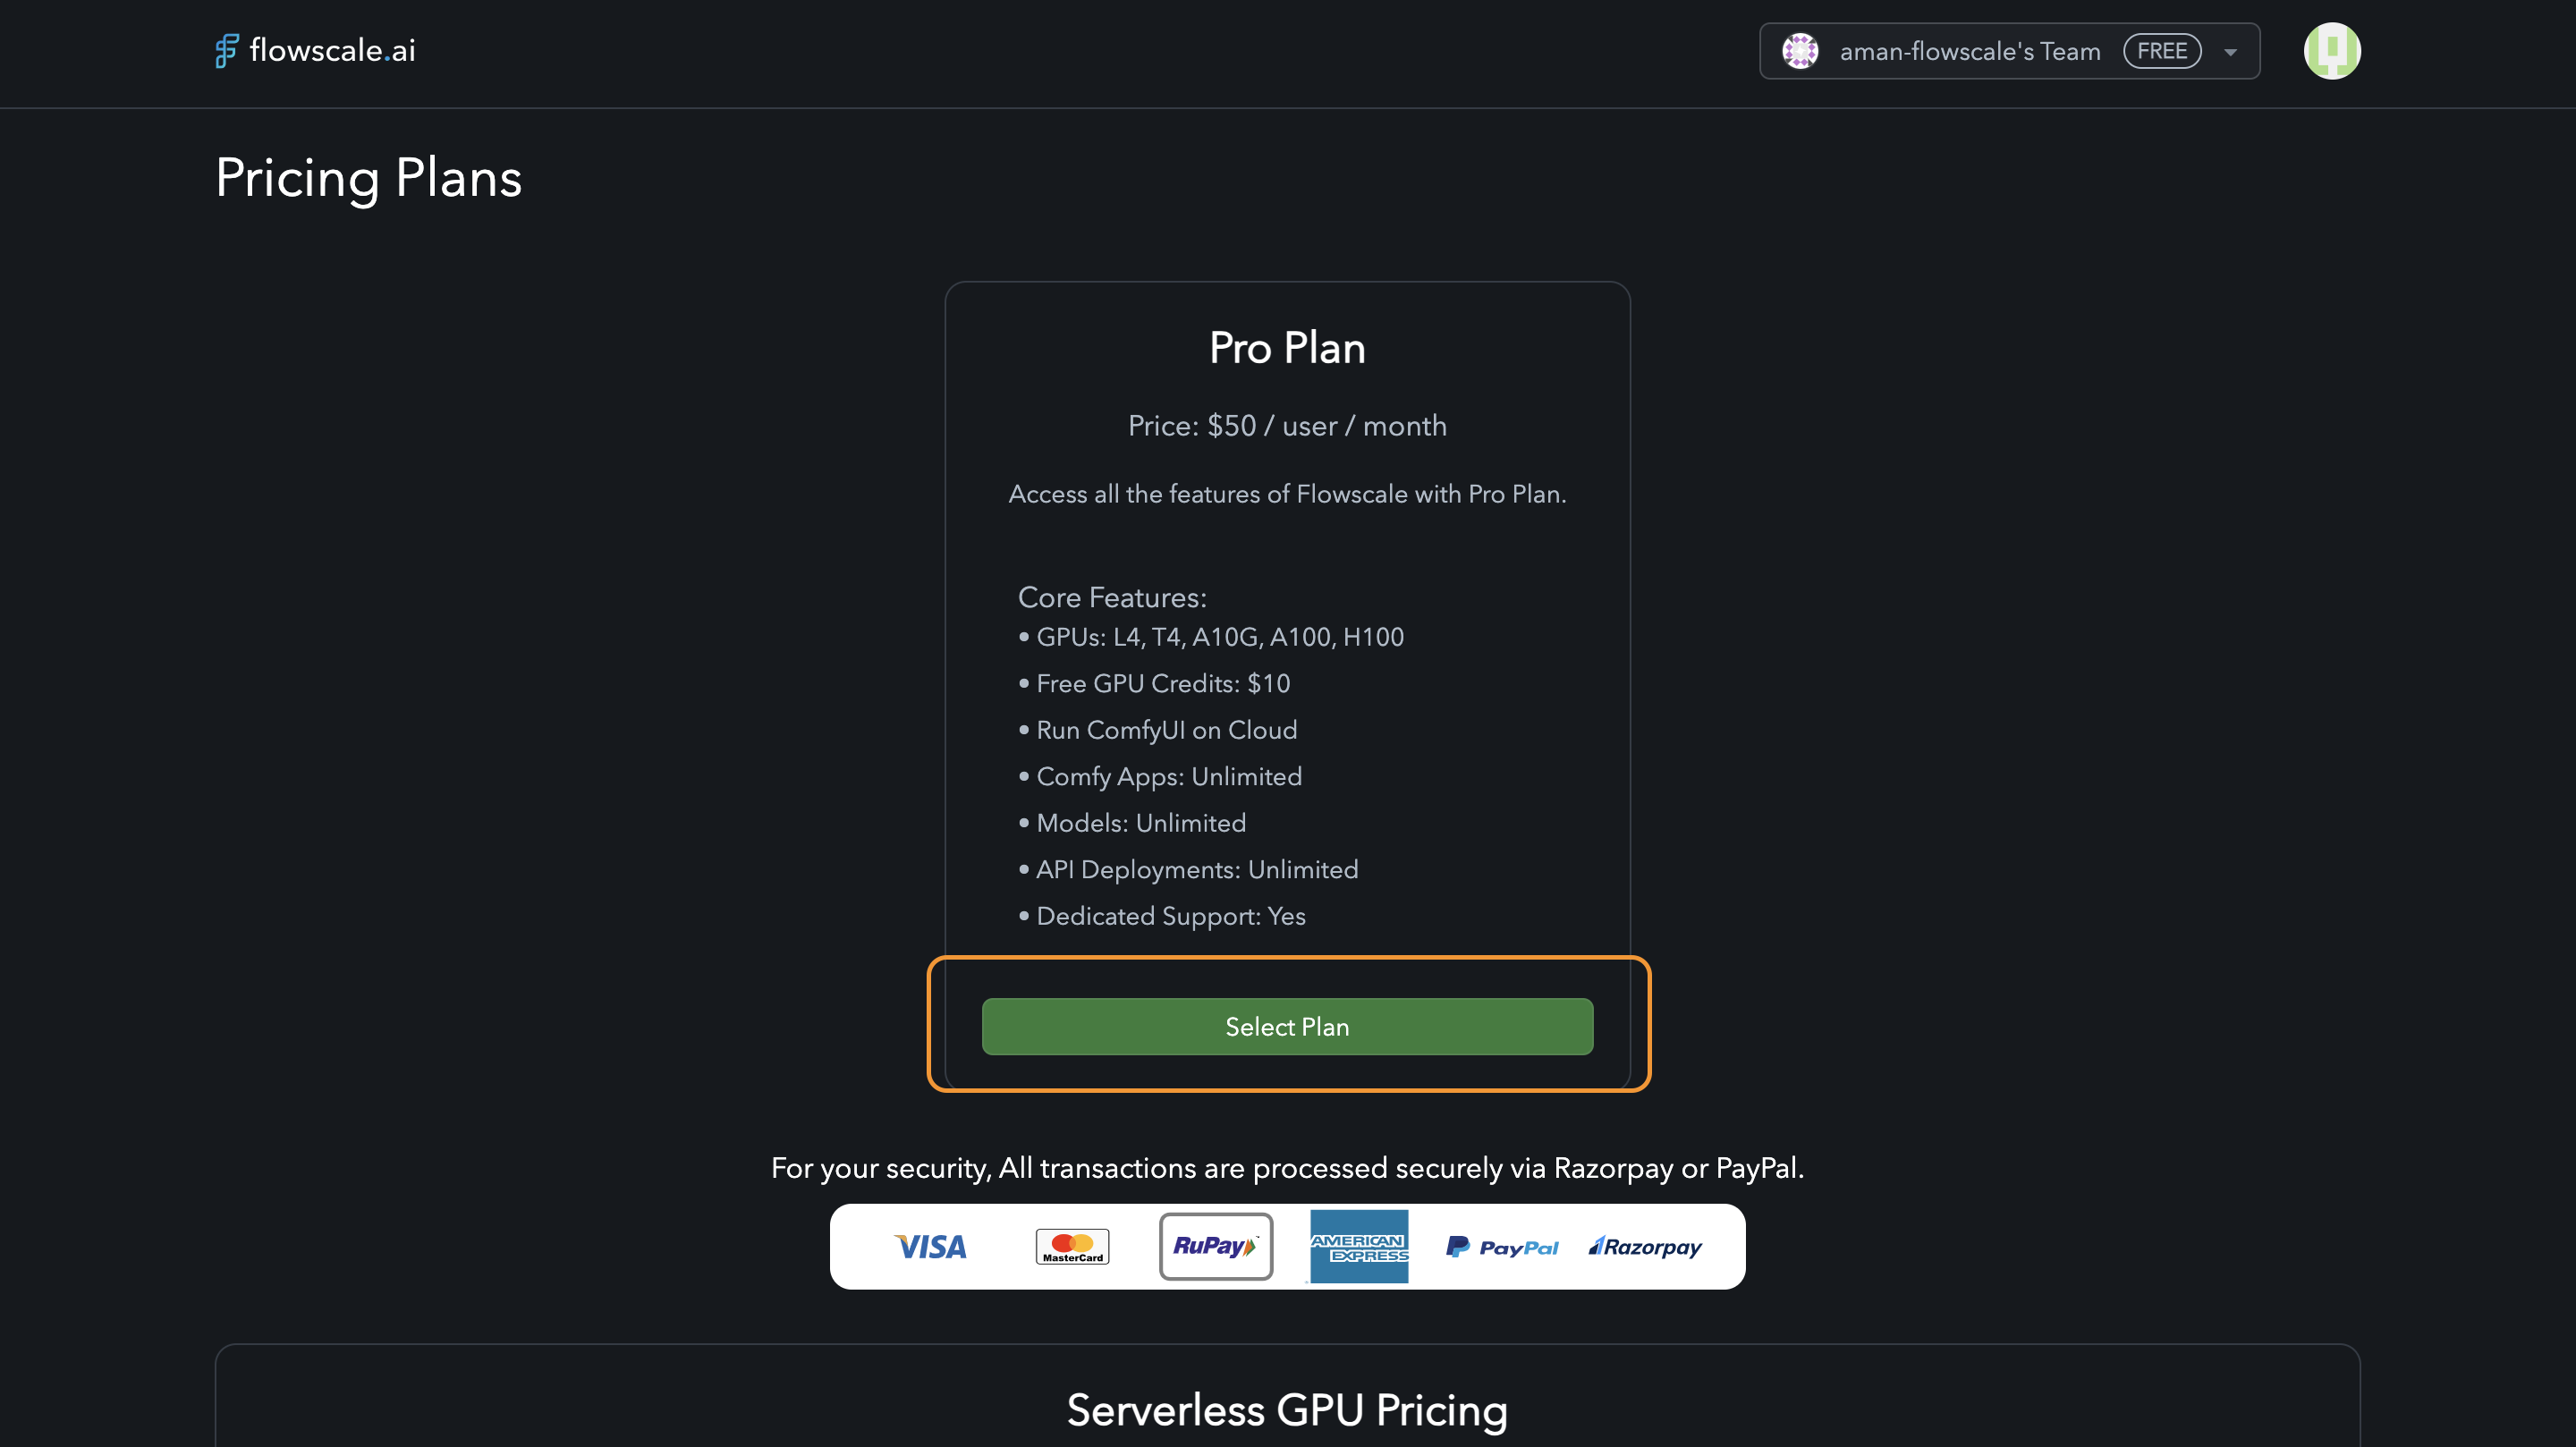
Select a Subscription Plan
-
Default Organization Creation:
Once your subscription is confirmed, FlowScale automatically creates a default organization with your name. This organization will appear in the top-right dropdown of your workspace.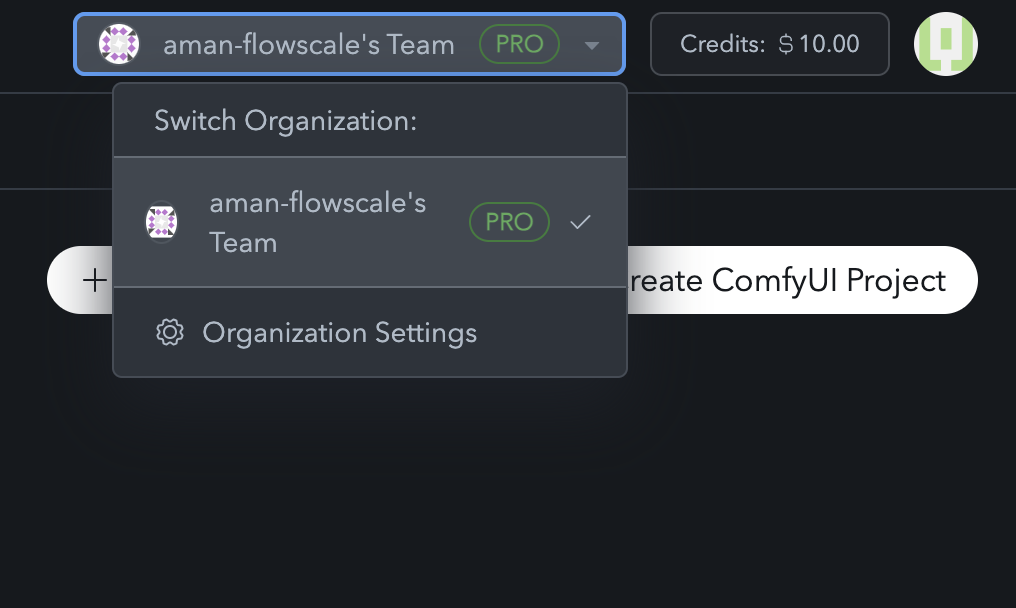
Default Organization
Managing Your Organization
-
Accessing Organization Settings:
Navigate to the Settings tab from the main dashboard. Here, you’ll see three sub-tabs:- General: Manage your organization’s details (name, logo, description).
- Manage Members: Invite and manage team members.
- Billing & Plans: Update seat count and subscription plans.
-
Organization Customization:
In the General Tab, you can:- Update your organization’s logo.
- Rename your organization and provide a description.
- Save changes to reflect the new settings across your account.
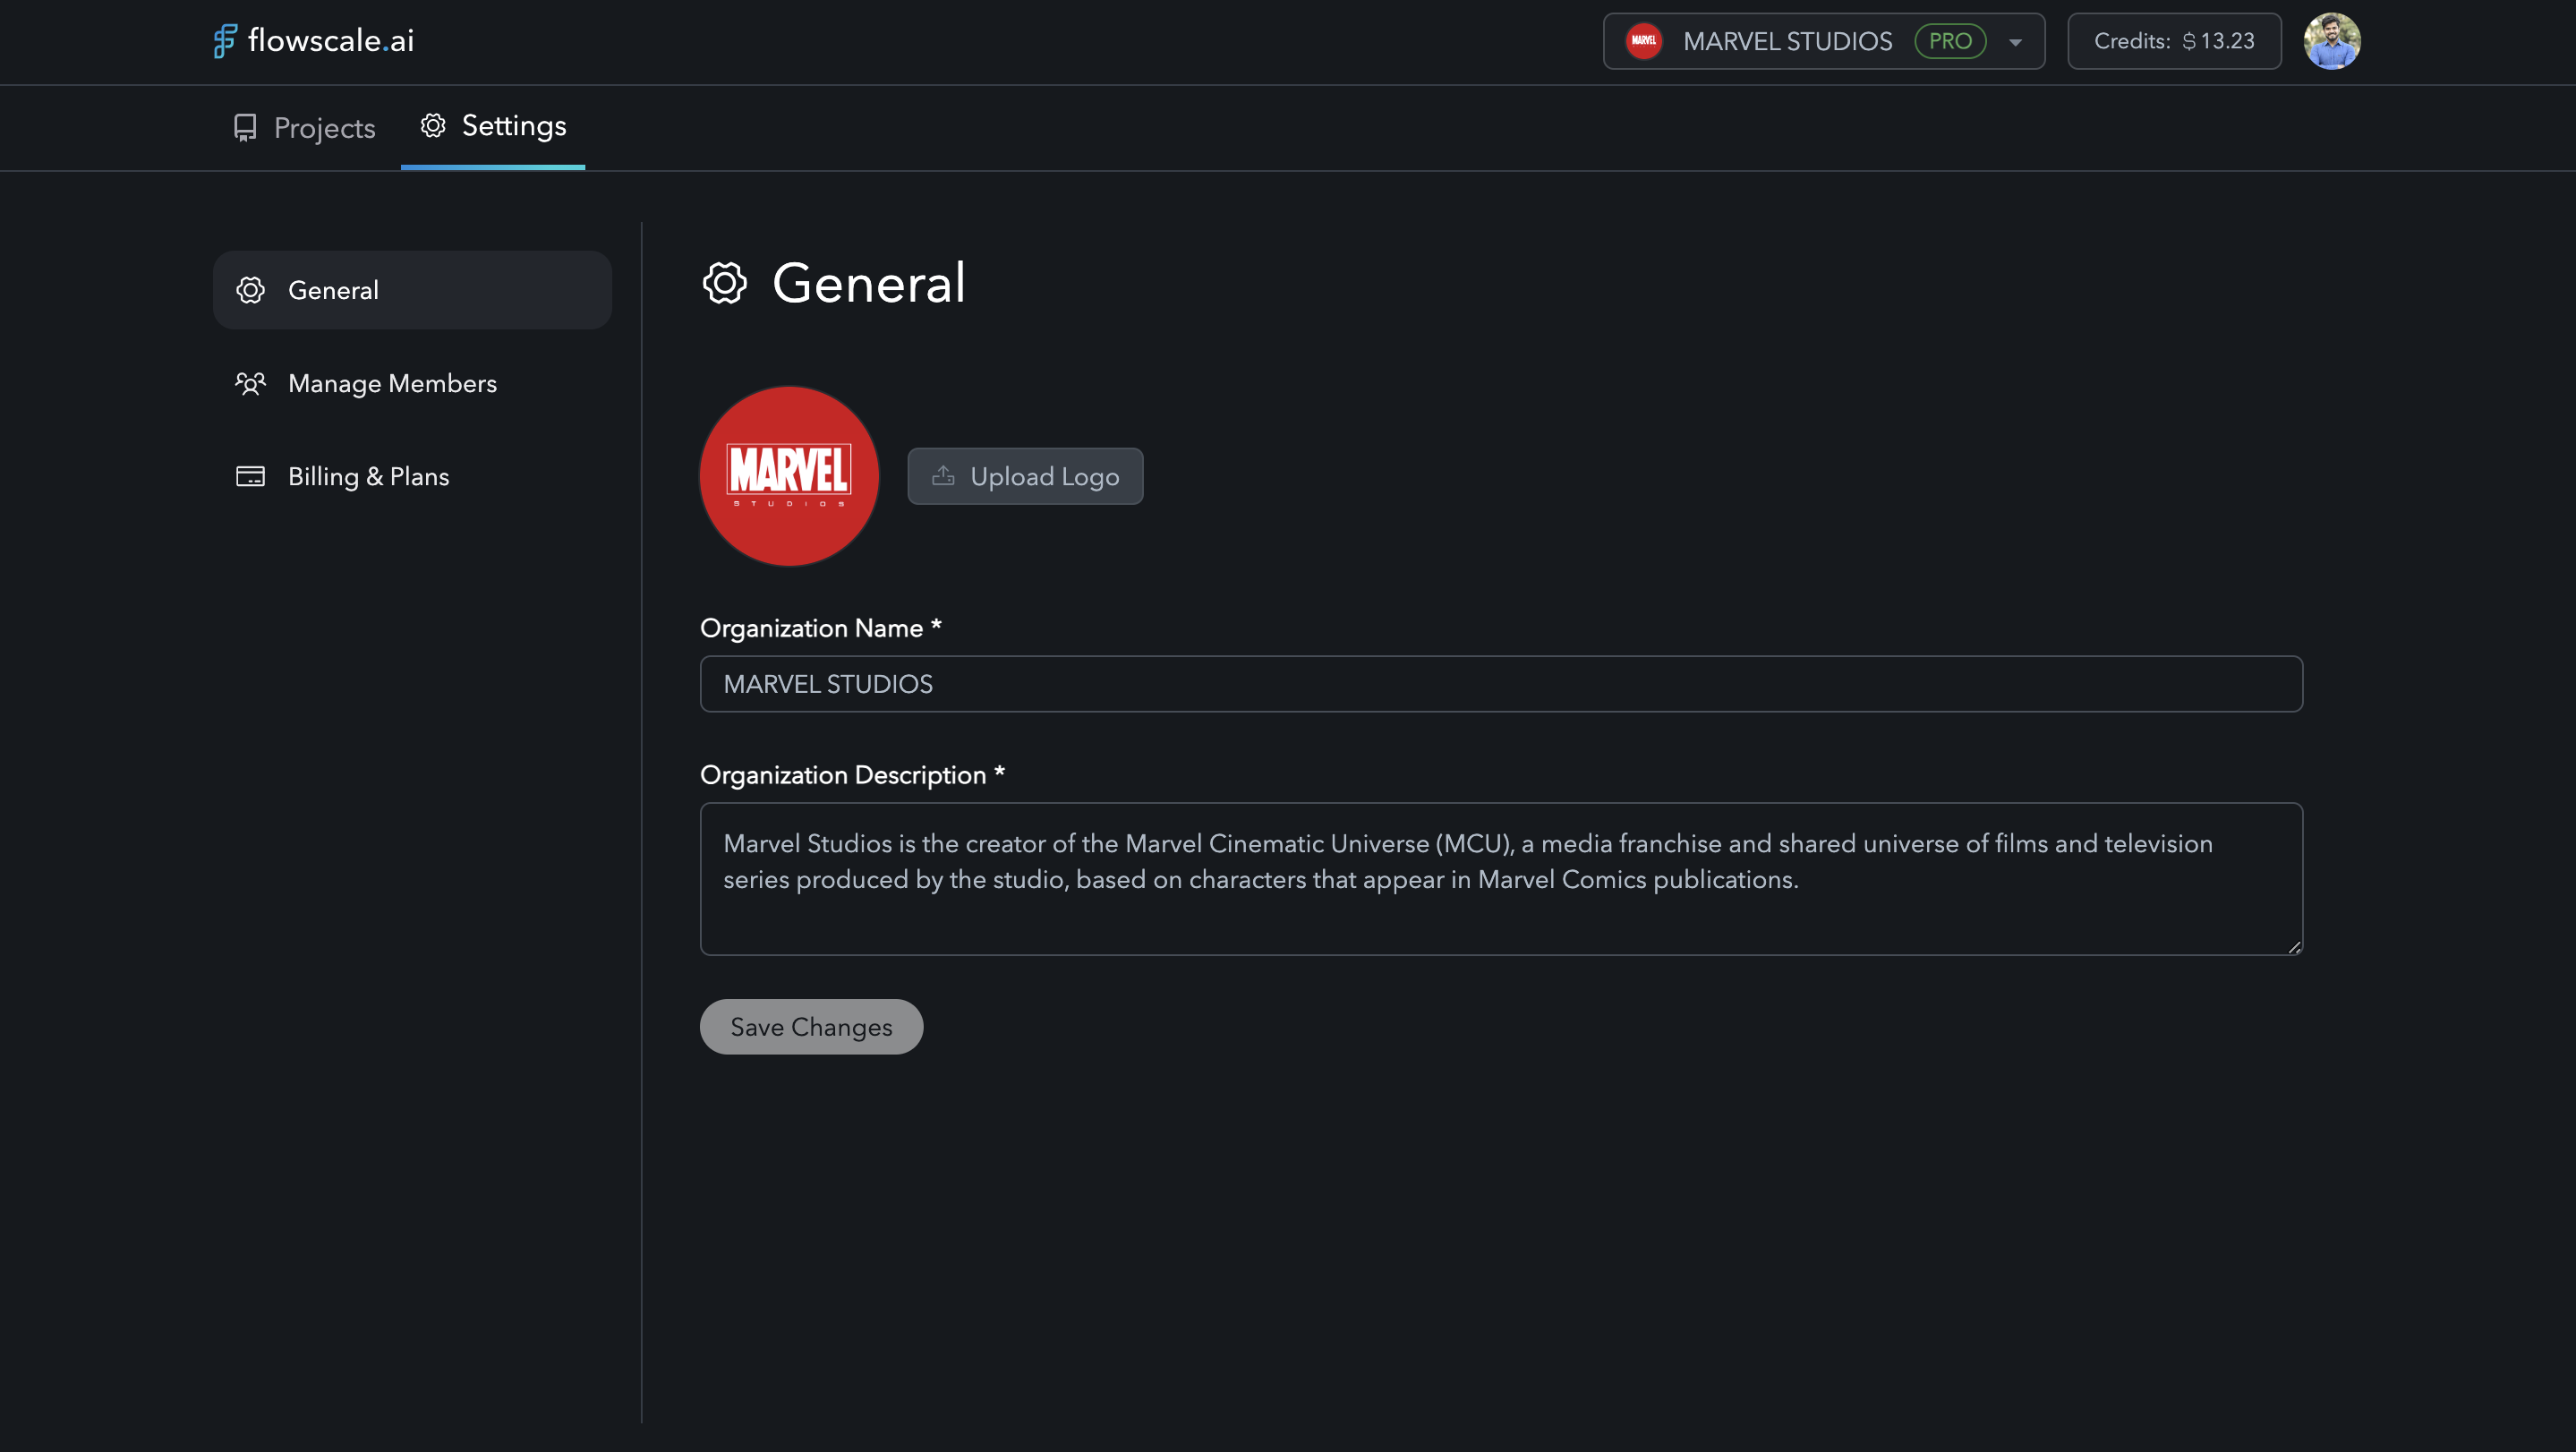
Organization Settings -> General Tab
Managing Multiple Organizations
- A user can be part of multiple organizations. As a freelancer or collaborator, you can be invited to other organizations by their owners.
- You can switch between organizations using the dropdown in the top-right corner of the dashboard.
2. Team Management
After creating your organization, you can invite team members to collaborate on projects. Here’s how to manage your team:Steps to Invite Team Members
-
Purchase Additional Seats:
By default, your plan comes with one seat (yours). To invite more members, you’ll need to purchase additional seats:- Go to Billing & Plans under the Settings Tab.
- Click on Edit Seats.
- Use the input box to increase the number of seats. This will dynamically display the total cost based on the number of additional members.
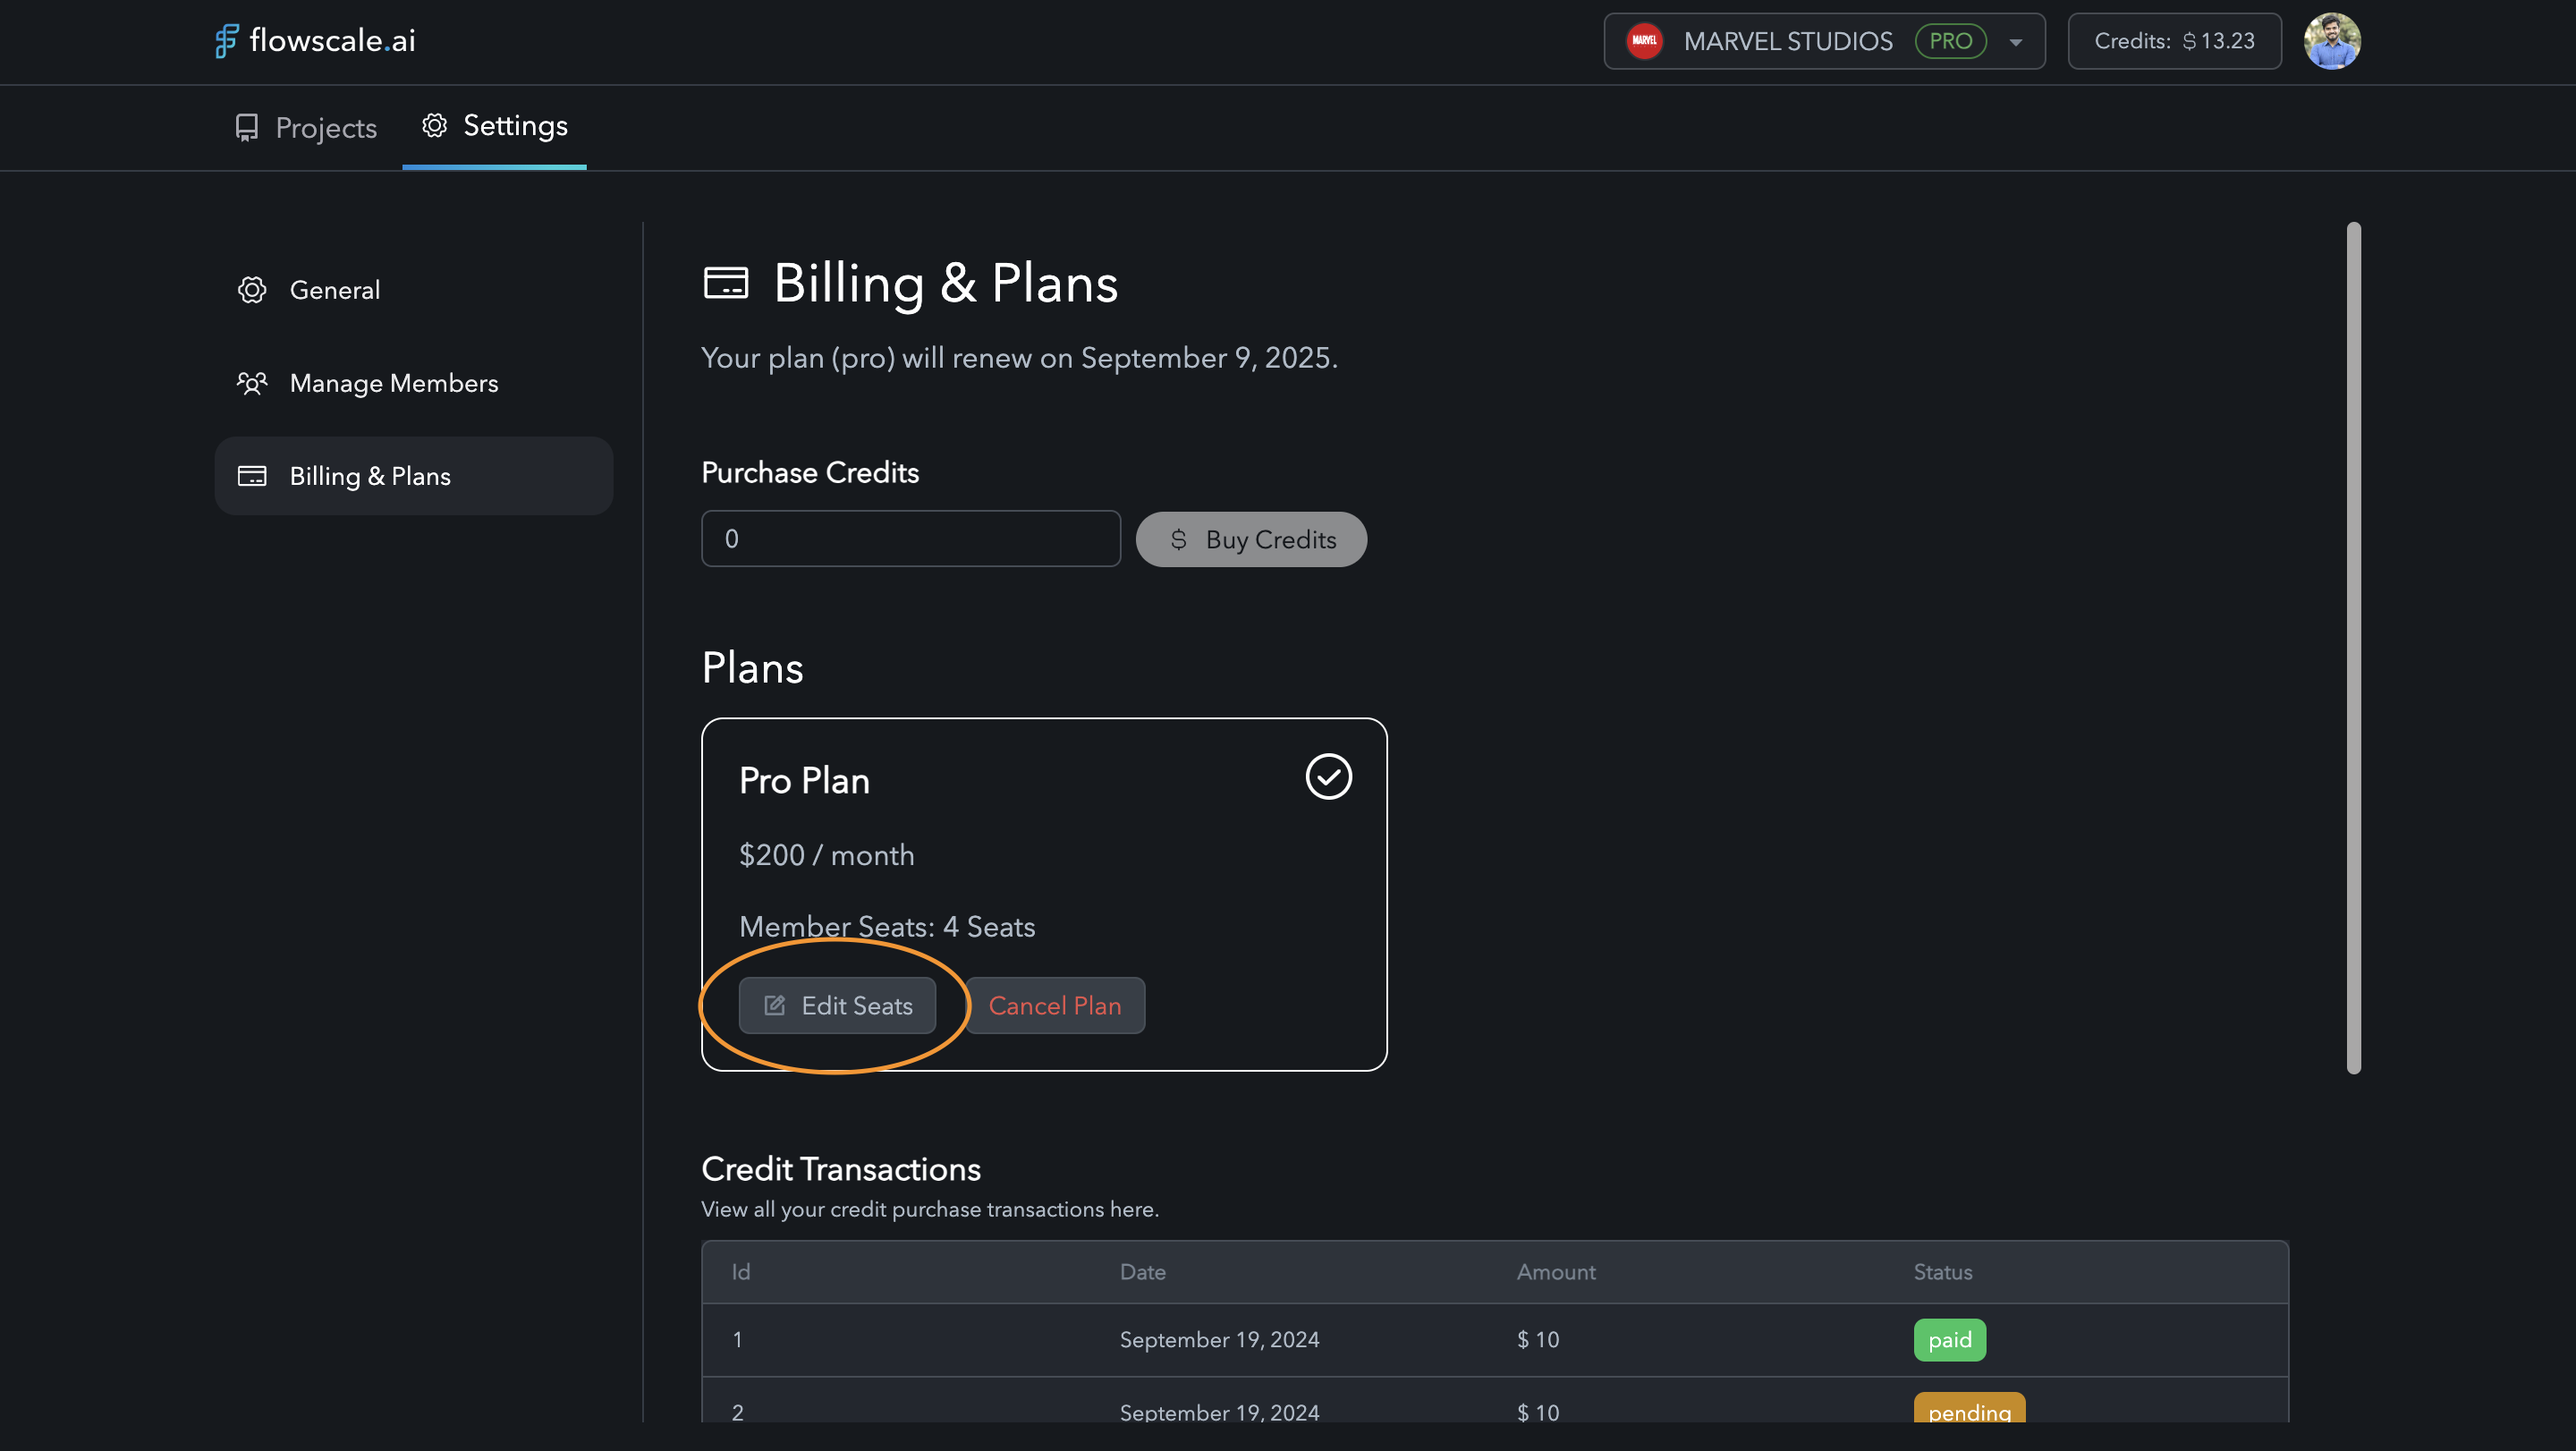
Organization Settings -> Billing & Plans -> Edit Seats
-
Add Members:
Once you’ve purchased additional seats, return to the Manage Members tab:- Click Add Member.
- Enter the username of the team member you wish to invite.
- The username is located in the top-right corner of the user’s FlowScale account, under their profile.
- Click Add Member.
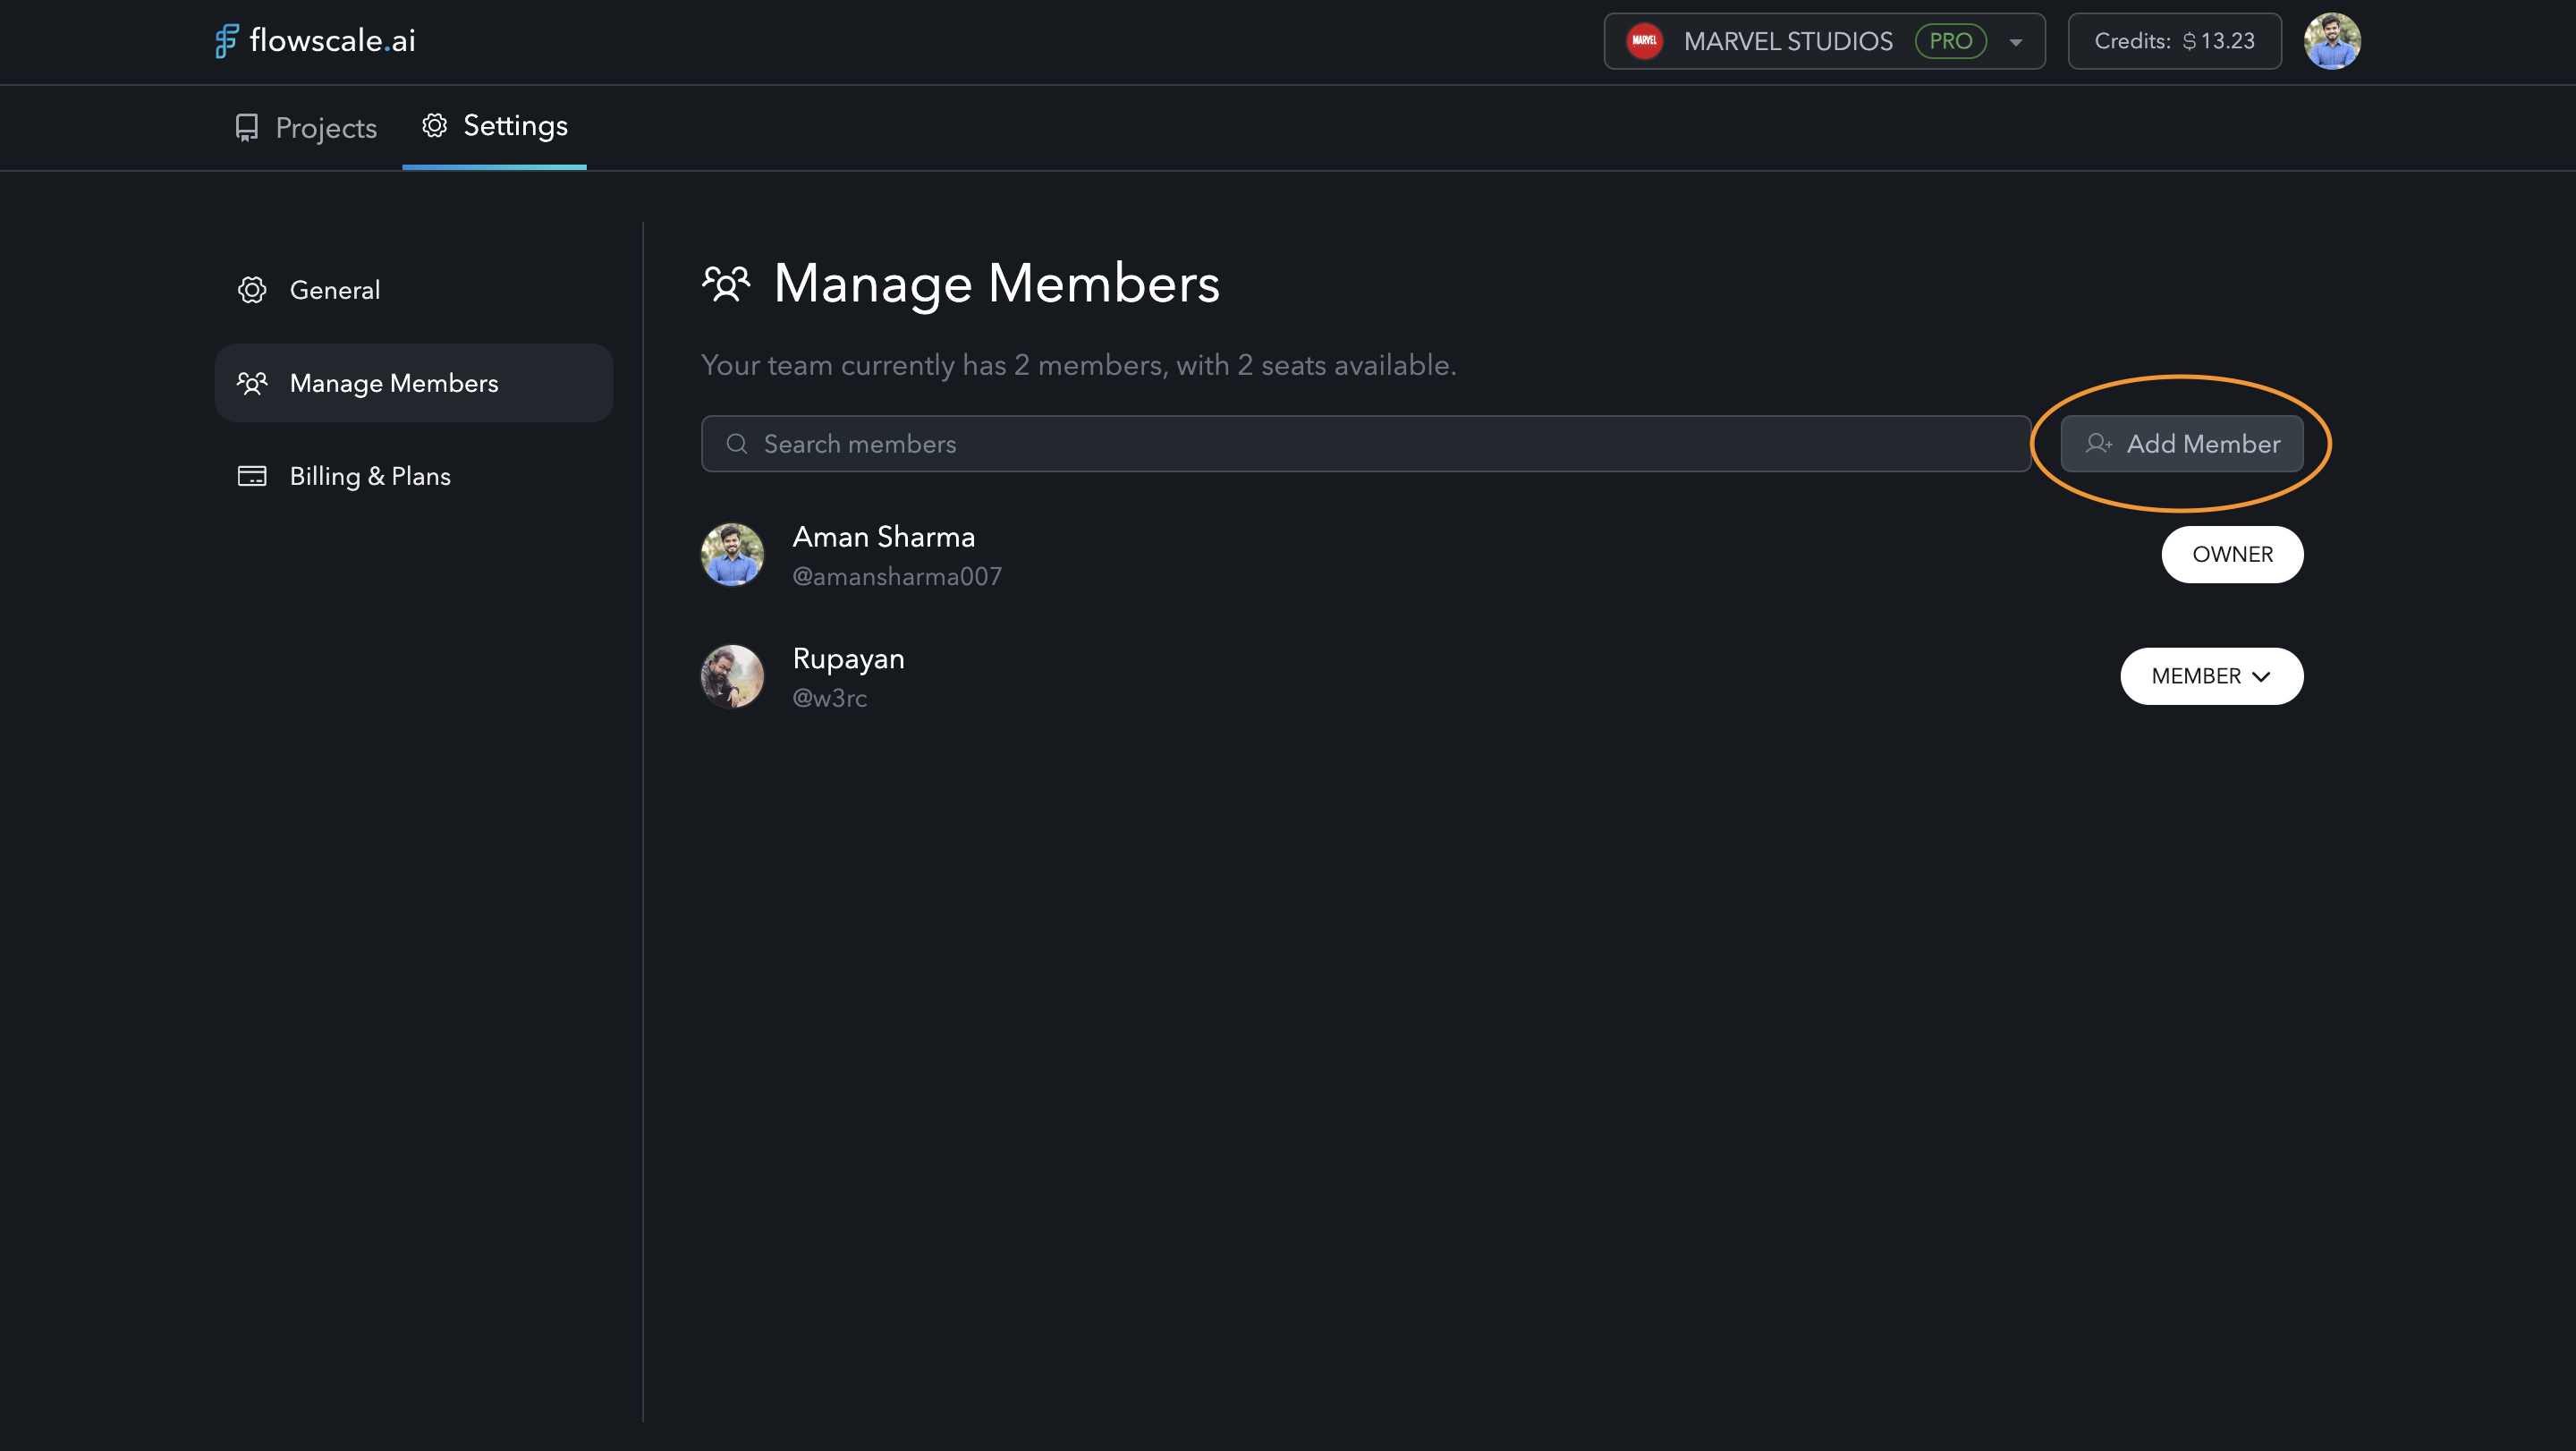
Organization Settings -> Manage Members -> Add Member
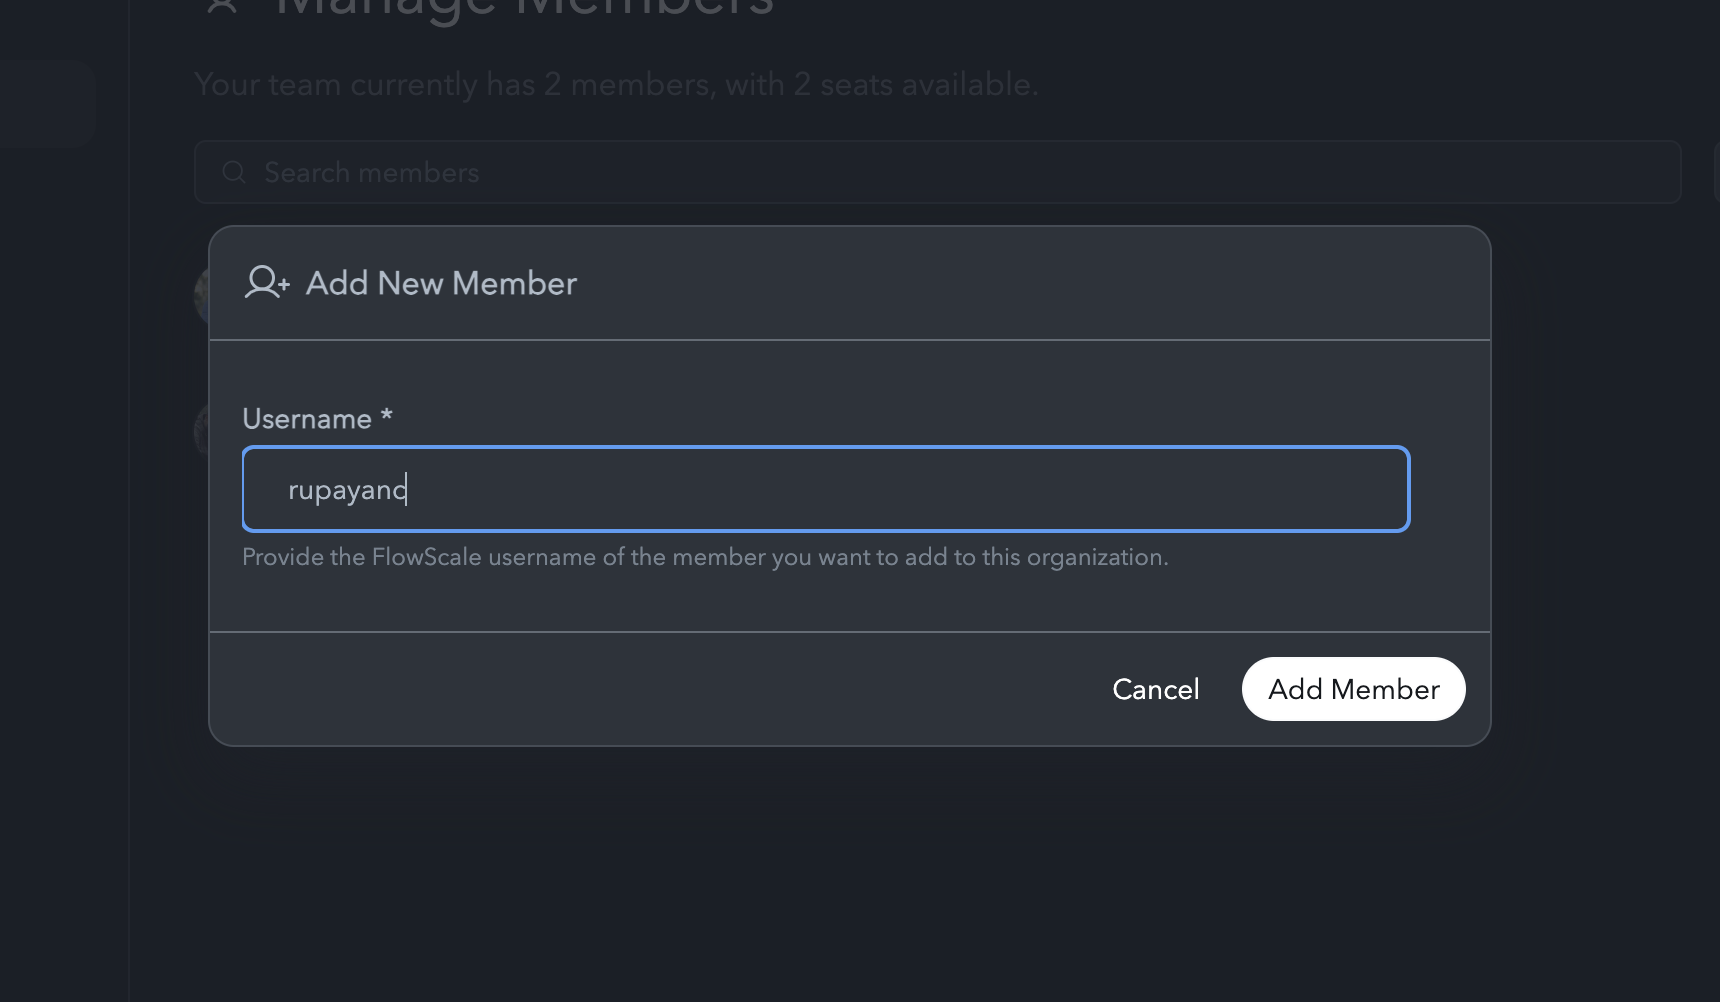
Provide Member's GitHub username
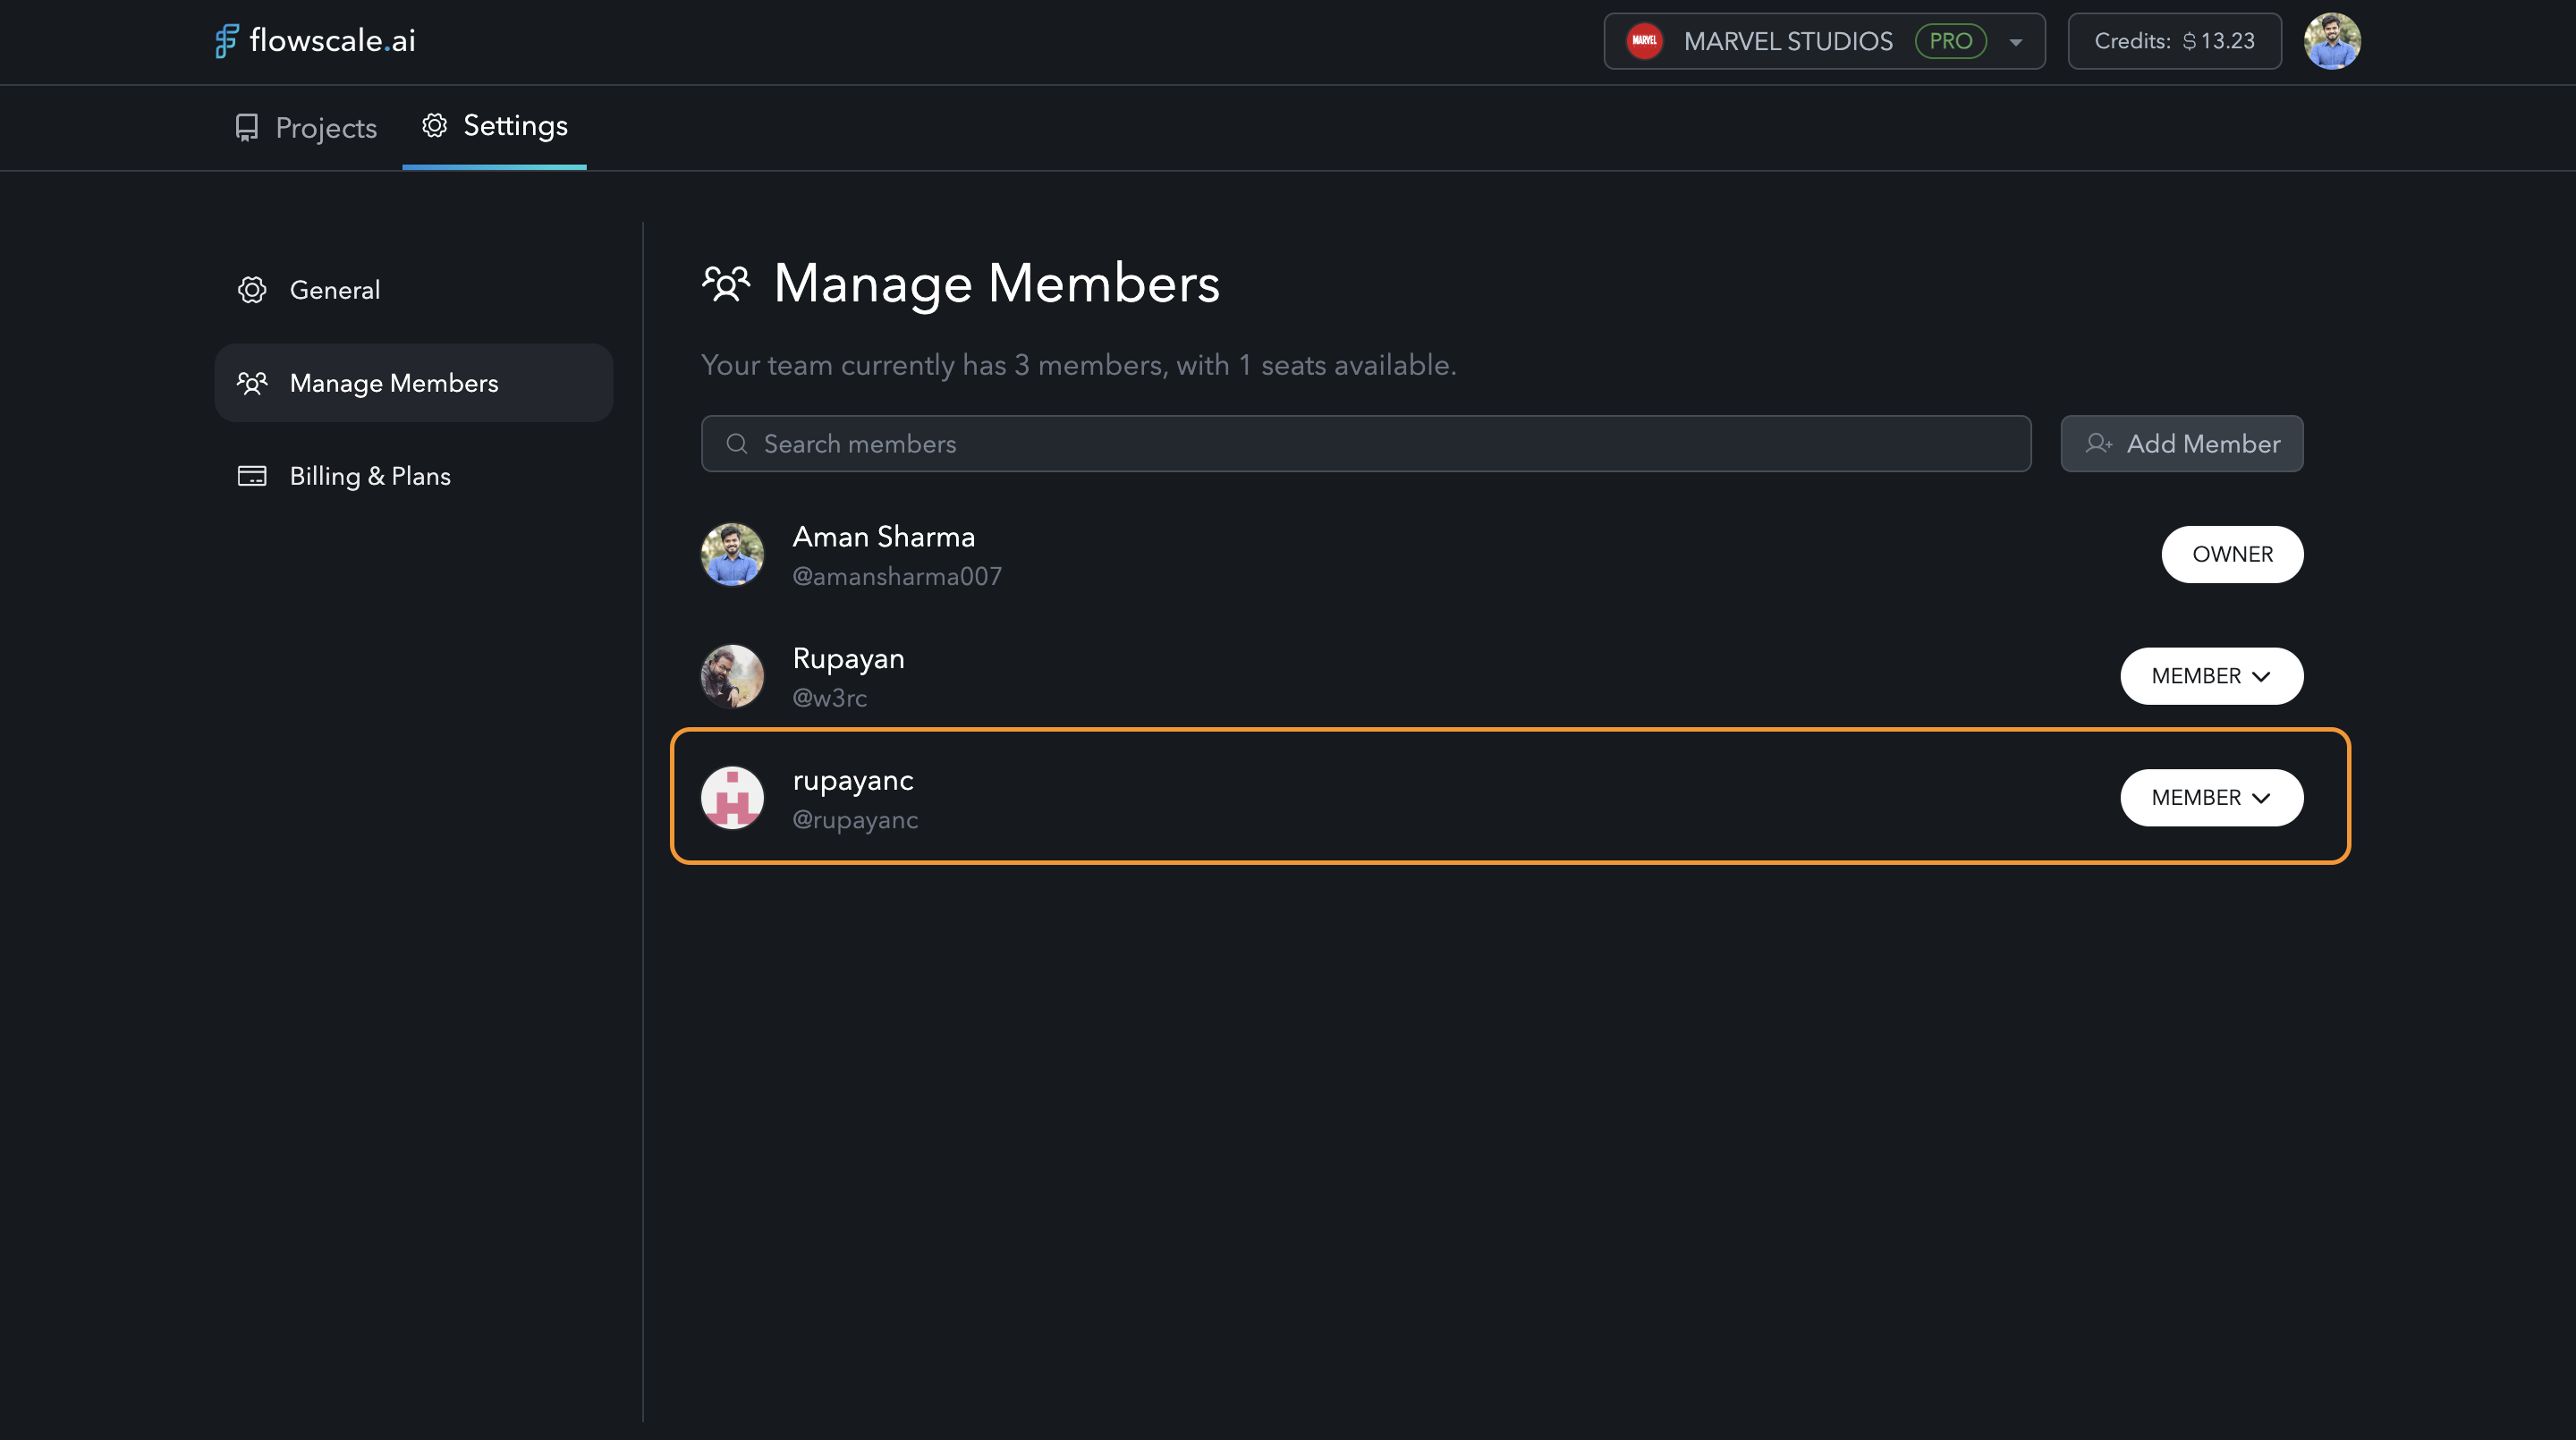
Member successfully added!
Roles and Permissions
- Owner: Has full administrative control over the organization. Can invite/remove team members, edit billing, and create projects.
- Member: Can only collaborate on projects they are added to. Members cannot manage billing, team, or organization settings.
3. Project Creation
Once your organization is set up and team members are added, you can begin creating projects to house your workflows.Steps to Create a Project
-
Access the Projects Page:
From the dashboard, navigate to the Projects section. Here, you’ll see two options:- Create ComfyUI Project: For starting a new project from scratch.
- Import Existing Project: For importing a project that already exists in GitHub. (This option is useful to import someone else’s project or a project you’ve worked on previously.)
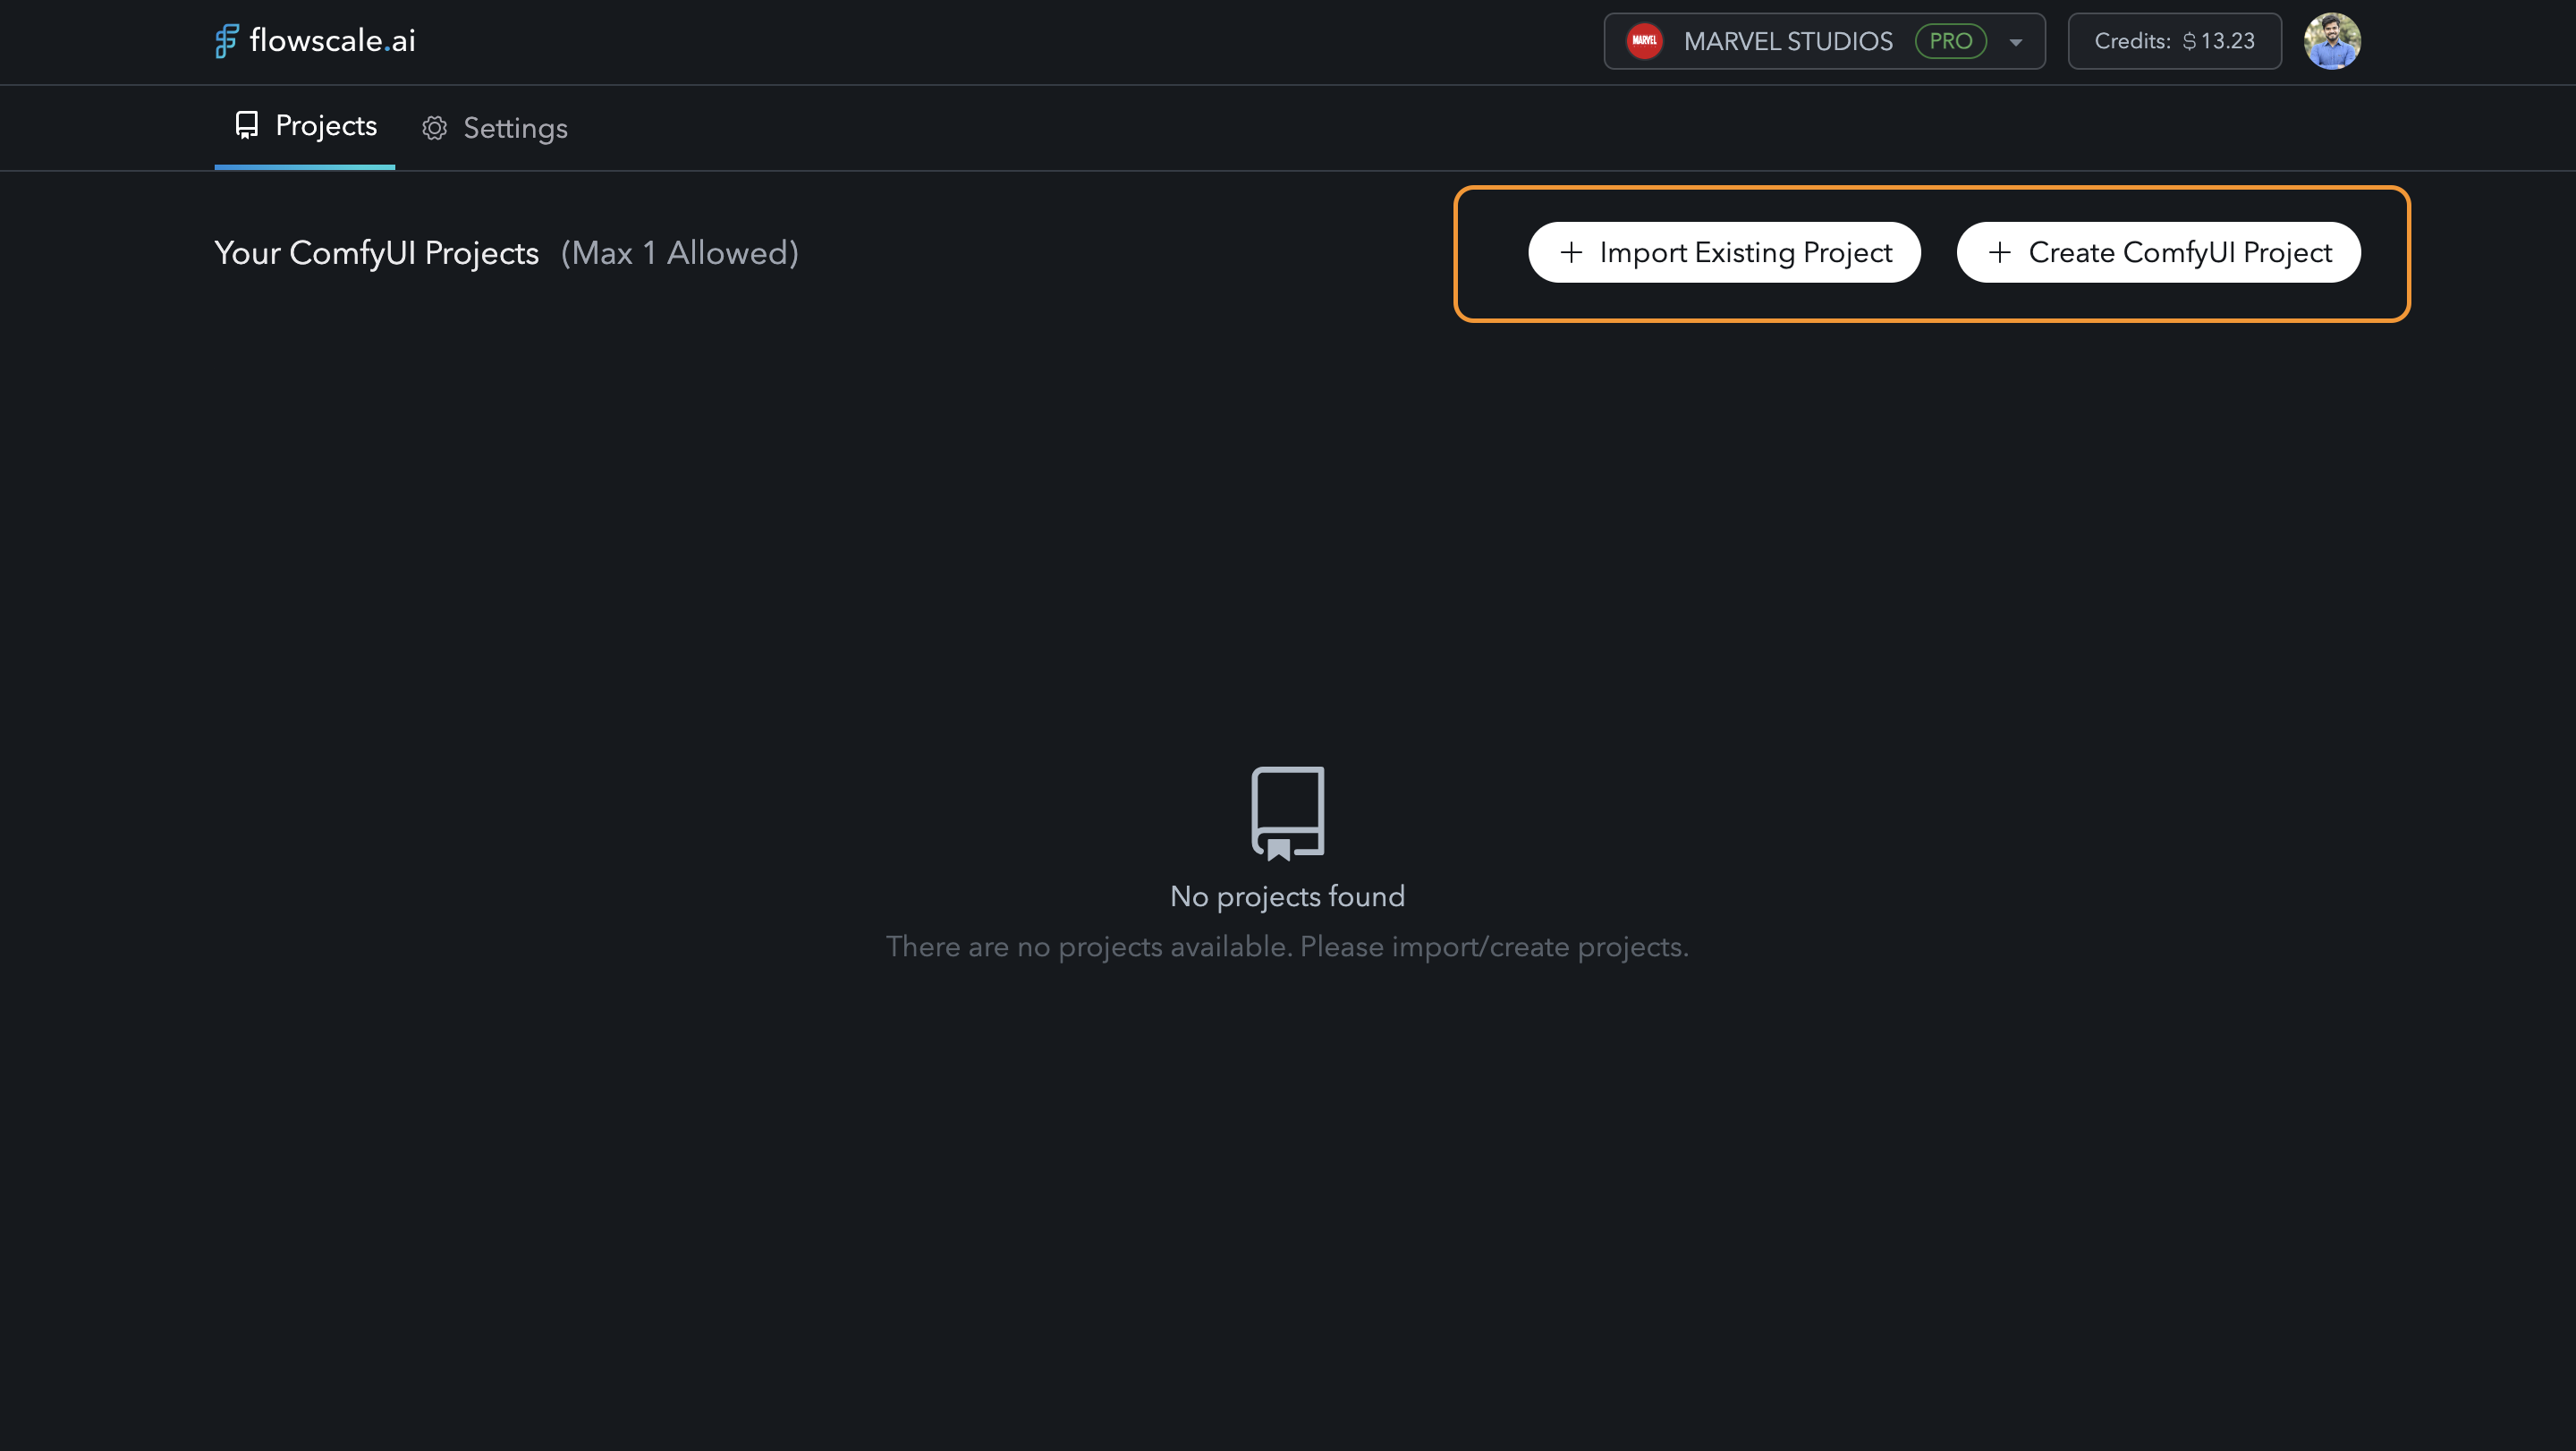
Get Started with Projects
-
Create a New ComfyUI Project:
- Click Create ComfyUI Project.
- A popup will prompt you to fill in the project name.
- Note: No spaces are allowed in project names. Use underscores (_) or hyphens (-) instead.
- Click Create. This action automatically creates a GitHub repository to store your workflow data.
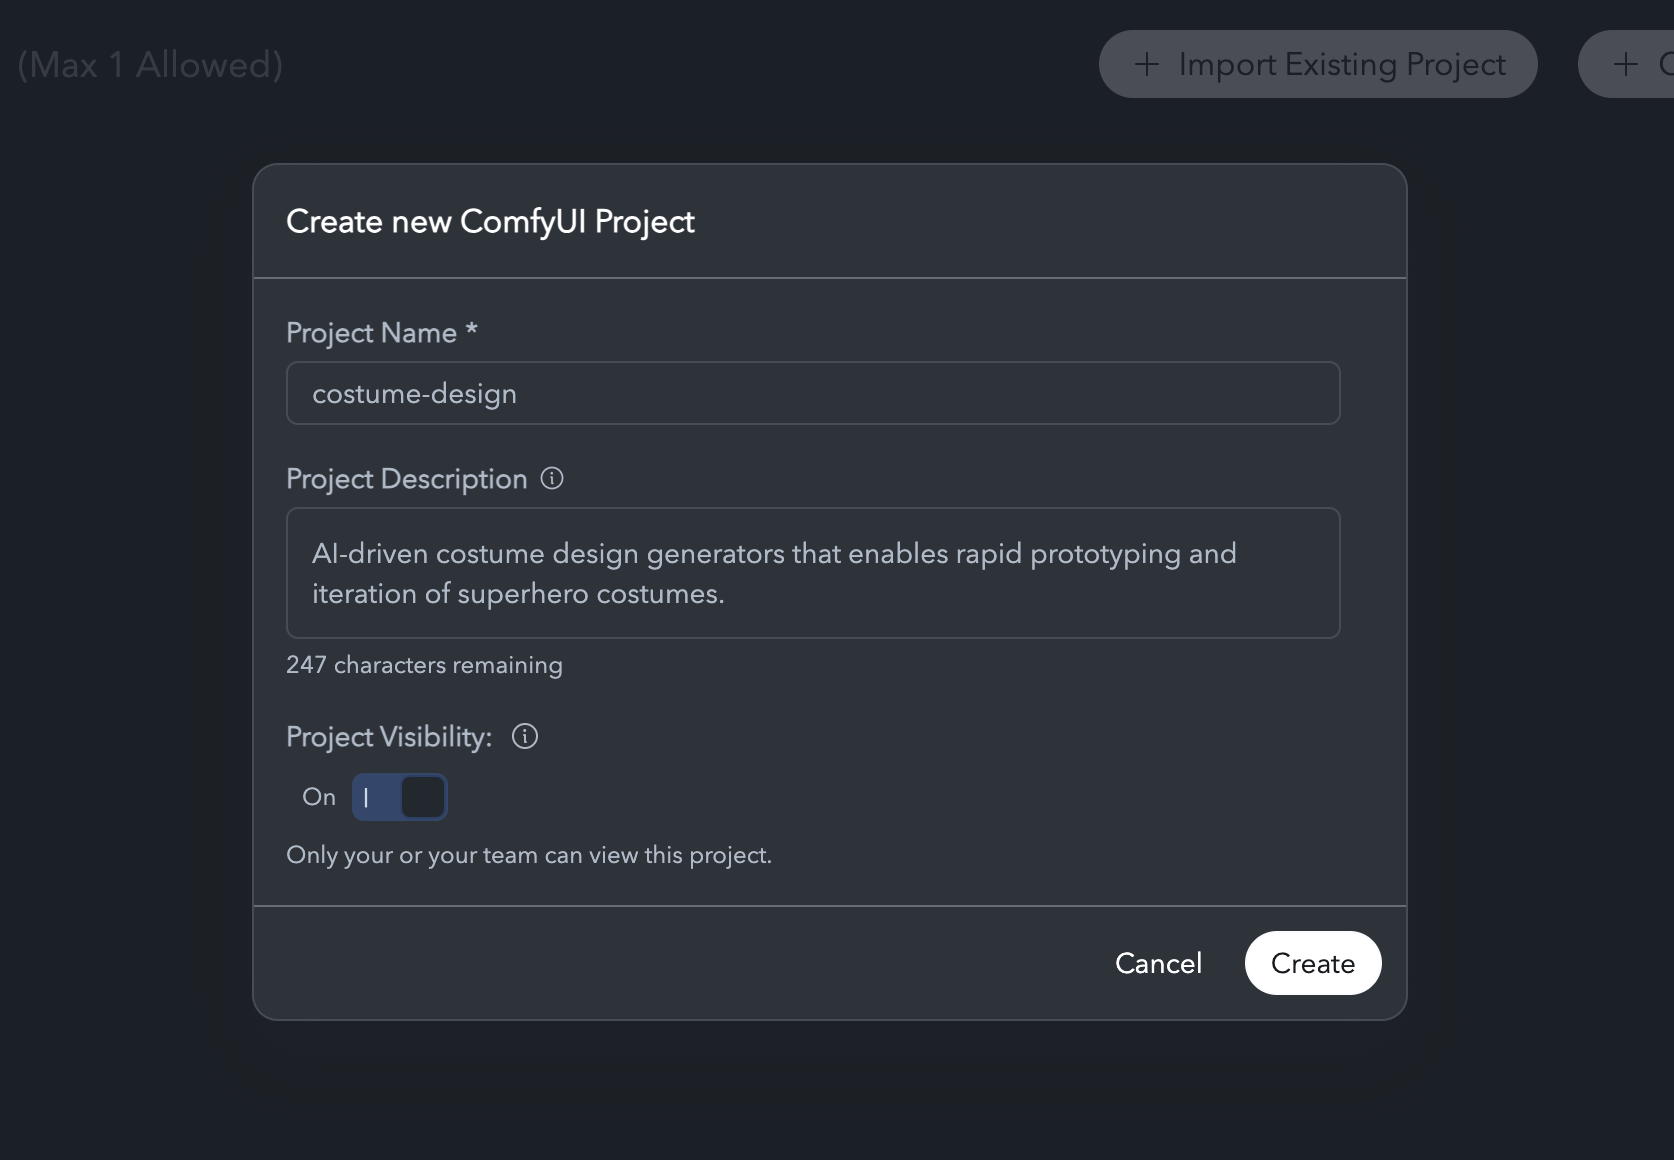
Create a Project

Project successfully created!
What Happens Behind the Scenes:
- When you create a project, FlowScale generates a GitHub repository in your account. This repository stores all your workflows, workflow configurations, and custom nodes list.
- This approach ensures full control and ownership of your data. You can own your workflows, without us having access to them, through GitHub, maintaining complete transparency and security.
4. Collaborator Management
After creating a project, you can add collaborators to work on it with you. Here’s how to manage your collaborators:Adding Collaborators to a Project
-
Open Project Settings:
In the project dashboard, click on Project Settings in the left-hand menu. You’ll see several tabs, including Project Collaborators.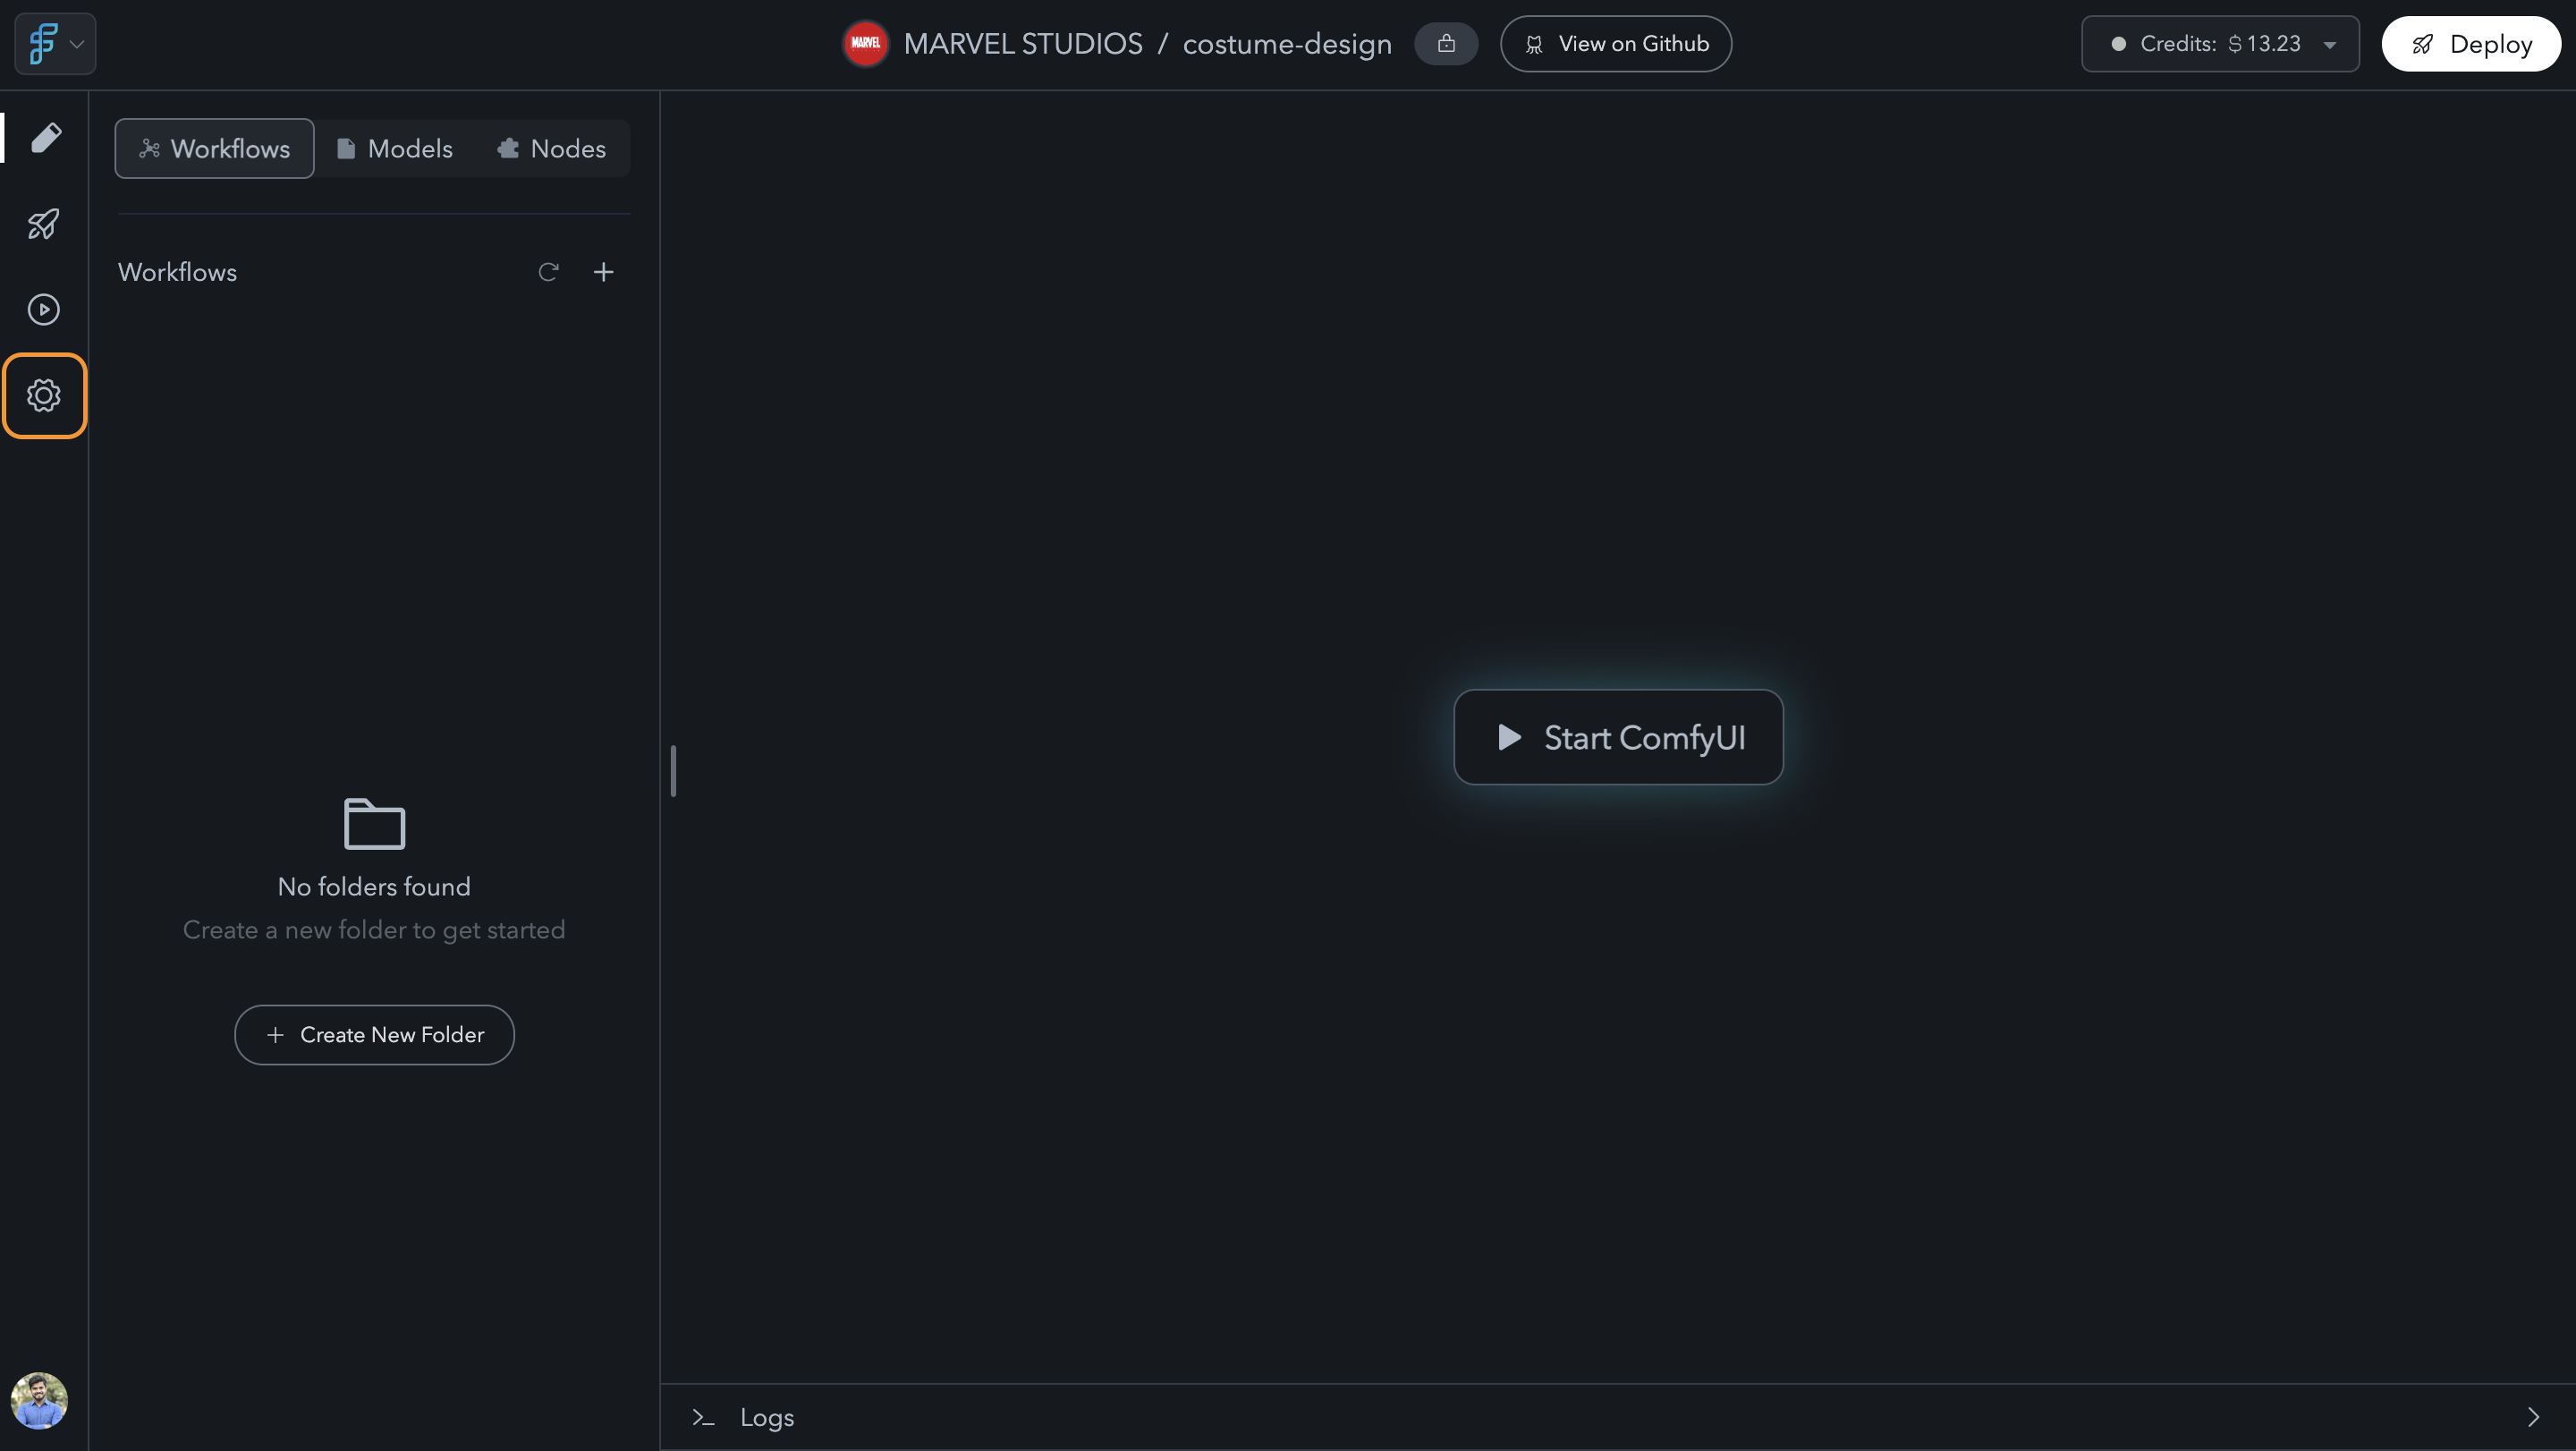
Project Page -> Settings
-
Add Collaborators:
Under Project Collaborators, click Add Collaborator. Enter the username of the team member you want to add and click Invite.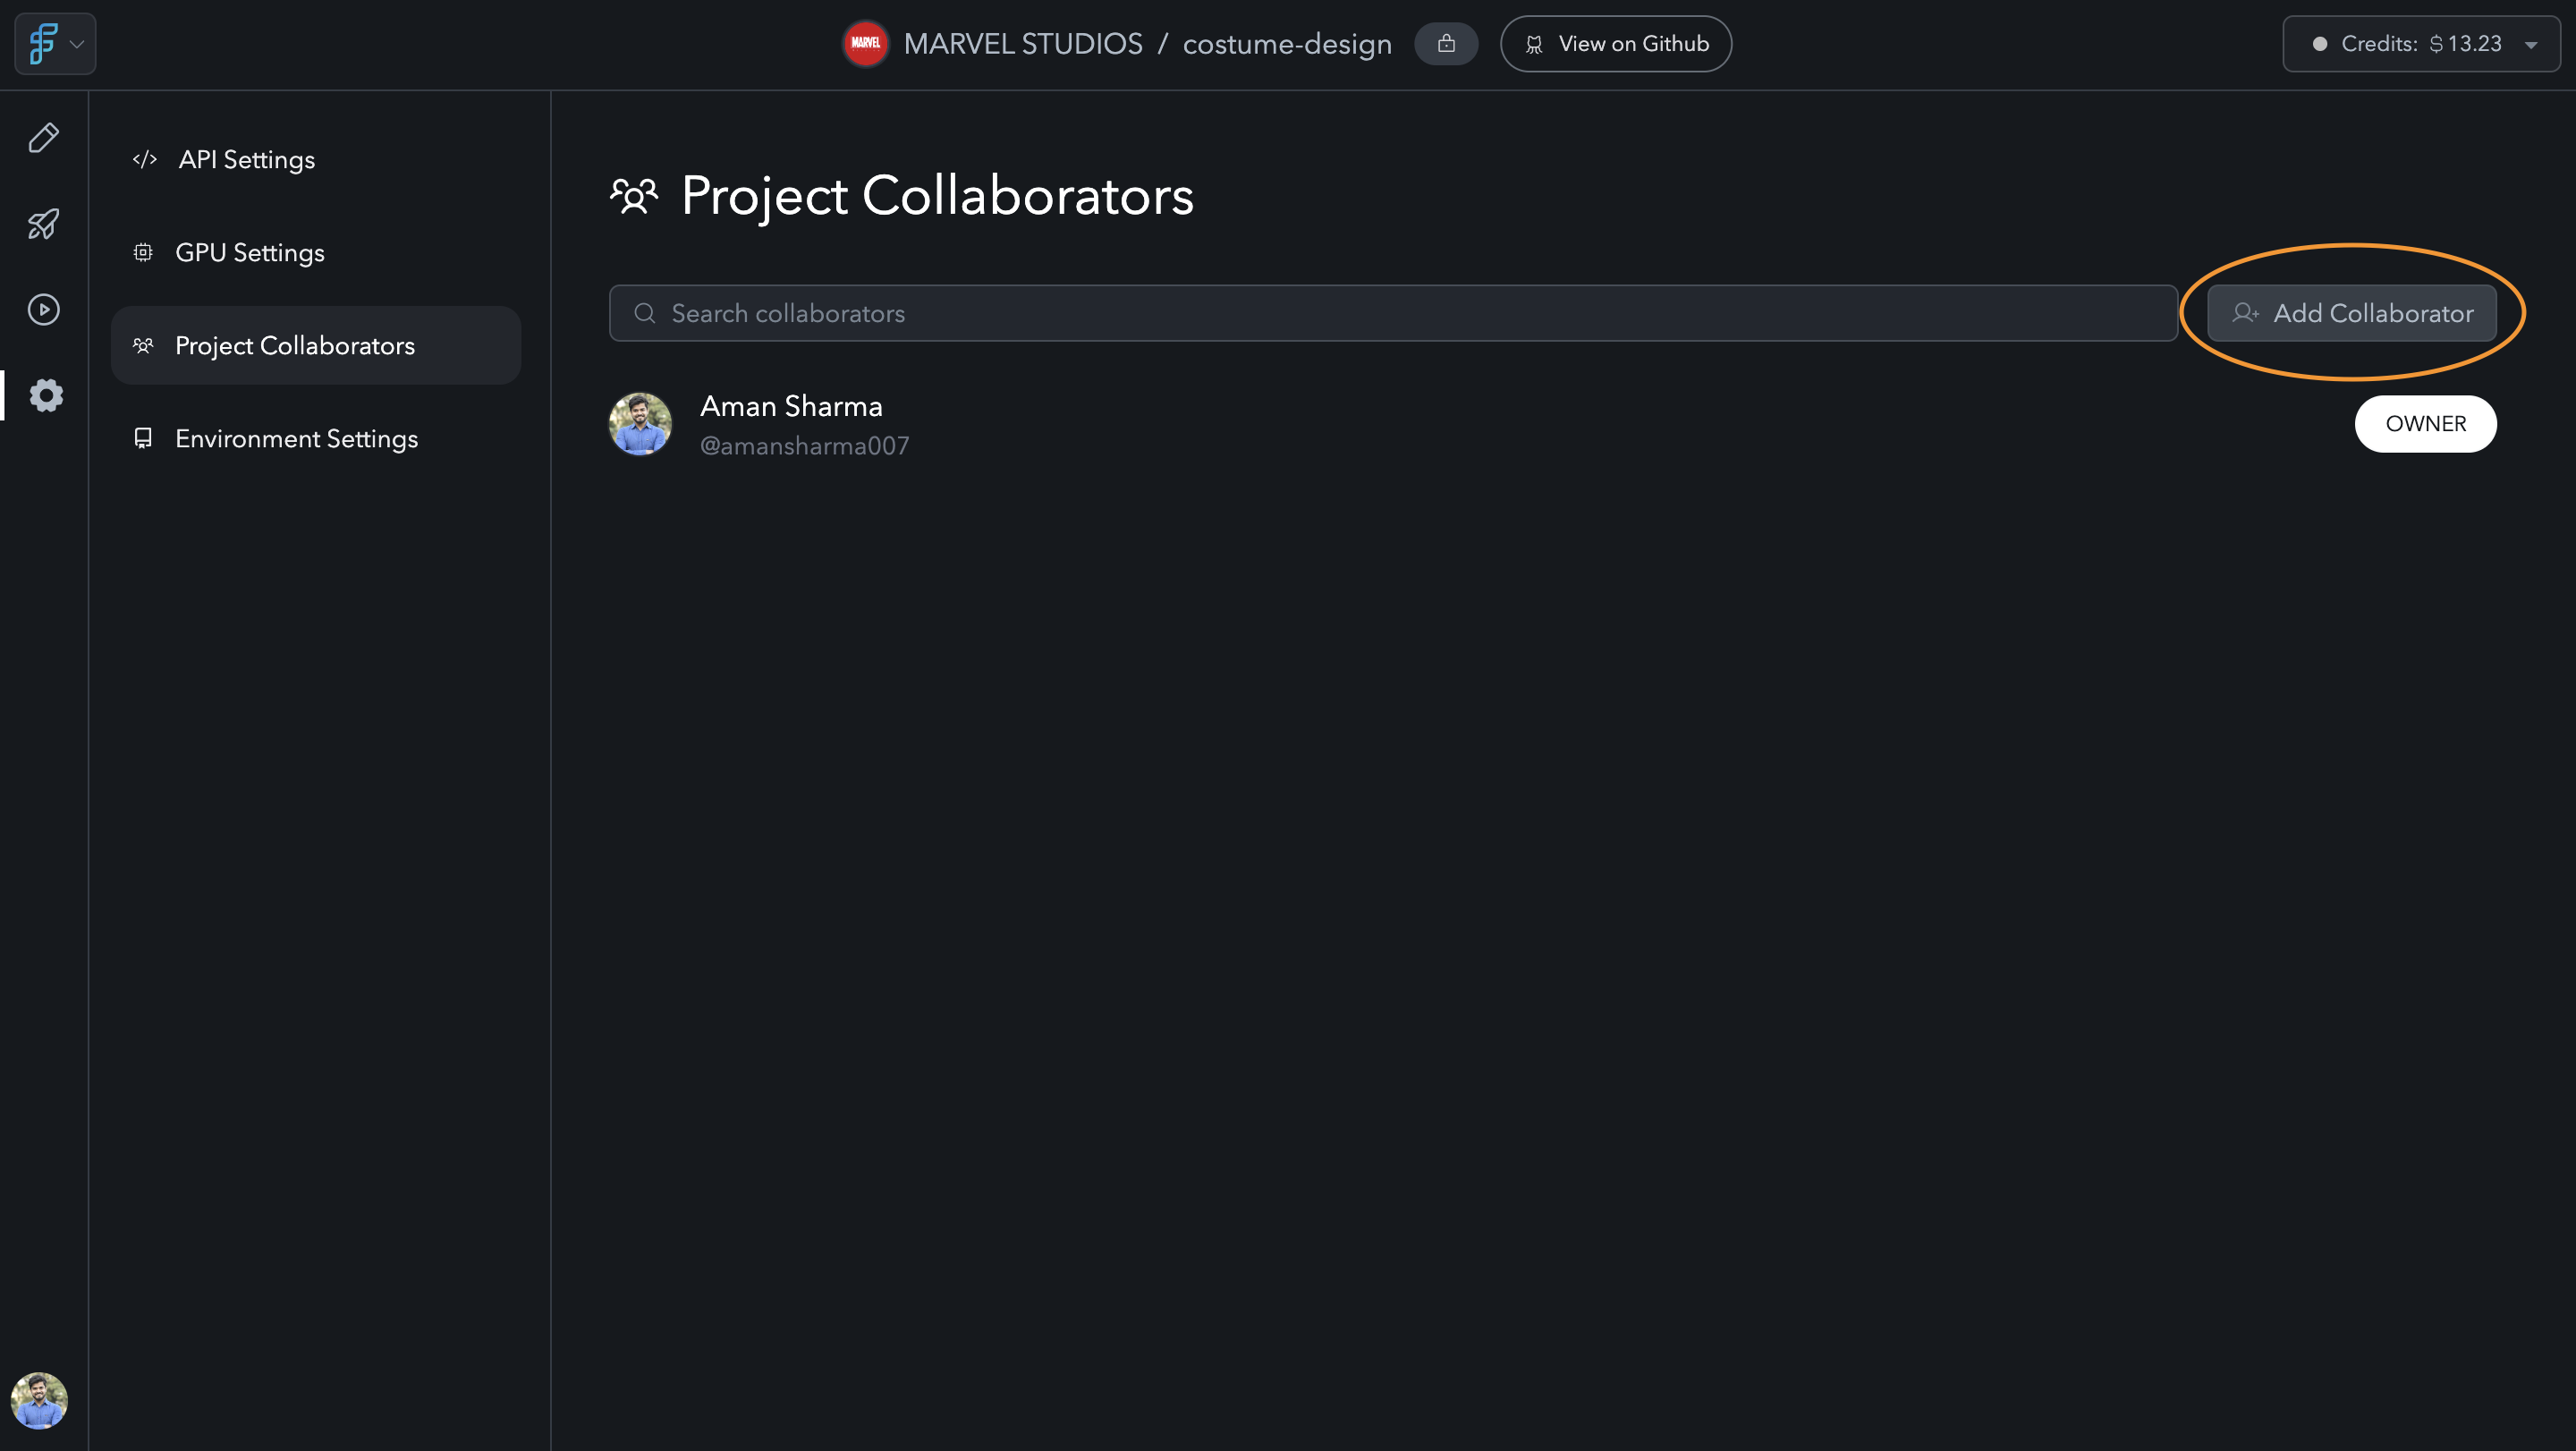
Project Settings -> Add Collaborators
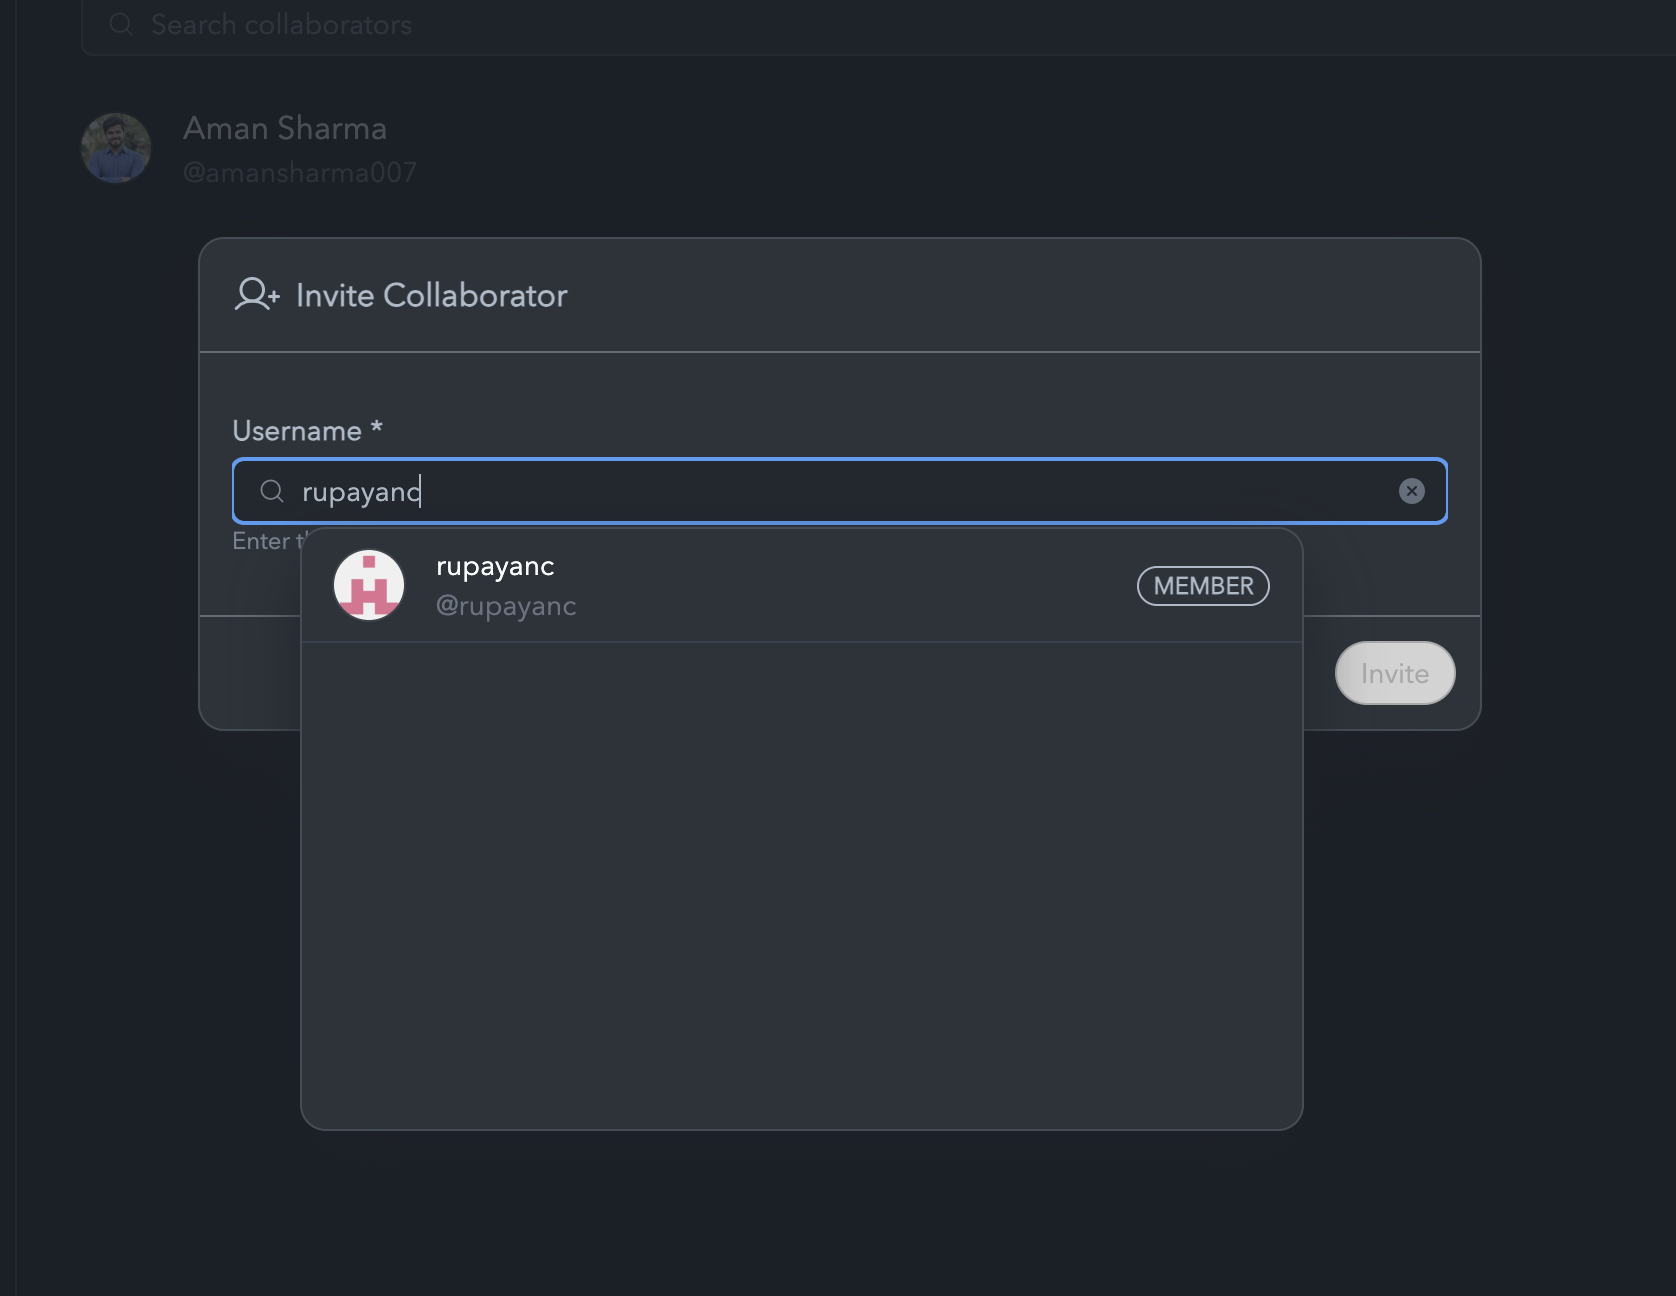
Project Settings -> Add Collaborators
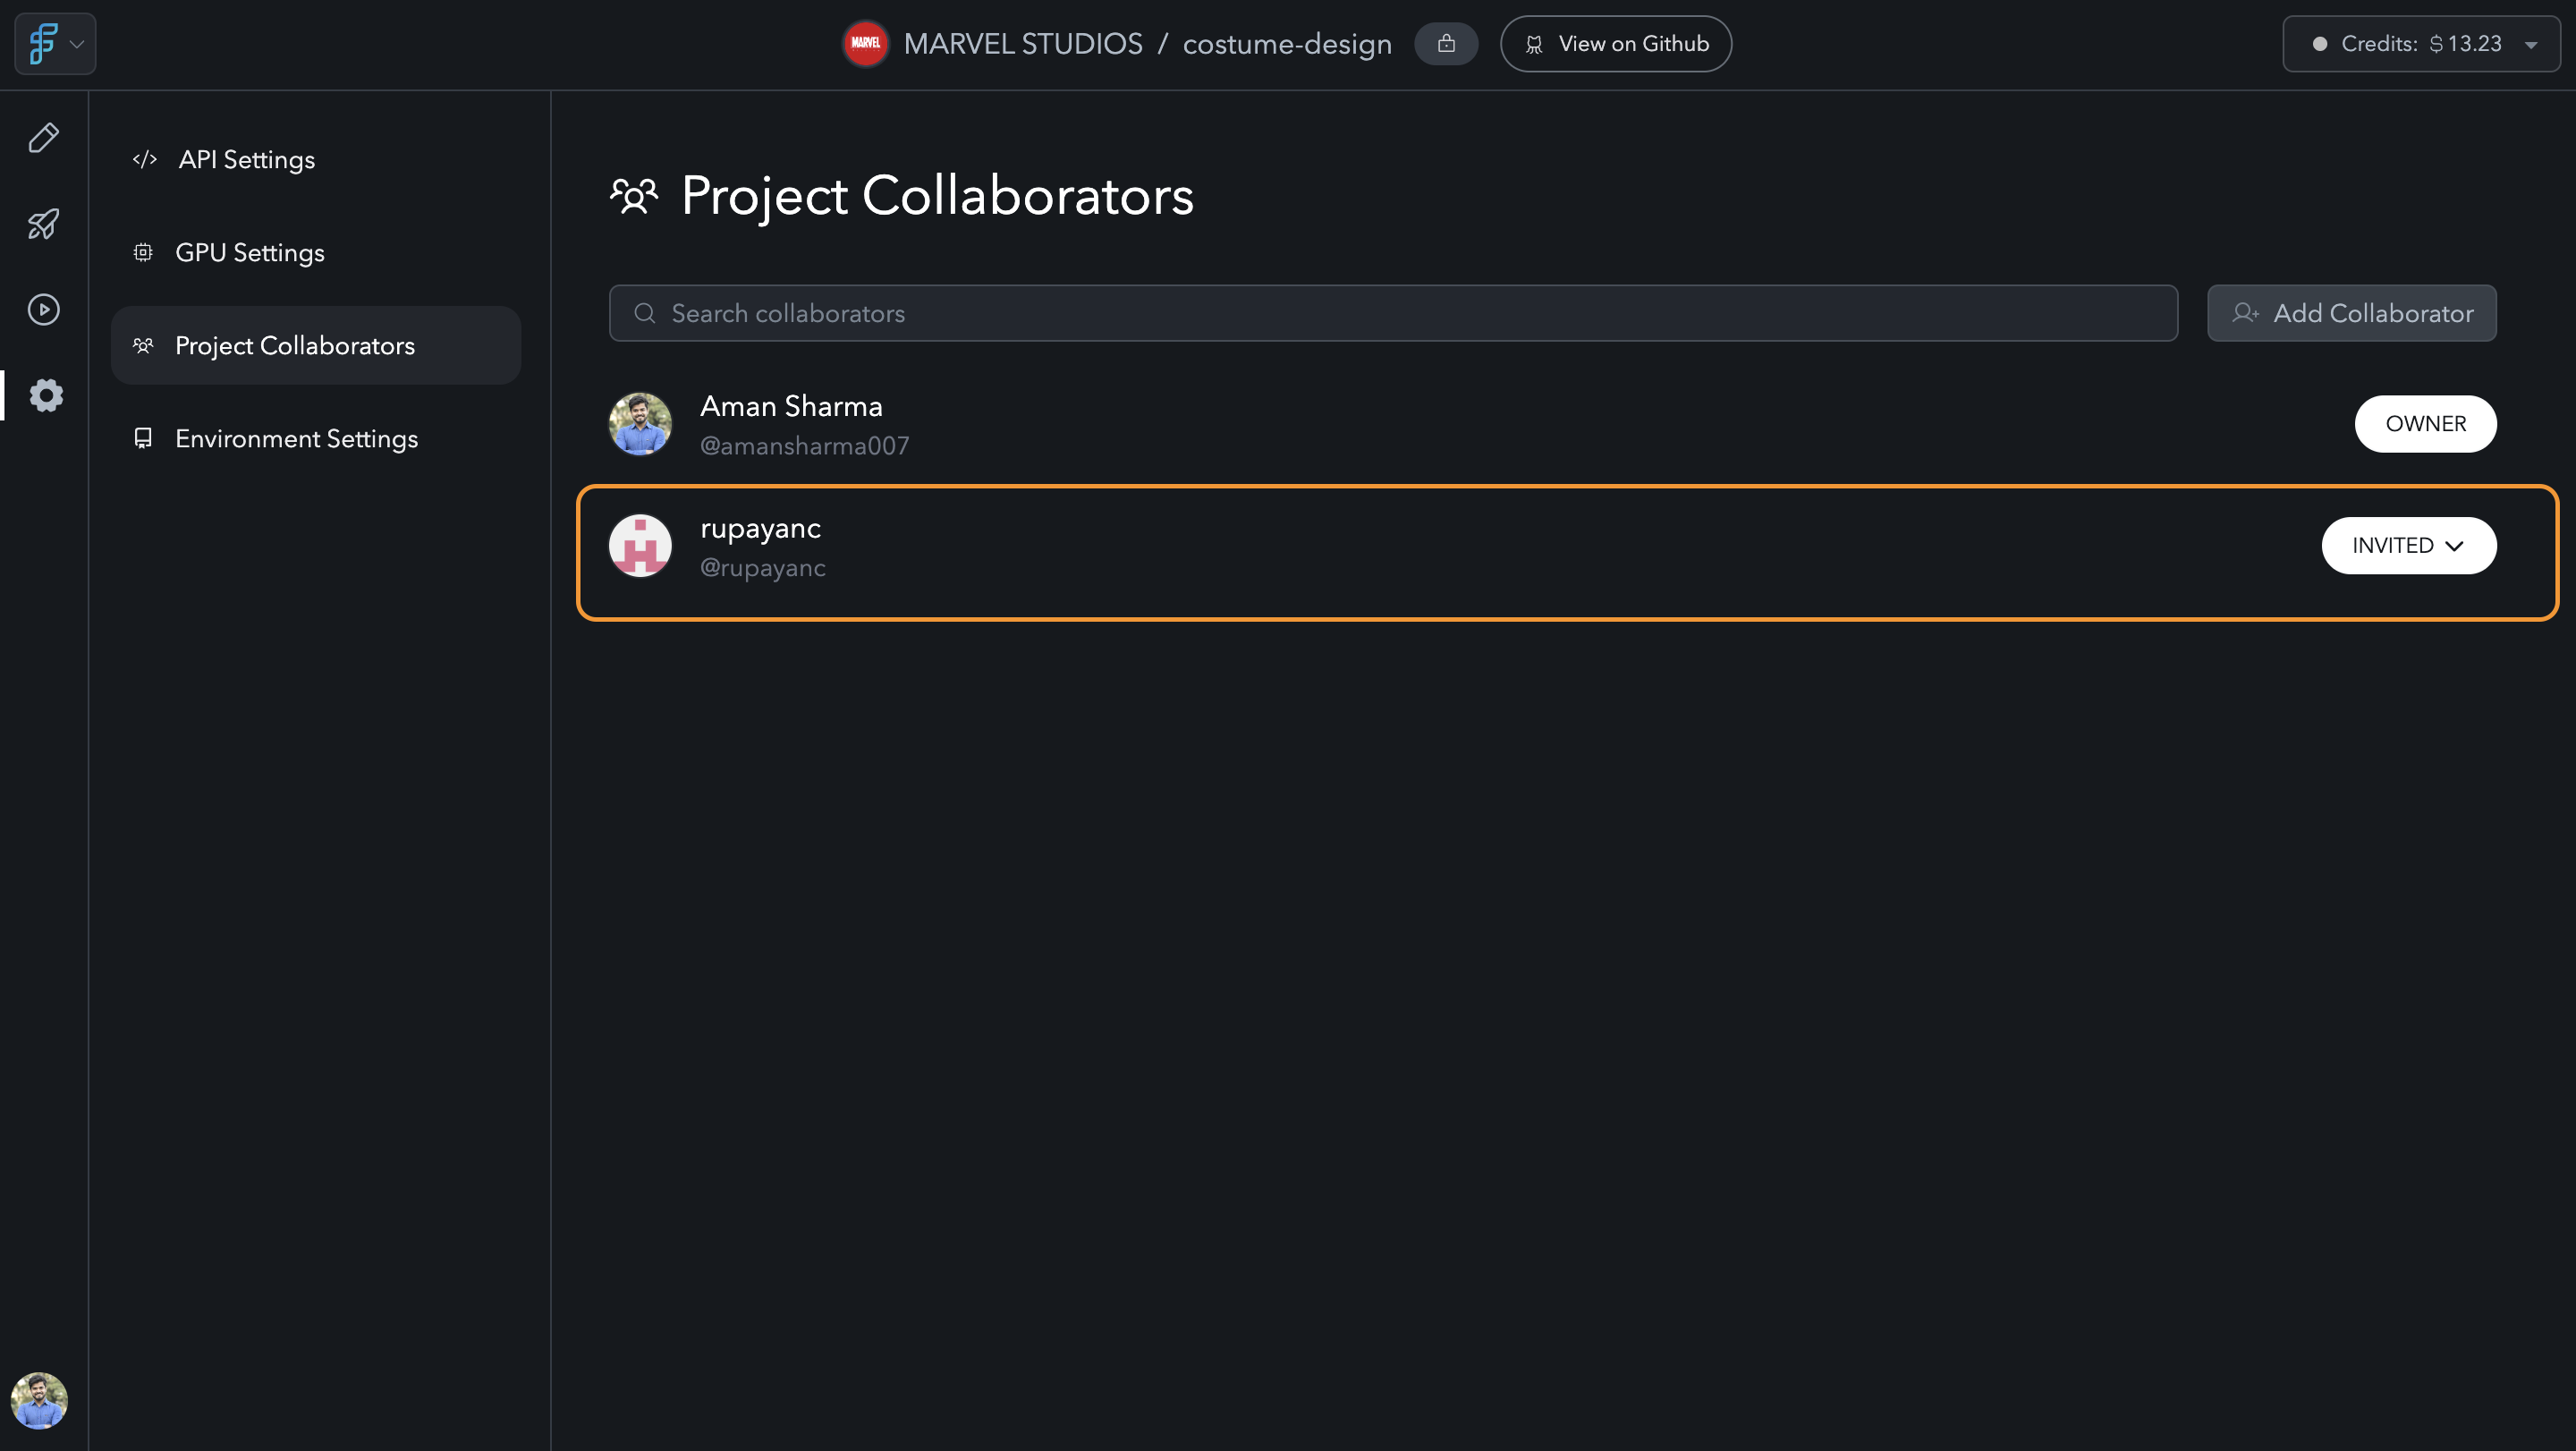
Project Settings -> Add Collaborators
-
GitHub Invitation:
Once the collaborator is invited, they will receive an email invitation from GitHub to access the project’s repository. The collaborator must accept the GitHub invitation to gain full access to the project within FlowScale.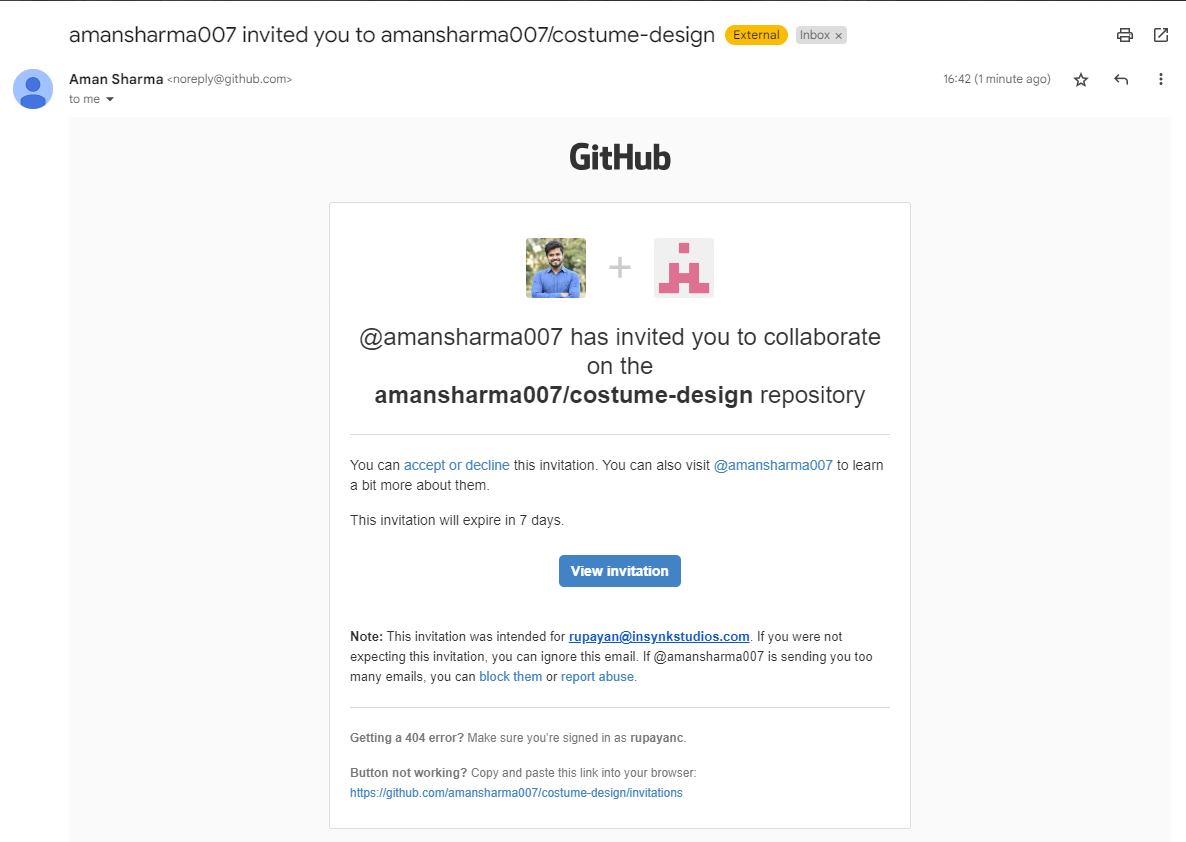
GitHub Collaborator Invitation
5. GitHub Integration
FlowScale relies heavily on GitHub for storing and managing workflow data. Here’s a summary of how the integration works:-
Data Storage:
Every project you create in FlowScale is backed by a GitHub repository. This ensures that your workflow data, and custom nodes are securely stored. -
Version Control:
GitHub’s versioning system allows you to manage multiple versions of your workflows. -
Collaborator Access:
When collaborators are added to a project in FlowScale, they are also added to the corresponding GitHub repository, ensuring they have access to all project data.

