What is the ComfyUI Workspace?
When you open a project in FlowScale AI, you enter the ComfyUI Workspace — your complete environment for building, testing, and managing generative AI workflows. Think of it as your personal AI laboratory where the familiar ComfyUI interface meets enterprise-grade cloud infrastructure.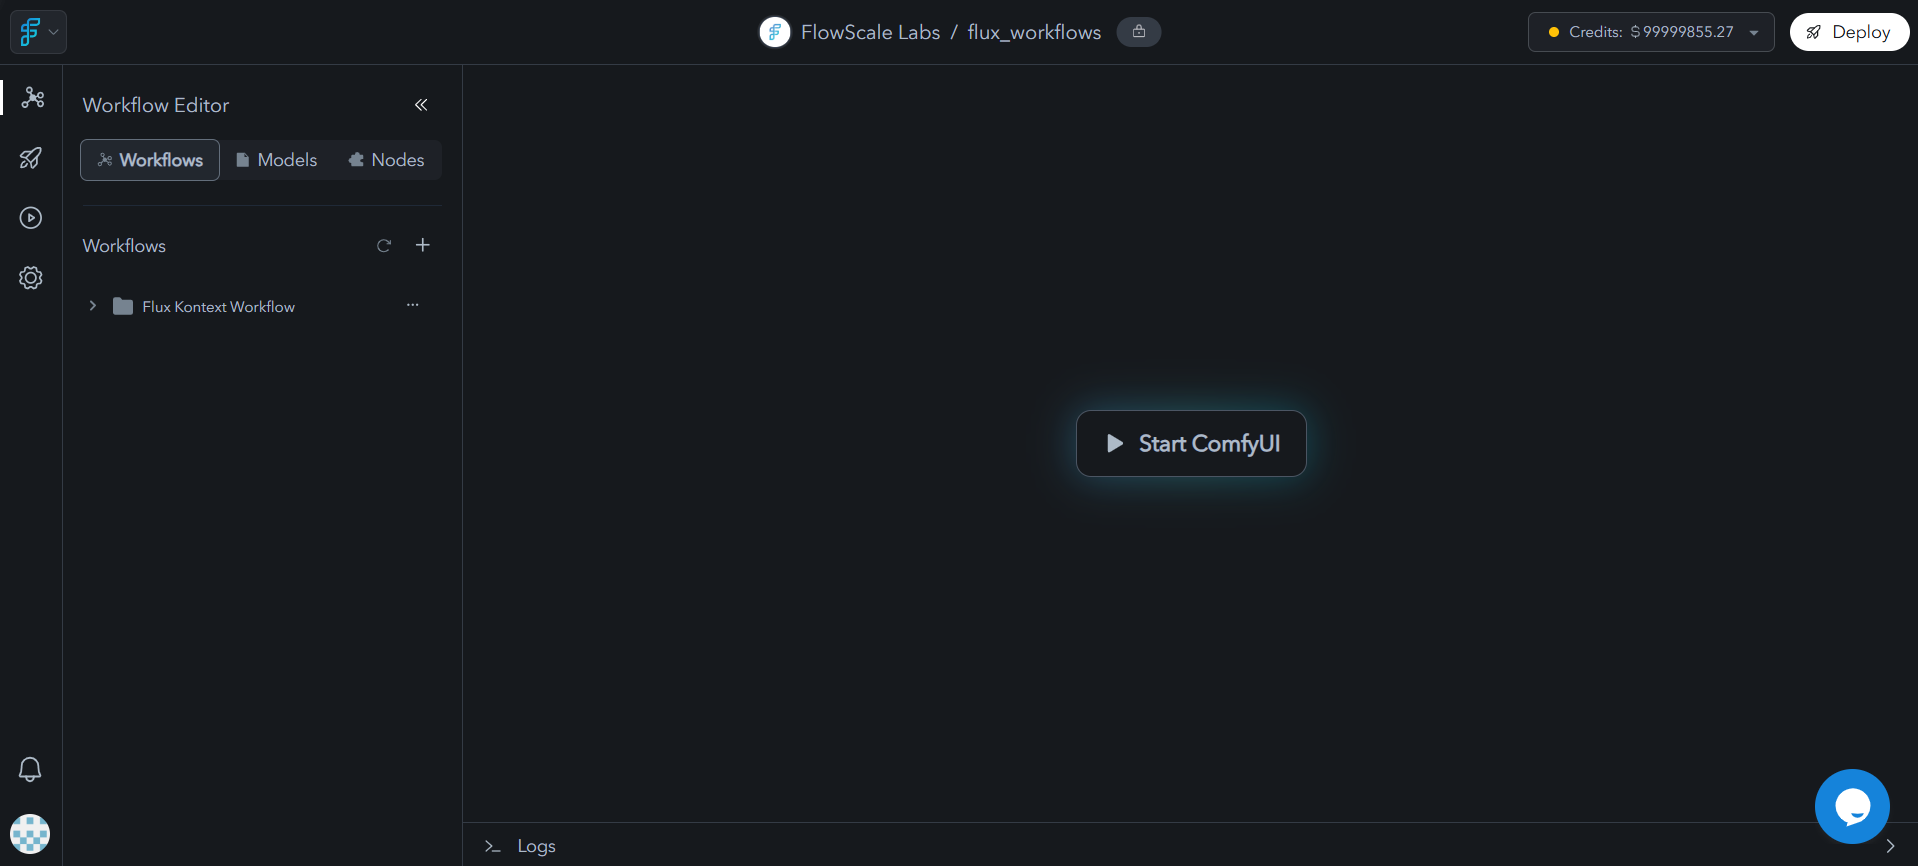
Understanding Your Workspace
Your workspace is thoughtfully organized into three key areas, each serving a specific purpose in your workflow development journey: Left Panel: Your Project Hub This is where you manage everything related to your project. The Workflows tab helps you organize your creations, the Models tab gives you access to your organization’s AI model library, and the Nodes tab manages the custom functionality your workflows depend on. Right Panel: Your Creative Canvas Here’s where the magic happens. After clicking “Start ComfyUI”, this area transforms into the full ComfyUI interface where you’ll design and test your AI workflows. Bottom Panel: Your Control Center Think of this as your mission control — buttons to save your work, toggle between CPU and GPU modes, run your workflows, and monitor everything through the logs.Your First Steps: Starting ComfyUI
Getting your creative environment up and running is straightforward. Here’s how your journey begins:The Launch Sequence
- Click “Start ComfyUI” in the right panel — this is your gateway to the creative process
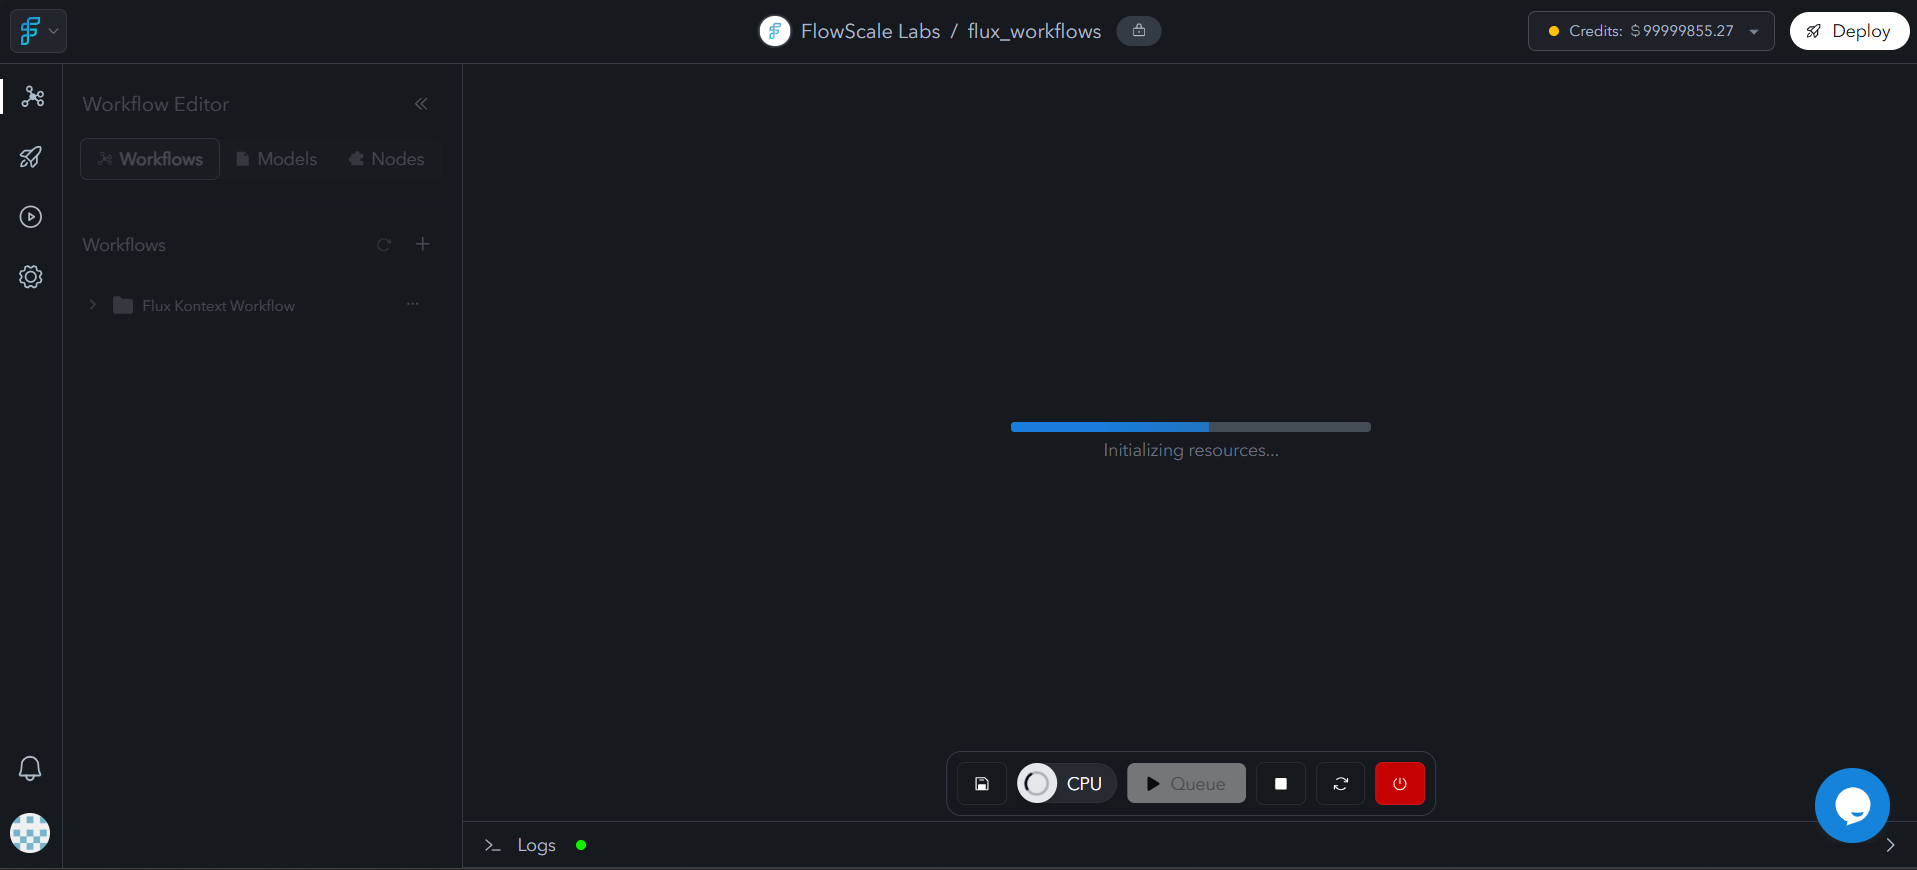
- Choose your computing power by selecting a Pod from the dialog
- Watch the magic happen as the system prepares your environment (you’ll see “ComfyUI resources are being prepared”)
- Enter your creative space as ComfyUI loads with a default workflow ready for your modifications
Mastering Your Control Center
Now that ComfyUI is running, let’s explore the control bar at the bottom — your command center for managing workflows efficiently and cost-effectively.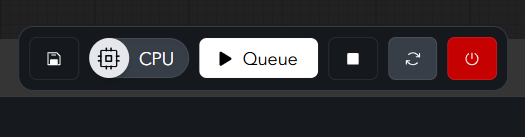
Save Button (💾) — Preserve Your Progress
Never lose your work. Click this after making changes to ensure your workflow modifications are safely stored in your project.CPU/GPU Toggle — Smart Resource Management
Here’s where FlowScale’s cost-effectiveness shines. Start in CPU mode ($0.14/hour) for workflow building and editing, then switch to GPU mode only when you need to run actual generations. This approach can save your organization significant costs while maintaining full functionality.Queue Button (White) — Bring Your Vision to Life
Ready to see your workflow in action? This button executes your current workflow, processing it through the entire pipeline with your specified inputs.Stop Button (Red Square) — Emergency Brake
Sometimes you need to halt a runaway process. This immediately stops any currently running generation, giving you back control.Refresh Button (🔄) — Reset and Reload
After installing new custom nodes or uploading models, refresh ComfyUI to make these new resources available in your workspace.Power Button (Red Circle) — Clean Exit
When you’re done working, this properly shuts down your ComfyUI session and frees up computing resources. You’ll need to restart ComfyUI when you’re ready to work again.Building Your Workflow Library
The Workflows tab is where your AI creations come to life and get organized. Whether you’re starting from scratch or bringing existing workflows into FlowScale, this is your creative command center.Starting Fresh: Creating New Workflows
Organize with Purpose Click the plus icon to create folders that make sense for your team — organize by project type, client, or development stage. A well-structured workspace saves time and reduces confusion as your library grows. Begin Creating The “Create New Workflow” button loads a default ComfyUI template, giving you a clean slate to build upon. It’s like having a prepared canvas waiting for your artistic vision.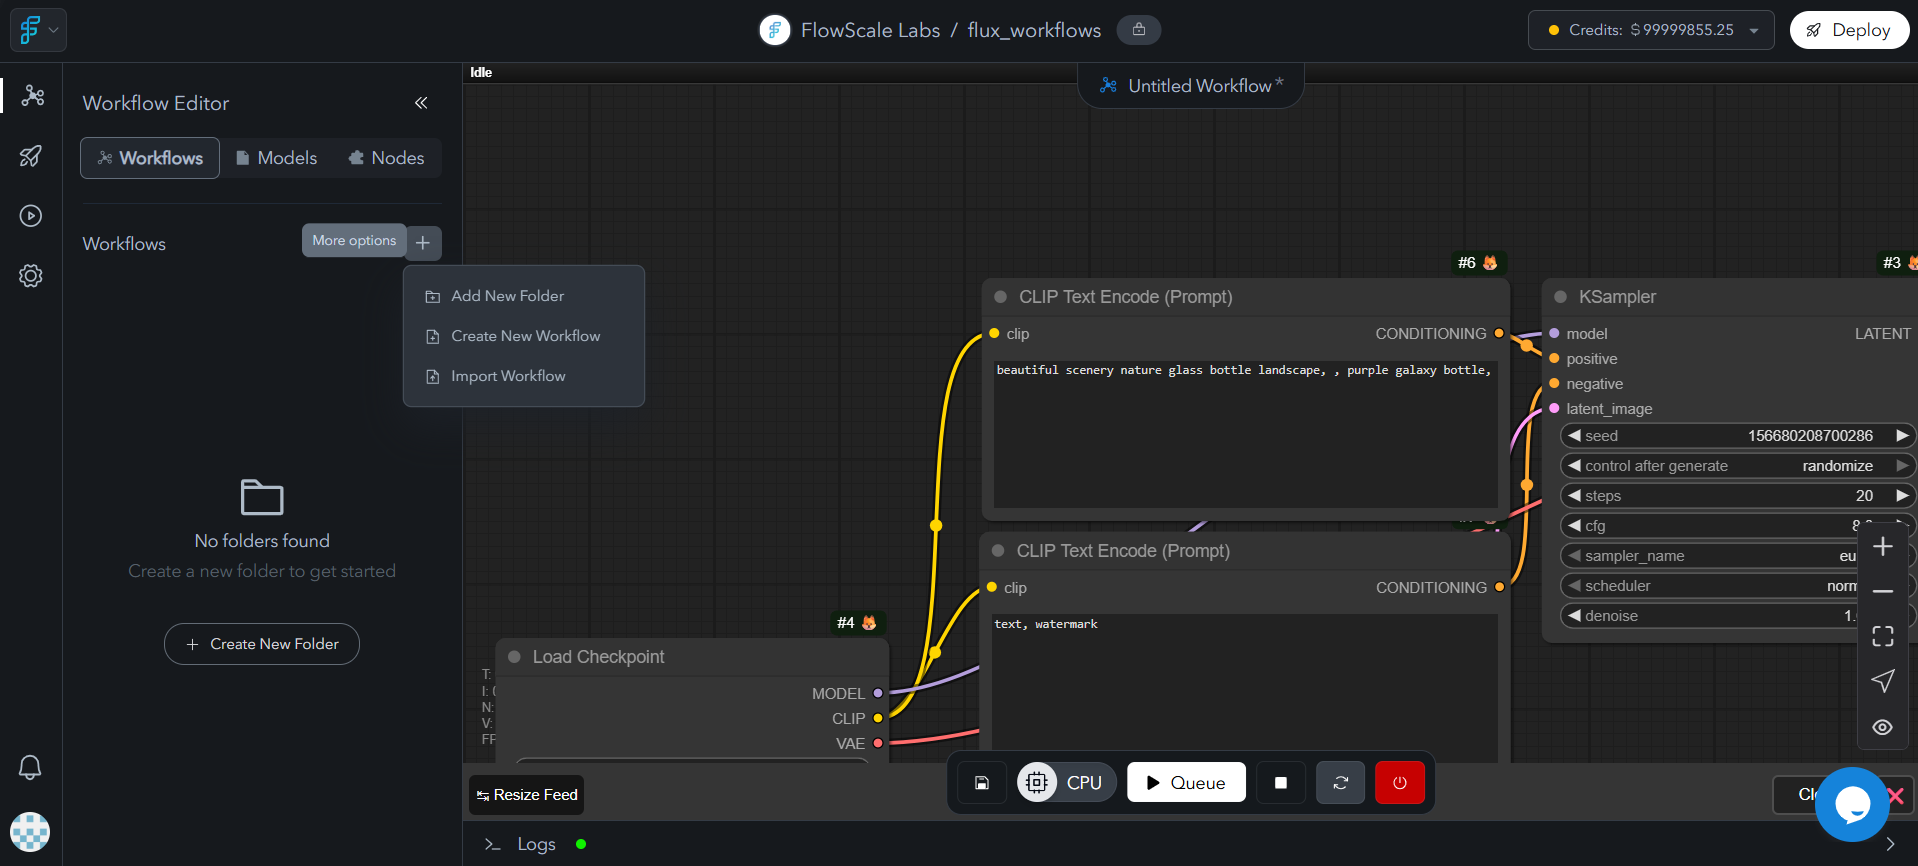
Bringing Existing Work: Import Workflows
Already have workflows you’ve built elsewhere? The import process is designed to be seamless:Step 1: Upload Your Creation

Step 2: Resolve Dependencies Intelligently

- Custom Nodes: Automatically detected and pre-selected
- Conflicting Nodes: When multiple repositories have similar names, choose the right one
- Missing Nodes: Provide GitHub URLs for nodes that couldn’t be found automatically
Managing Your Growing Library
As your workflow collection expands, the three-dot menu on each item gives you essential management options: rename for clarity, download for backup, or delete when no longer needed. The visual indicators (red cross or green checkmark) instantly show you which workflows are ready for API deployment.Accessing Your AI Arsenal: Models and Custom Nodes
Models Tab: Your Organization’s AI Library
The Models tab brings your organization’s entire AI model collection directly into your workspace. It’s the same powerful interface you’d find in the global Models section, but conveniently located where you’re actively building workflows. This means while you’re deep in creative flow, you can quickly browse, add, or manage the AI models your workflows depend on — without leaving your workspace. For detailed model management guidance, see our Models documentation.Nodes Tab: Extending Your Capabilities
Think of custom nodes as specialized tools that expand what your workflows can accomplish. The Nodes tab manages these extensions, ensuring your workflows have all the functionality they need.Automatic Management
When you import workflows, any required custom nodes appear here automatically. You can see what’s installed, what’s needed, and the status of each dependency at a glance.Adding New Capabilities Manually
Sometimes you’ll want to add custom nodes for future projects or specific functionality:- Click the plus button and select “Add Custom Node”
- Search by name for popular nodes, or provide a GitHub repository URL for specific ones
- Configure advanced settings if needed:

Working Smart: Best Practices for Success
As you become more comfortable with the ComfyUI Workspace, these practices will help you work more efficiently and avoid common pitfalls:Resource Management That Saves Money
- Start in CPU mode for all your workflow building and editing work
- Switch to GPU only when you need to run actual generations
- Stop ComfyUI sessions when you step away — this frees up resources and keeps costs down
Organization That Scales
- Create descriptive folder names that your future self (and teammates) will understand
- Use clear workflow names that indicate their purpose or use case
- Save your work regularly — make it a habit after any significant changes
Dependency Management That Prevents Headaches
- Import all required custom nodes during the workflow import process
- Test workflows immediately after importing to catch dependency issues early
- Document special requirements so team members know what’s needed
Your Journey Starts Here
Ready to begin your AI workflow adventure? Here’s your roadmap:- Open your project in FlowScale AI and familiarize yourself with the workspace layout
- Start ComfyUI by selecting a pod that matches your current needs
- Create your first workflow or import an existing one to get hands-on experience
- Install any required custom nodes to ensure everything works smoothly
- Test your workflow with sample inputs to verify everything functions correctly
- Save your work regularly and establish good organizational habits from the start