TL;DR: A Pod is a cloud GPU machine managed by FlowScale AI that powers your ComfyUI workspace and any APIs/playgrounds you deploy from a project. Pods give you fine‑grained control over cost, performance, access, and scale—all without having to provision infrastructure yourself.
Why Pods Exist
Run ComfyUI
Every FlowScale AI project needs an attached pod to spin‑up a ComfyUI workspace in the cloud
Serve APIs & Playgrounds
Deploy workflows as API endpoints with a Playground UI
Scale on Demand
Serverless GPU containers that scale automatically based on traffic
Key Concepts
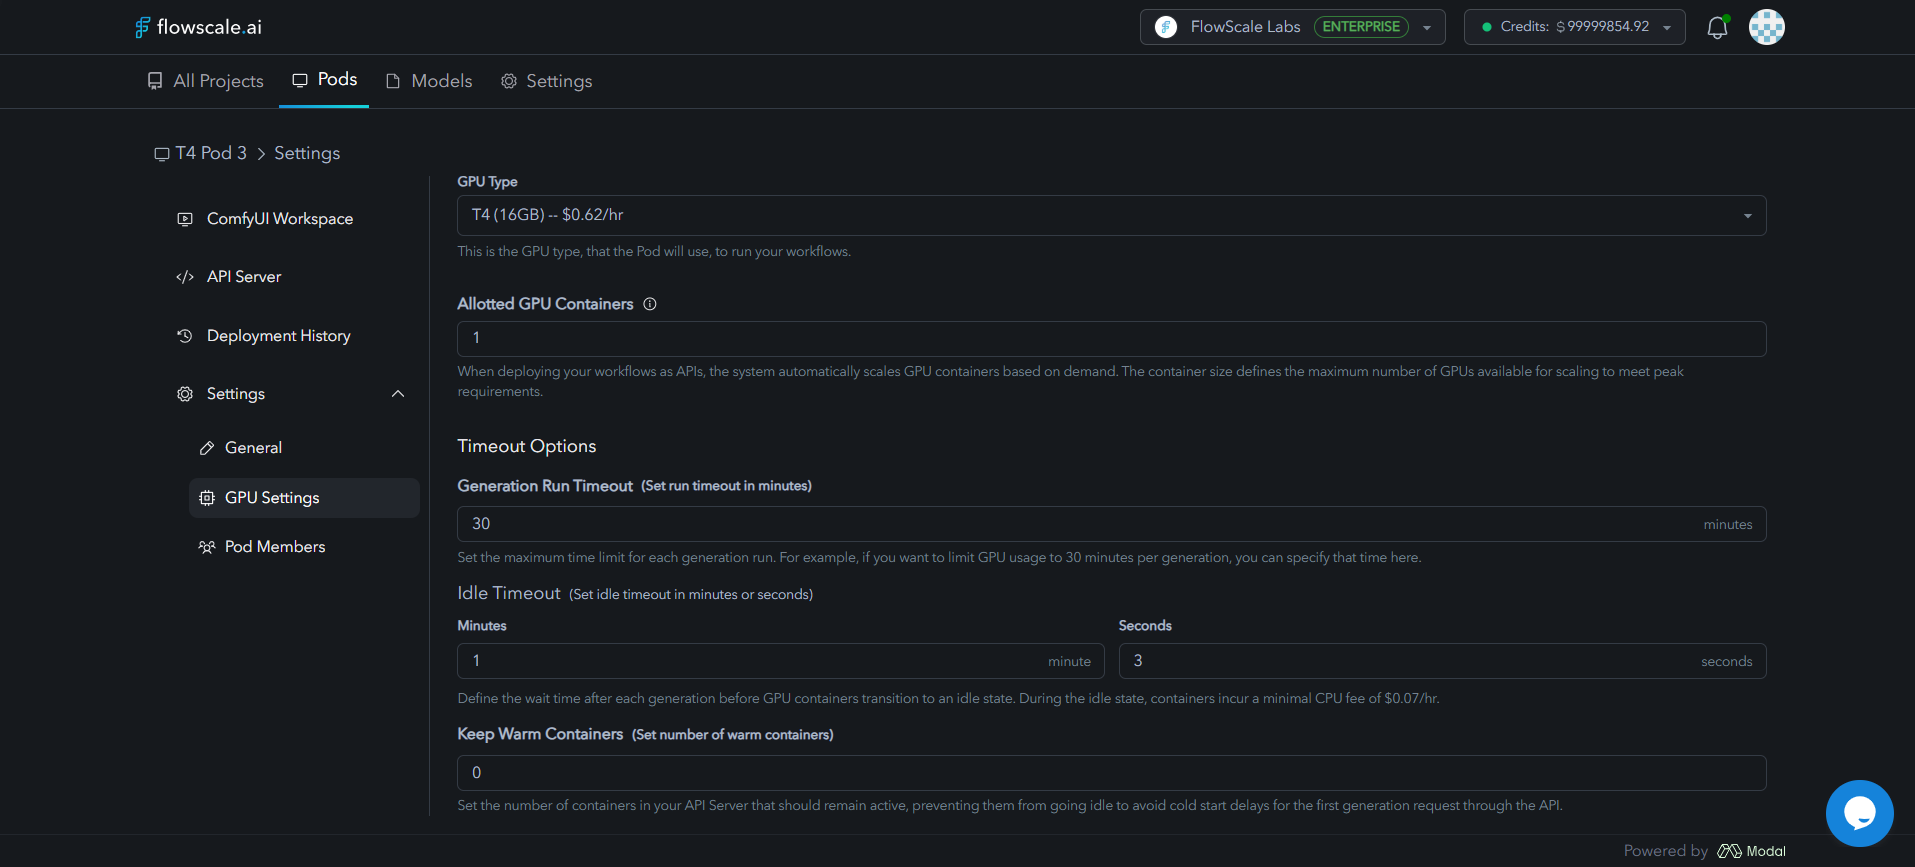
GPU Type
GPU Type
The graphics card model used by the pod (e.g. T4 16GB, A10G 24GB, L40S 48GB, A100 40GB, A100 80GB, H200 141GB, B200 180GB). Each model has a different $/hr rate.
Allotted GPU Containers
Allotted GPU Containers
The maximum number of GPU workers the pod can burst to during high load.
Idle Timeout
Idle Timeout
Time a container waits after a generation before parking (→ $0.07/hr CPU fee only).
Cold Start
Cold Start
The first request that wakes an idle container. Adds ~10‑20s latency depending on model size.
Warm Containers
Warm Containers
Containers you pin always‑on. Great for latency‑sensitive use cases; incurs full GPU cost 24/7.
Run Timeout
Run Timeout
Hard cap (in minutes) on a single generation. Prevents runaway jobs & surprise bills.
Credit Budget
Credit Budget
Optional soft‑limit that stops the pod once the specified credit amount is consumed.
Pod Types & GPU Configurations
T4 - 16GB VRAM
Best for: Development, simple workflows, testingPerfect for getting started and lightweight image generation tasks
A10G - 24GB VRAM
Best for: Enhanced development, moderate workloadsCost-effective option with improved performance over T4
L4 - 24GB VRAM
Best for: Standard image generation, medium workloadsBalanced performance for most production use cases
L40S - 48GB VRAM
Best for: Advanced image/video generation, large modelsHigh-memory GPU for complex multi-modal workflows
A100 - 40GB VRAM
Best for: Complex workflows, large model trainingHigh-performance computing for demanding AI tasks
A100 - 80GB VRAM
Best for: Massive models, extensive batch processingMaximum A100 memory for the largest workloads
H100 - 80GB VRAM
Best for: Largest models, real-time inferenceTop-tier performance for the most demanding workloads
H200 - 141GB VRAM
Best for: Massive models, extreme workloadsMaximum memory capacity for the largest AI models
B200 - 180GB VRAM
Best for: Next-generation AI inference, cutting-edge modelsLatest architecture with massive memory for breakthrough AI performance
Creating a Pod
Pod Settings Configuration
Navigate to Pods › Your Pod › Settings to access three configuration tabs:- General
- GPU Settings
- Pod Members
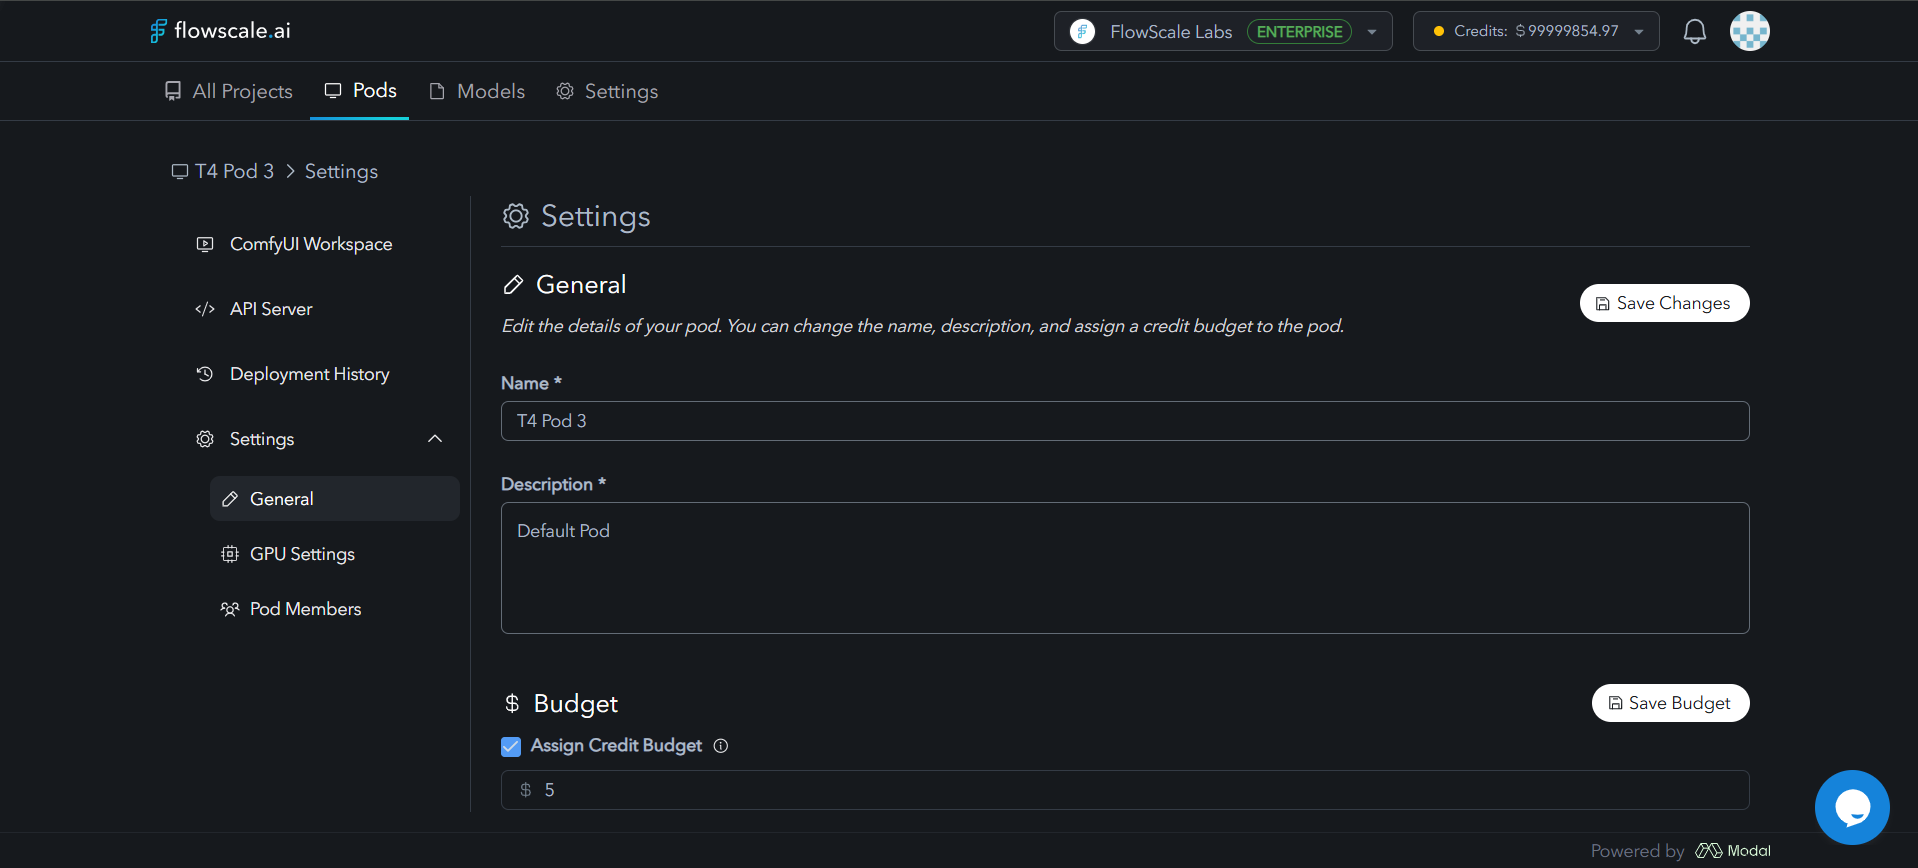
- Rename or add description to your pod
- Toggle Assign Credit Budget and manage spending limits
How Pod Scaling Works
Key Phases:- Cold Start – Container boots and loads workflow graph ± model weights
- Warm Pool – Containers stay resident until Idle Timeout expires
- Round‑Robin – FlowScale AI evenly distributes jobs to maximize utilization
Cost Control Best Practices
Monitoring & Performance
Real-Time Metrics
Monitor CPU, GPU, memory, and storage utilization in real-time
Performance Analytics
Track execution times, throughput, and latency patterns
Error Tracking
Monitor error rates, failure types, and get debugging information
Cost Analytics
Track resource costs and identify optimization opportunities
Next Steps
Deploy Workflows
Deploy your ComfyUI workflows to production pods